How to migrate WordPress to LayerStack Cloud Servers by Plesk Panel
The server administrator can transfer a WordPress instance to a Plesk server using the Site Import extension. This guide outlines the general steps to migrate WordPress by Plesk Panel.
Installing the extension
Log in to the Plesk panel of the server.
Go to
Extensions>Extensions Catalog, and then search forSite Importand click on theSite Importextension name.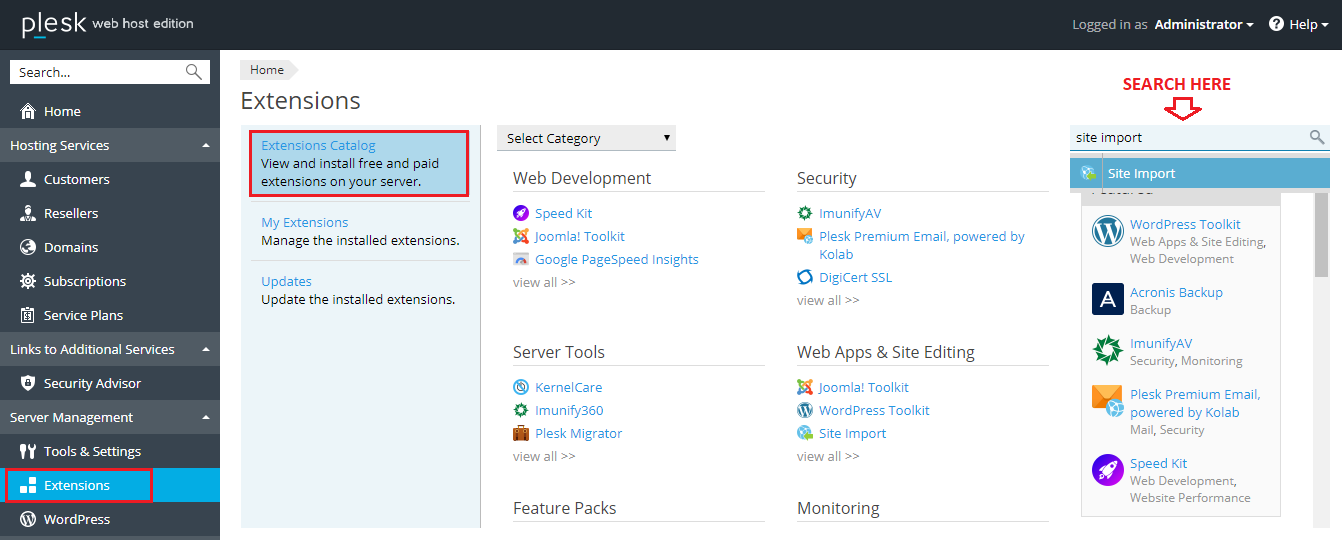
Click
Installto install it.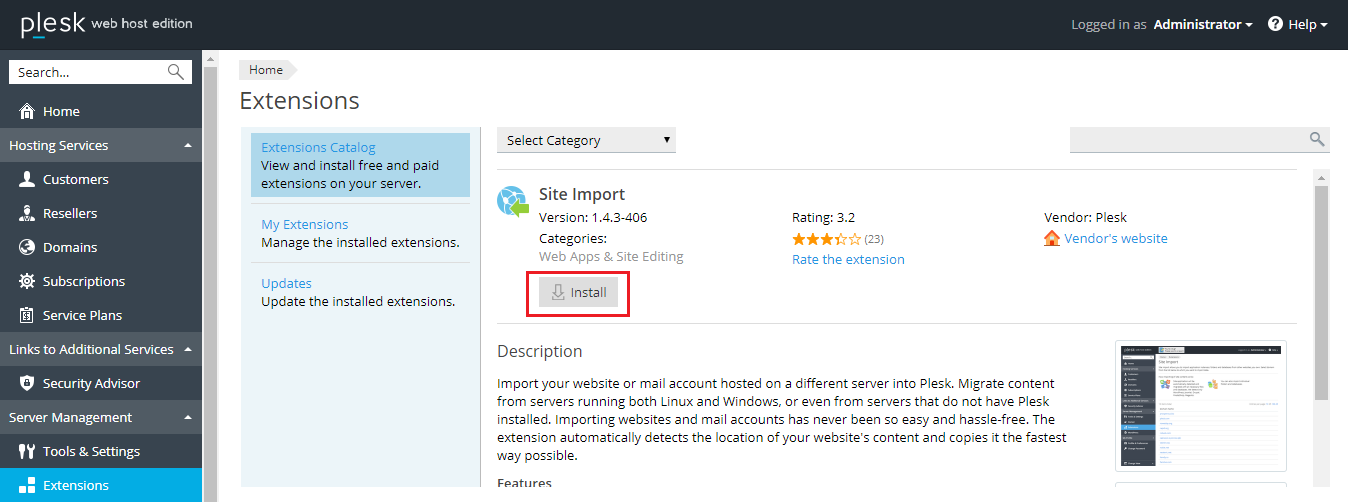
Importing WordPress
Once the Site Import extension has been installed, the WordPress application can be migrated from the remote server to the Plesk server using either simple mode or advanced mode.
Simple mode:
Click on
Domains>domain.com>Website Importingoption.In the below example, we have used the website
layerstacksupport.com.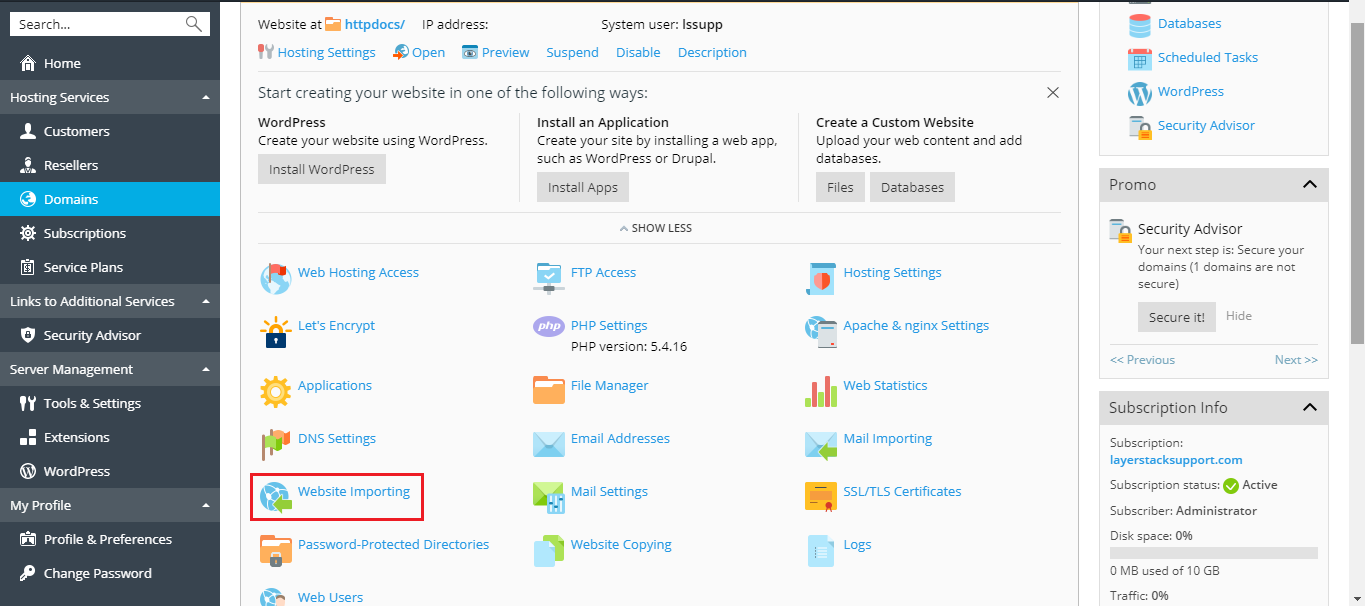
Specify the name of the website from which WordPress is to be imported in the
Source domain namefield and the username and password of an FTP or SSH (Plesk for Linux only) user on the source server that has access to the source website’s files.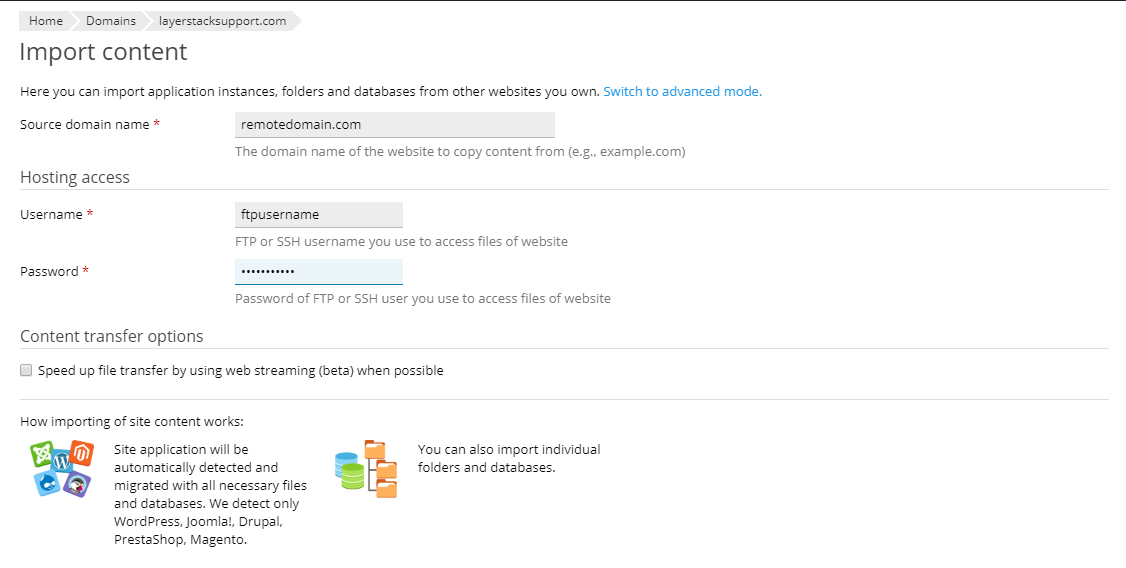
Select the
Speed up file transfer by using web streaming (beta) when possiblecheckbox if a large number of small files needs to be imported. This option is also useful in case the migration gets interrupted by any means since enabling the checkbox enables Plesk to resume interrupted import instead of starting over.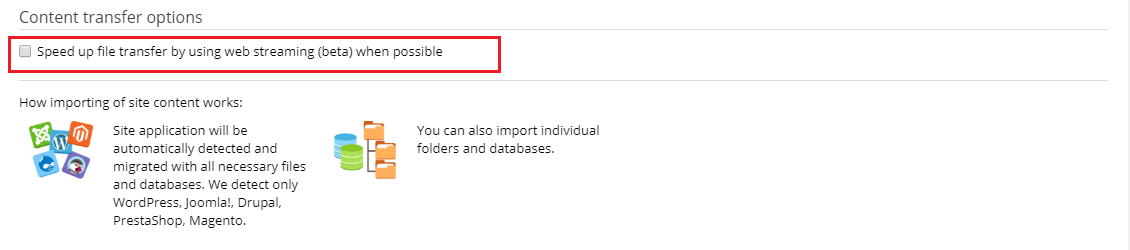
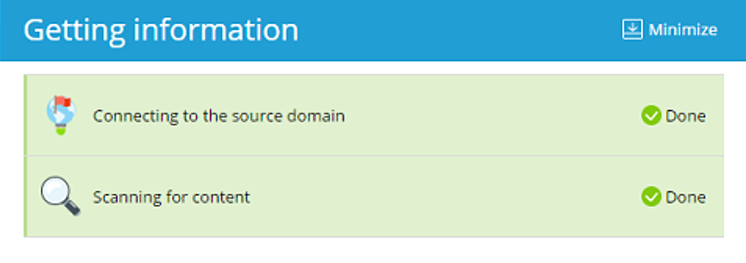
Click on
OK.Plesk will then try connecting to the source website and scanning it for content. If the connection is successful, select one or more objects of the following types to import:
Applications
Folders
Databases
If the connection is not successful, make sure that the below requirements are met and try again:
The source website’s domain name resolves to the correct IP address from the destination Plesk server.
The FTP or SSH username and password are correct and have access to all files and directories of the source website.
You can connect to the source server via FTP from the destination Plesk server.
NOTE: If the connection is successful but scanning for content fails, the advanced mode of importing can be tried.
Advanced mode:
In advanced mode, several important parameters such as connection type, data transfer, document root, etc can be specified.
Click on
Domains>domain.com>Website Importingoption and then click onSwitch to advanced mode.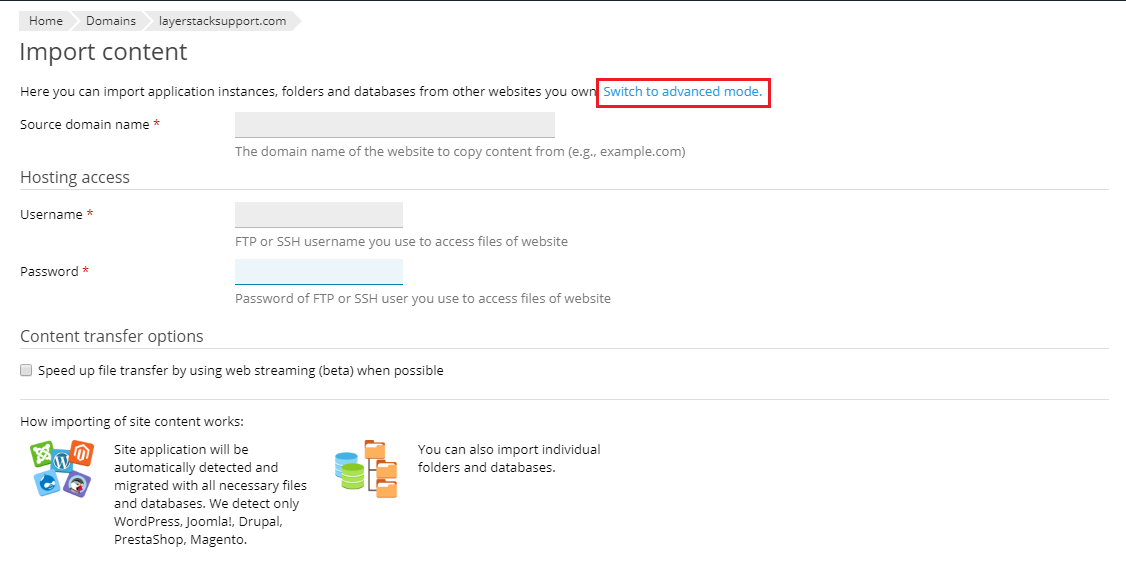
Specify the name of the website from which WordPress is to be imported in the
Source domain namefield.Specify the full URL corresponding to the document root of the source website in the
Source website URLfield.
If the document root is
/var/www/vhosts/domain.com/httpdocs, specifyhttps://domain.com.If the document root is
/var/www/vhosts/domain.com/httpdocs/my/wordpress, specifyhttps://domain.com/my/wordpress.
Select
SSHfrom underConnection type.Specify the
UsernameandPasswordof an SSH user on the source server that has access to the source website’s files in the corresponding fields.If the source server has any custom SSH port, this can be specified in the
SSH portfield.Specify where to look for the website files in the
Source document rootandFiles rootfields.If the document root of the source website is inside the home directory of the SSH user, specify the document root absolute path in the
Source document rootfield and keep theFiles rootfield empty.
For example, if the document root of the source website is
/var/www/vhosts/domain.com/httpdocsand the home directory of the SSH user is/var/www/vhosts/domain.com, specify/var/www/vhosts/domain.com/httpdocsin theSource document rootfield and keep theFiles rootfield empty.If the SSH user is chrooted, the document root absolute path that needs to be specified in the
Source document rootfield is/httpdocs.If the home directory of the source website is outside the home directory of the SSH user, specify the document root absolute path in the
Files rootfield and keep theSource document rootfield empty.For example, if the document root of the source website is
/var/www/vhosts/domain.com/httpdocsand the home directory of the SSH user is/root, specify/var/www/vhosts/domain.com/httpdocsin theFiles rootfield and keep theSource document rootfield empty.
- Select the desired method for transferring the content under
Way to transfer files.
(Recommended) If
Automaticis selected, Plesk will first try to import content via rsync, the fastest method. If the attempt fails, Plesk will use SCP instead.To have Plesk use rsync or SCP, select the corresponding option.
Plesk can also be made to use Web streaming by selecting it from the list. This option is good when a large number of small files needs to be imported or if there are chances that the import may be interrupted, however, choosing it may cause issues with the import.
Click on
OK.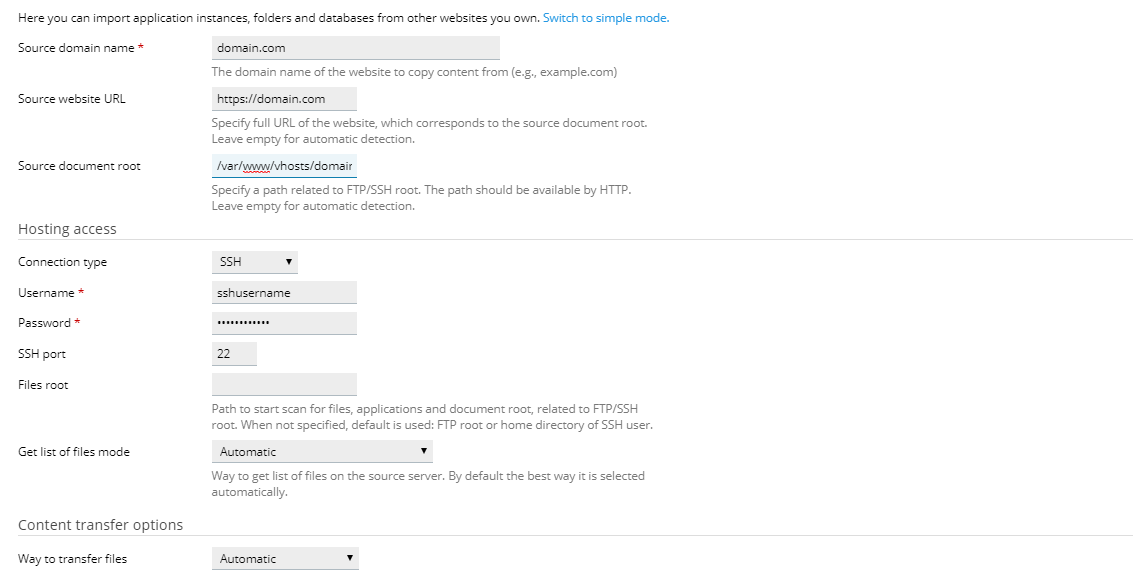
Importing Applications
When a website importing is initiated, Plesk scans the source website for the presence of certain applications and lists them.
When importing an application, keep in mind the following limitations:
The application must use a MySQL database.
The MySQL database server must use the default port.
Select the checkbox(es) next to the application(s) that needs to be imported.
By default, the application files are placed in the same location relative to the document root they occupied on the source. If required, the location at which the application files are placed on the target server can be changed. For this, click the / link under
Destination Pathand type in the path to the destination folder (relative to the document root).Click
Start Import.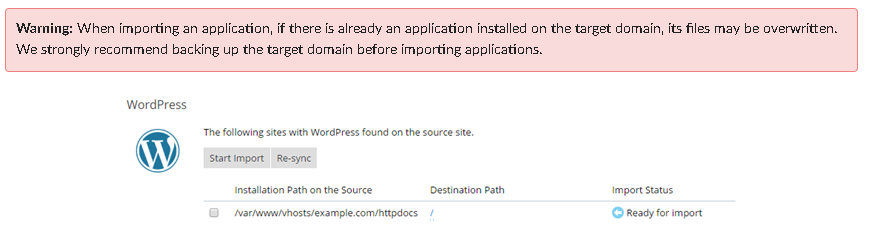
The installation’s status will change from
Ready for importtoQueued, and then toIn progress. Once the status changes toImported, application importing should be completed.
Synchronizing Imported Applications
At any time after an application has been imported, it can be imported again by selecting the corresponding checkbox and clicking the Re-sync button. This will overwrite any changes that have been made to the installation on the destination server.
Related LayerStack Product
Related tutorials
How to use the WordPress One-Click Install on LayerStack Cloud Servers
How to reset WordPress Admin Password via MySQL Command Line
Installing Plesk control panel on Linux & Windows Cloud Servers
How to perform a Full Backup and Domain Backup in Plesk Panel
How to harden WordPress Security between Cloud Servers and Cloudflare
