How to harden WordPress Security between Cloud Servers and Cloudflare
By utilizing these tools, you can safeguard your website against a variety of threats, including Denial of Service attacks, password guessing attempts, code injection vulnerabilities, and unauthorized SSH access attempts.
Set up a WordPress Server instance. (If you already have one, you can skip this step and move on to preparing your Cloudflare account.)
Create or log in to your Cloudflare account.
Transfer your domain's name servers to Cloudflare. (Cloudflare needs your domain connected to your account before it can protect all your domain's DNS records. To do this, log in to your domain provider and change the name servers to the Cloudflare records provided in your account.)
Configure your domain's A record to direct to your WordPress server.
Set up Cloudflare rules
When you use Cloudflare to hide your WordPress server's IP address, it keeps your server safe. Cloudflare also adds extra security features like encryption, protection against cyber attacks, and verifying if visitors are real people or bots.
Enable Proxying to hide the WordPress Server IP
Follow these steps to keep your server's IP address hidden using Cloudflare:
Log in to your Cloudflare account.
Find the
Websitessection.Click on
Add a siteto set up Cloudflare domain.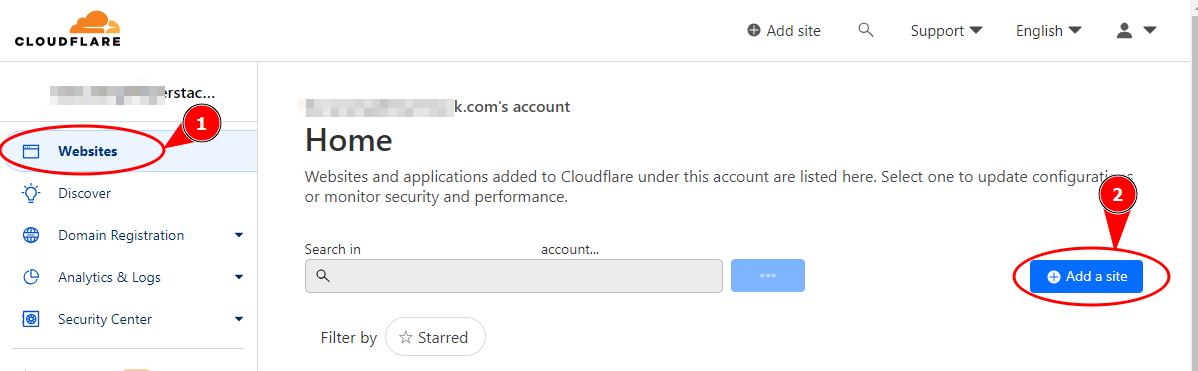
Add the domain name and click
Continue.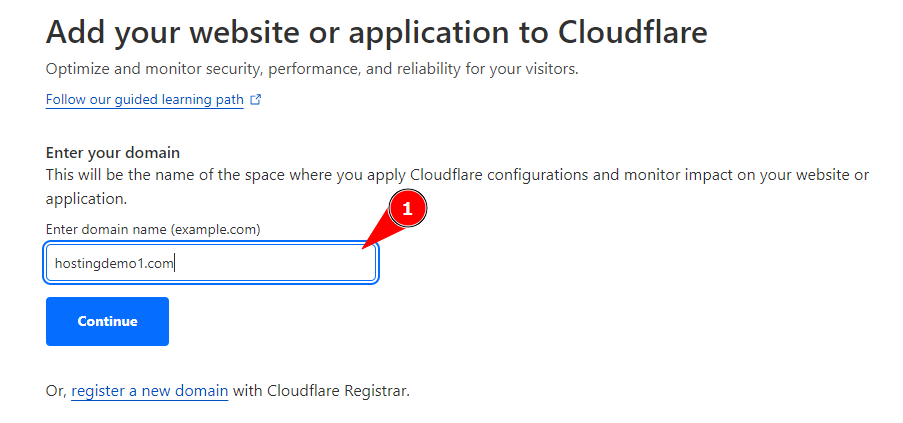
From the menu on the left, look for
DNSand then findRecordsunder DNS. ClickAdd recordto add a new record.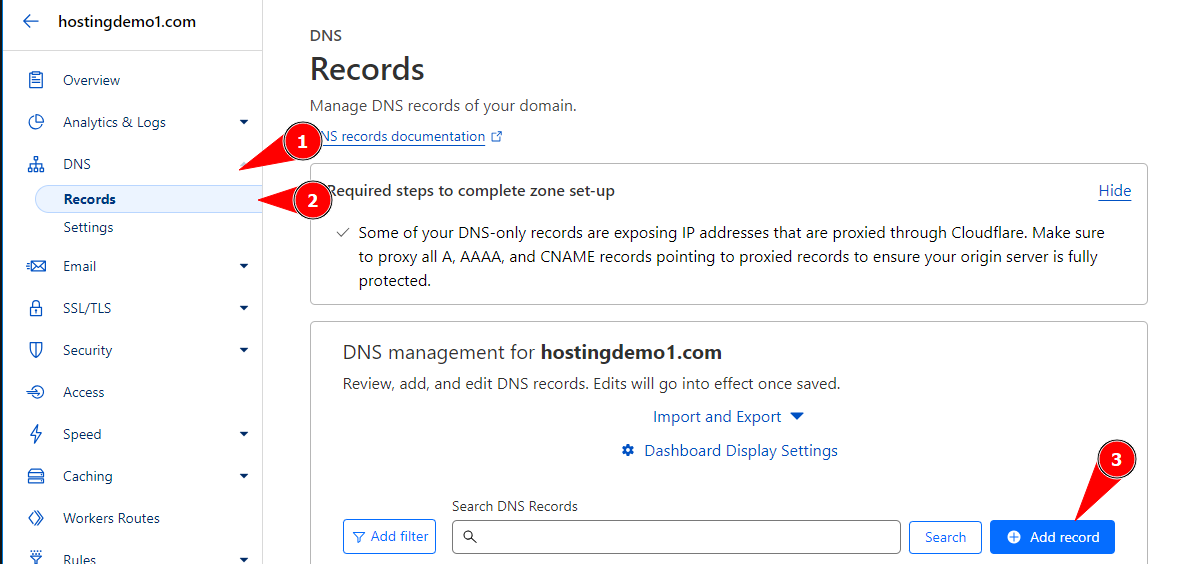
Choose the record with
Atype and clickEdit.Turn on the Proxy Status. It will change to
Proxied.Click
Saveto activate the proxy for your domain's record.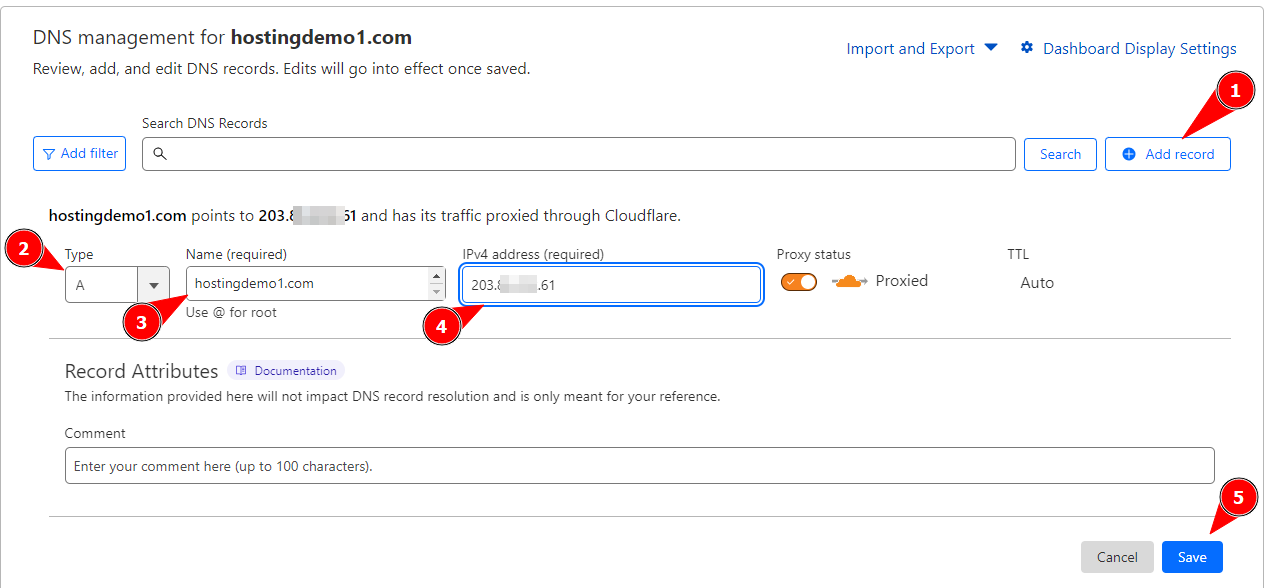
To double check whether your real server IP is hidden, use your computer's terminal to
pingyour domain name.
Set the SSL/TLS Encryption mode
Ensure strong encryption for your website by following these steps:
Go to your Domain Management page.
Click on
SSL/TLSin the left menu.Choose
Full (strict)to make sure all data between your WordPress server, Cloudflare, and visitors is encrypted.Scroll down to the
SSL/TLS Recommendersection and turn on theenabletoggle button. This will give you suggestions if your SSL setup needs enhancements.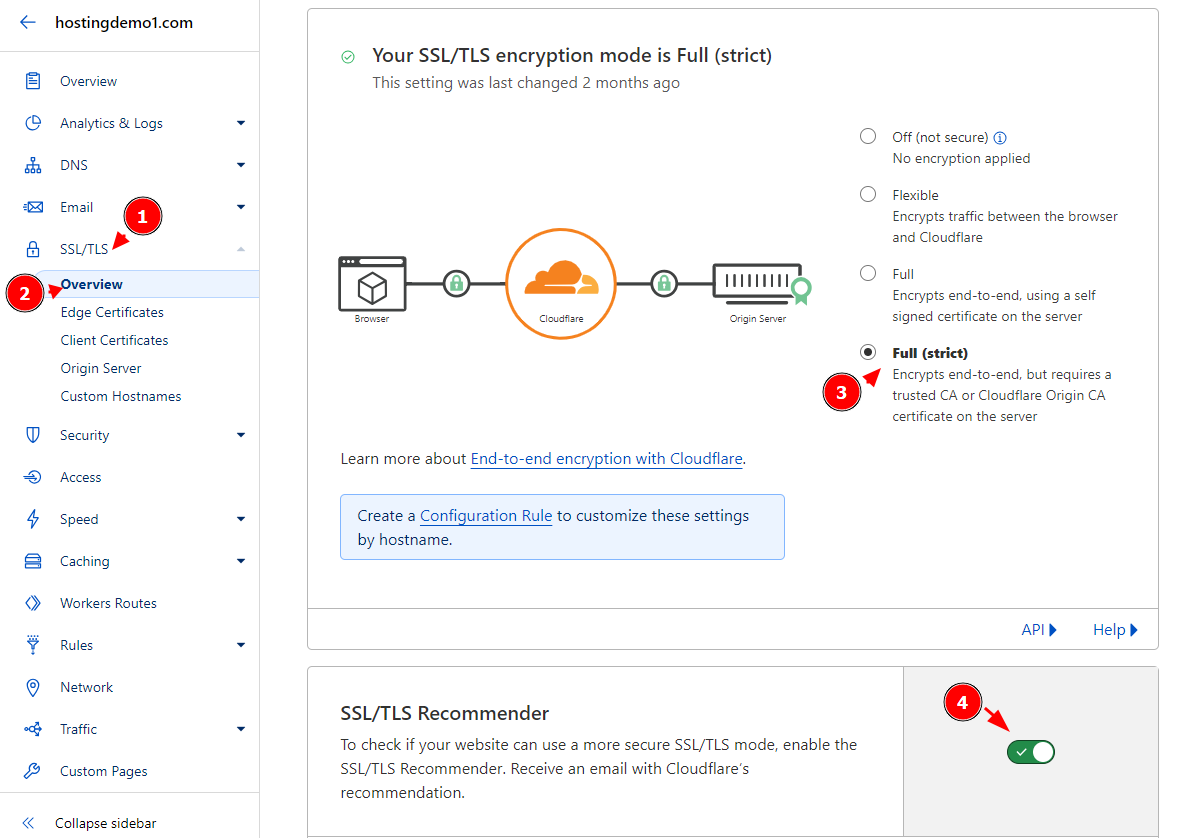
Configure Web Application Firewall (WAF) rules
Securing Your Site with Cloudflare’s Web Application Firewall (WAF). You can protect your site from certain threats using Cloudflare Web Application Firewall (WAF).
Click
Securityon the left menu.Choose
WAF.In
Custom rulespage, click+ Create ruleto make a new condition.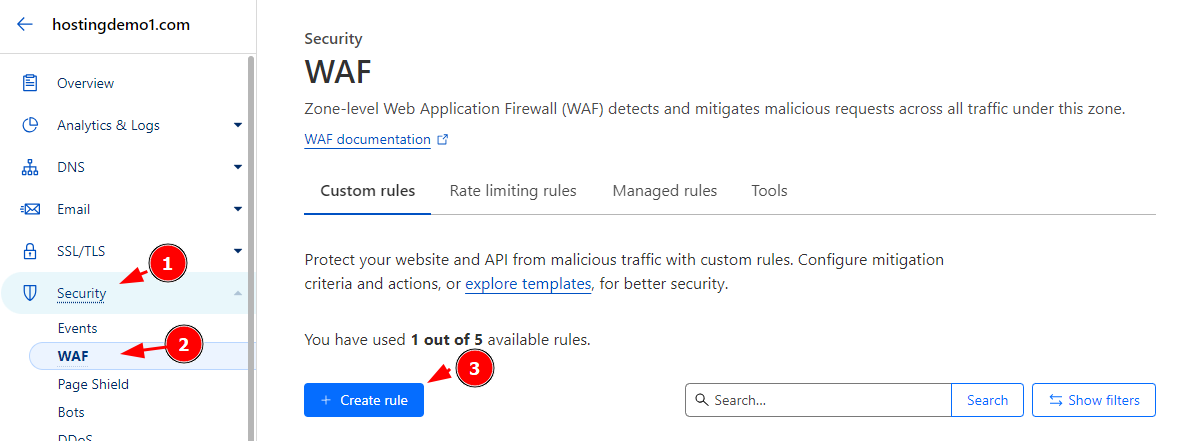
Give your rule a name.
Choose
URI Fullfrom the field dropdown.Keep the operator as
equals.In the Value field, enter: https://example.com/wp-admin/script
For example: https://hostingdemo1.com/wp-admin/admin-ajax.php?action=scriptalert('XSS Attack!');This script examines incoming HTTP requests and checks if their full URI matches "https://hostingdemo1.com/wp-admin/admin-ajax.php?action=scriptalert('XSS Attack!');".
If a match is found, it's likely a security measure to detect and potentially block cross-site scripting (XSS) attacks, where malicious JavaScript is injected into a URL parameter. The alert message indicates a possible XSS attack attempt.
Under
Choose Action, pickBlock.Click
Deployto activate your new WAF rule.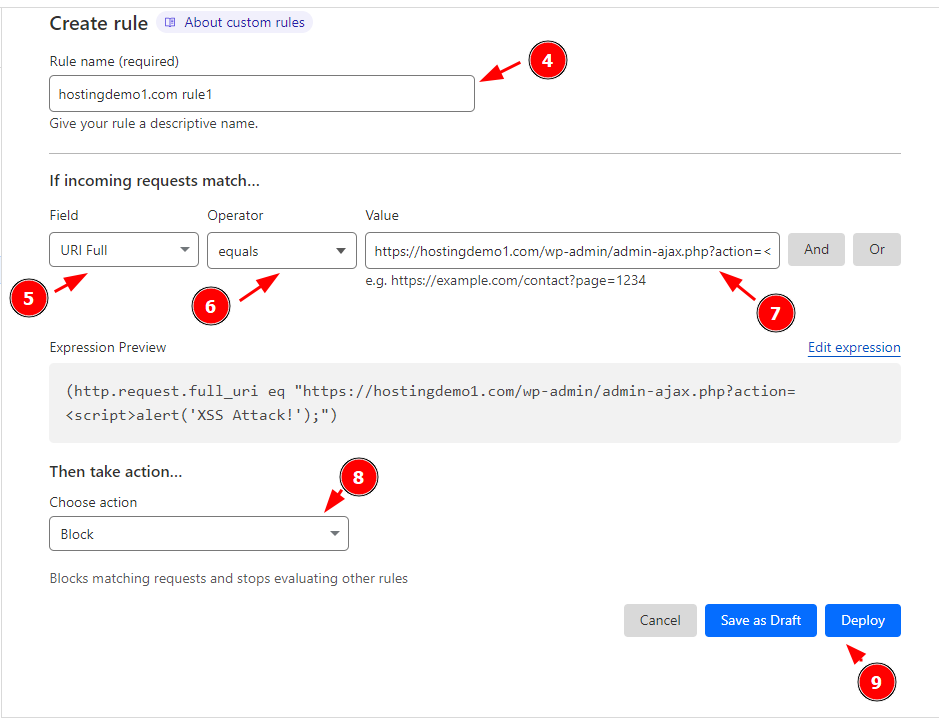
DDOS Cloudflare security
Open the Settings drop down and select
DDOS.In the section dedicated to HTTP DDoS attack protection, choose
Deploy a DDoS override.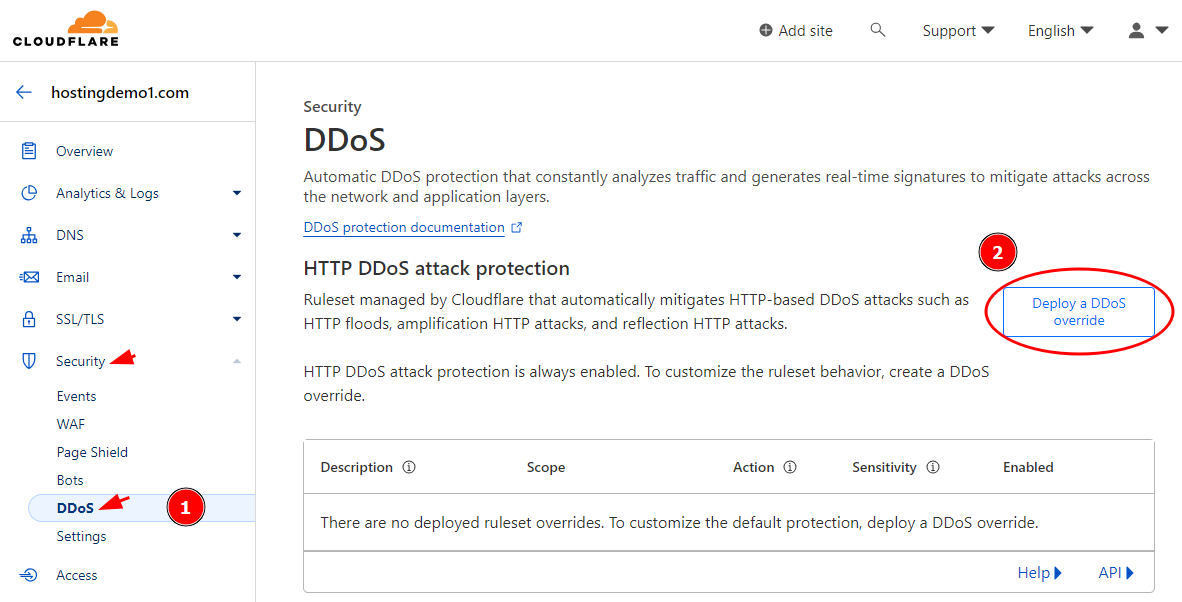
Input a name into the
Override Namesection.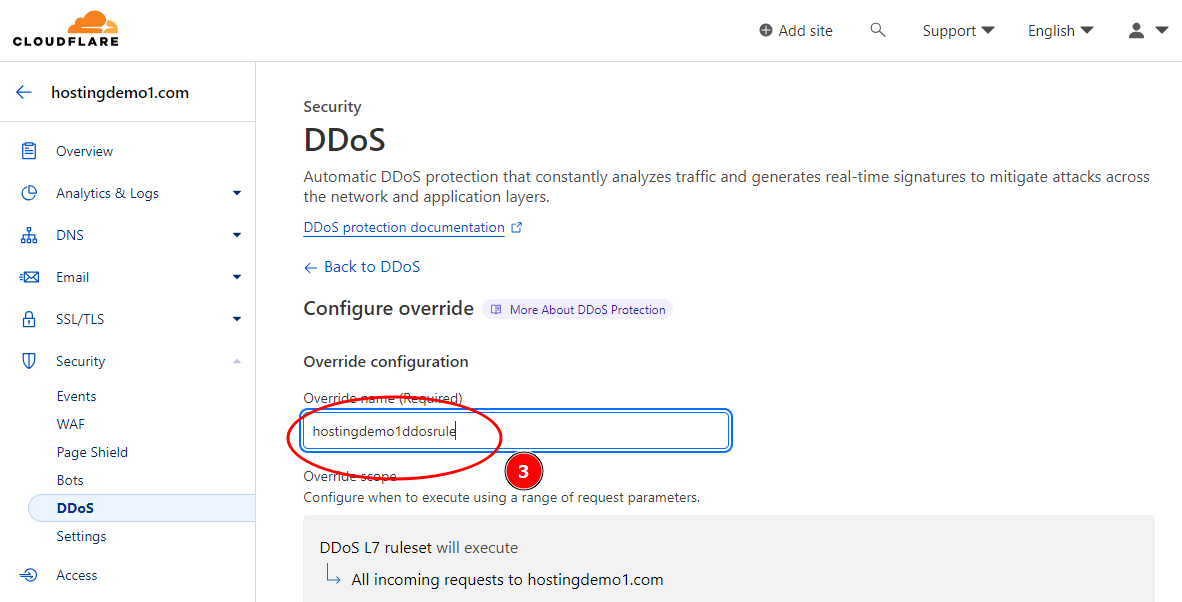
Ensure that the
DDoS L7 ruleset configurationvalues remain at theirDefaultsettings and proceed to the Rule Configuration section, and press theBrowse Rulesbutton.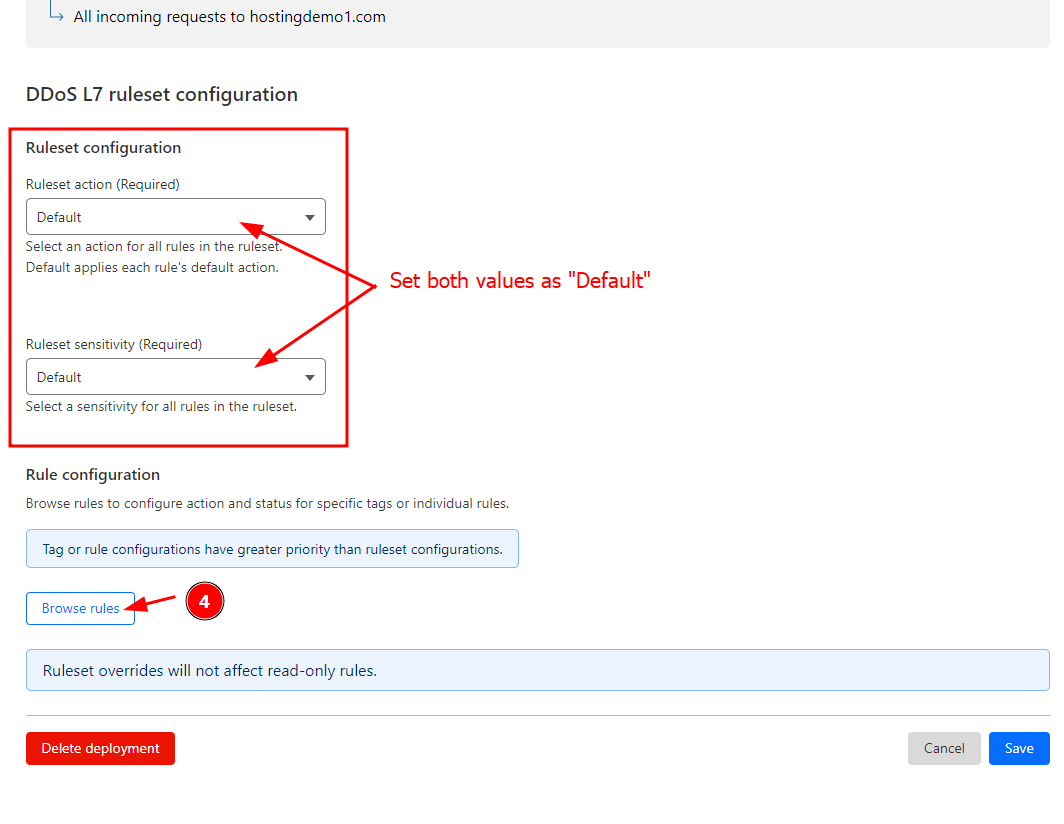
Tick the checkbox next to each rule you want to enable. Once you're prepared, press the
Set Actionbutton, and chooseBlock.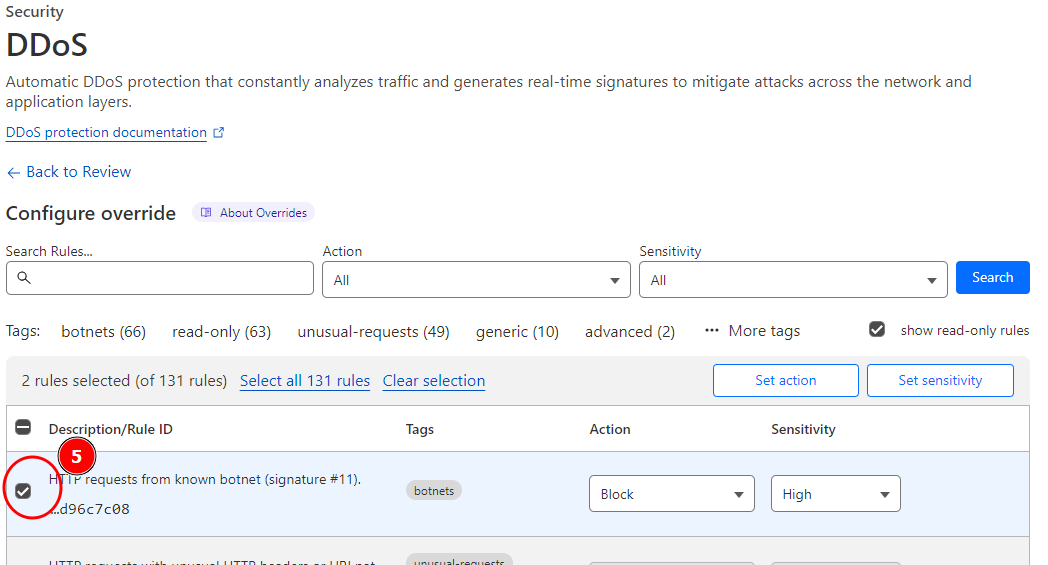
Scroll down and click
Nextto save your rule changes.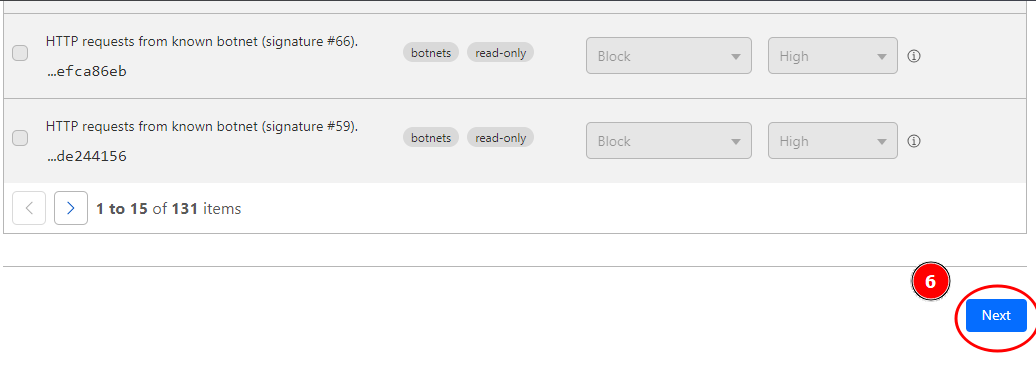
By following this guide, the WordPress website can fortify its security defenses against a wide range of potential threats, including malicious bot attacks.
Furthermore, the implemented filters have the capability to deter any malicious bots attempting to access your WordPress site, ensuring that every visitor is a genuine human user.
Related Tutorials
How to migrate WordPress to LayerStack Cloud Servers by Plesk Panel
How to reset WordPress Admin Password via MySQL Command Line
How to use the WordPress One-Click Install on LayerStack Cloud Servers
How to change the maximum Upload Size for WordPress (One-click Apps)
How to install WordPress in a subdomain on Cloud Servers with Nginx
