How to install WordPress on Ubuntu ARM server with PHP 8
WordPress is a robust CMS tool for things like creating and managing websites, blogging and building open-source websites that rely on PHP and MySQL programming languages. With its high-end flexibility and with more than 20,000 plugins actively running, it has certainly become the most preferred choice for developers and consumers.

This guide outlines the basic steps to install WordPress on the ARM server (Ubuntu 20) with PHP8.
First of all, make sure the server is updated. Use the following command to update the server.
# apt update && apt upgrade -y

Installing Apache Webserver
Start to install Apache Webserver.
# apt install apache2 -y
Check the status of Apache Webserver.
# systemctl status apache2.service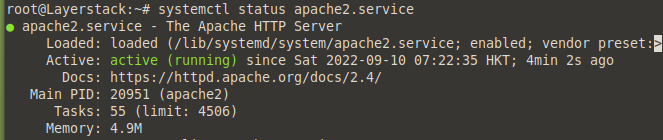
Installing Database Server
Start to install the MySQL database application.
# apt install mysql-server -y
Check the status of the MySQL database.
# systemctl status mysql.service
Installing PHP 8
Install the
ca-certificates apt-transport-https software-properties-commonusing the following command.# apt install ca-certificates apt-transport-https software-properties-common
Add
ppa:ondrej/phprepository for additional versions of PHP.# add-apt-repository ppa:ondrej/php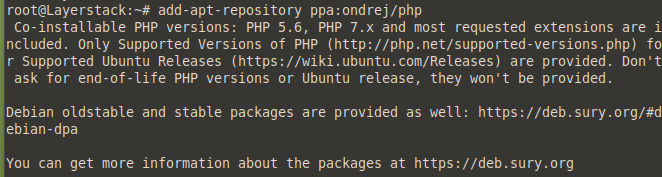
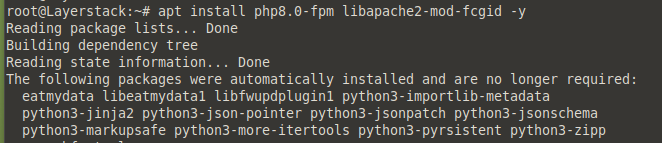
Install the following modules.
# apt install php8.0 libapache2-mod-php8.0 -y

# apt install php8.0-fpm libapache2-mod-fcgid -y

# apt install php8.0-mysql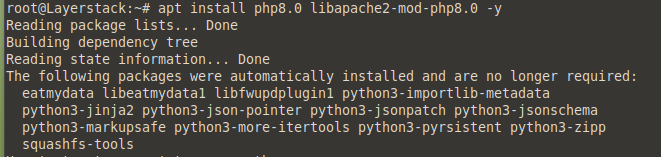

Enable the following modules.
# a2enmod proxy_fcgi setenvif

# a2enconf php8.0-fpm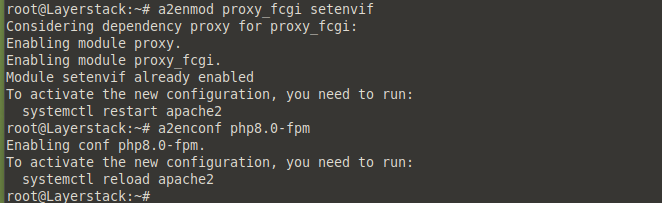
Restart apache after enabling the modules.
# systemctl restart apache2
Verify the PHP version.
# php -v
Add a file info.php in
/var/www/html/and add the following into the file.# vim info.php
<!--?php


phpinfo();


phpinfo(INFO_MODULES);


?-->
Open your web browser and enter your domain name or server address as shown. Here is just the sample IP & domain.
http://111.11.11.111/info.php

OR

http://your-domain.com/info.php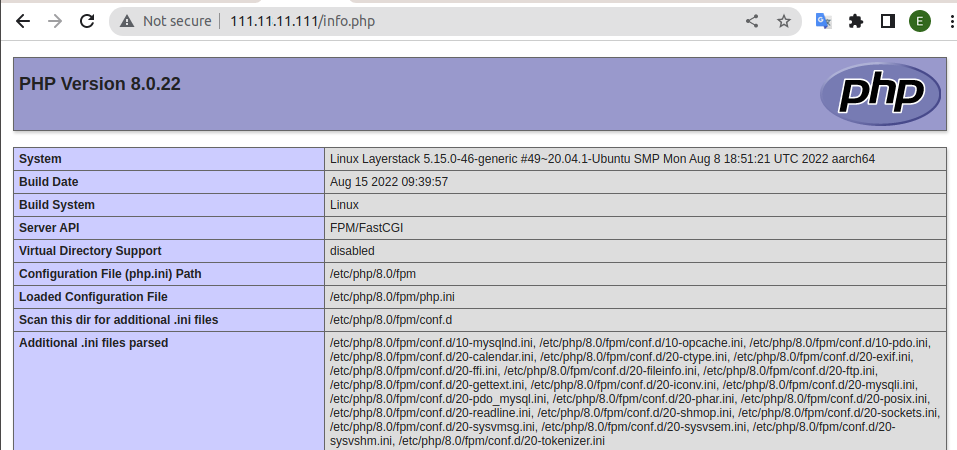
Verify the PHP status.
# systemctl status php8.0-fpm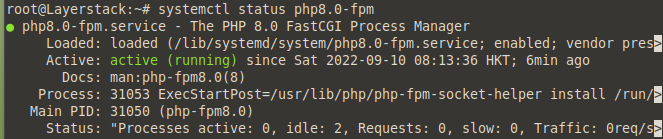
Installing WordPress
Change the directory to
/var/www/html/.# cd /var/www/html/
Remove/delete all the files in the
/var/www/html/.# rm -rf /var/www/html/*
Download the latest version of WordPress.
# wget https://wordpress.org/latest.zip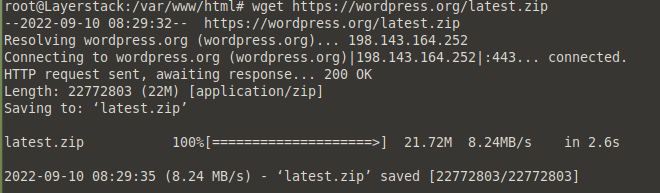
Extract the
latest.zipusing unzip command.# unzip latest.zip
Move all the files inside
/var/www/html/wordpress/to/var/www/html/.# mv /var/www/html/wordpress/* /var/www/html/
Configuring a database for Wordpress in MySQL Database
Log in to MySQL database.
# mysql -u root -p
At the MySQL shell, type the following commands. Remember to use your own, valid values for the database name, and database user, and also use a secure and robust password as the database user password:
> CREATE DATABASE wordpress_database;

> CREATE USER 'wpdb_user'@'%' IDENTIFIED WITH mysql_native_password BY 'password';

> GRANT ALL ON wordpress_database.* TO 'wpdb_user'@'%';

> FLUSH PRIVILEGES;

> EXIT;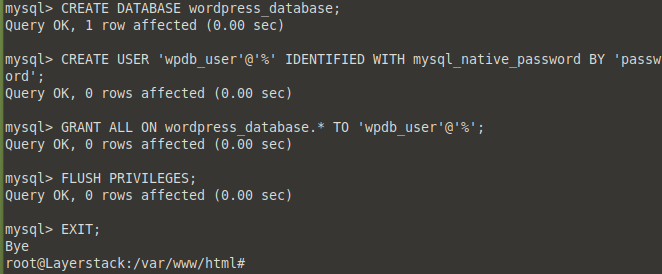
Copy the
wp-config-sample.phpand rename it towp-config-sample.php.# cp wp-config-sample.php wp-config.php
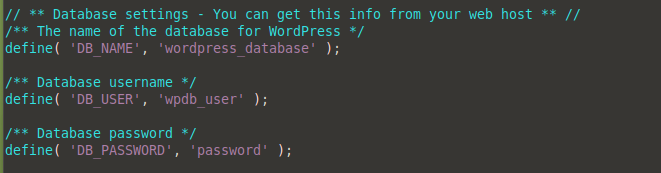
Edit
wp-config.phpfile to add the database information.# vim wp-config.php
Use the added database credentials:
Add a user
webuser(any name will suffice).# useradd webuser
Change the ownership of the
/var/www/html directory.# chown -R webuser:webuser /var/www/html
Restart Apache and MySQL database.
# systemctl restart apache2.service

# systemctl restart mysql.service
Open your web browser, then enter your domain name or server address and can see the WordPress website.
http://123.123.123.123/

OR

http://your-domain.com/
Related LayerStack Product
Related Tutorials
How to migrate WordPress to LayerStack Cloud Servers by Plesk Panel
How to use the WordPress One-Click Install on LayerStack Cloud Servers
How to reset WordPress Admin Password via MySQL Command Line
How to change the maximum Upload Size for WordPress (One-click Apps)
How to install WordPress in a subdomain on Cloud Servers with Nginx
How to harden WordPress Security between Cloud Servers and Cloudflare
