WordPress is a widely used CMS (Content Management System) application, which is based on PHP and MySQL. A plugin is an individual block of software that contains specific functions which can be easily added to a WordPress website. These help to enhance the functionality of the WordPress website by adding new features to it.
A WordPress plugin can be installed for your website in the following three ways.
Installation using WordPress plugin search function
This is the easiest way to install a plugin for your WordPress website. Freely available plugins can be installed in this manner.
Click on Plugins and then Add New options inside the WordPress admin dashboard, and search for the plugin name in the search box.
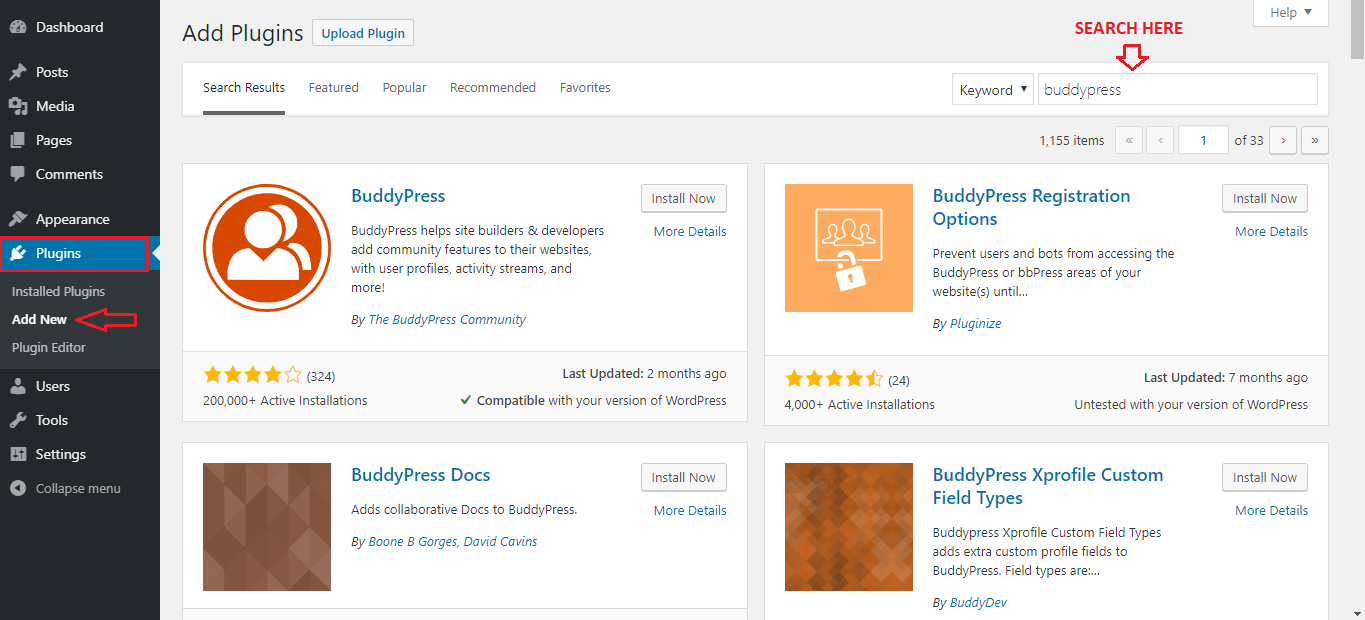
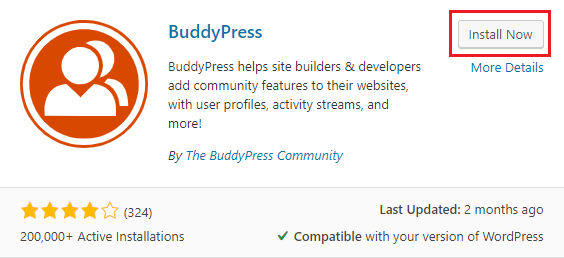
Click on Install Now button for the plugin that you need to install. WordPress will automatically download and install the plugin for the website.
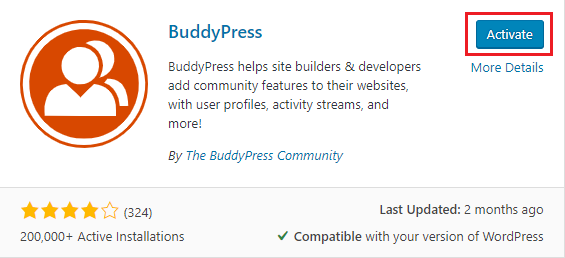
Once the plugin has been installed, click on Activate to enable the plugin for your WordPress website. The plugin can then be configured according to your needs.
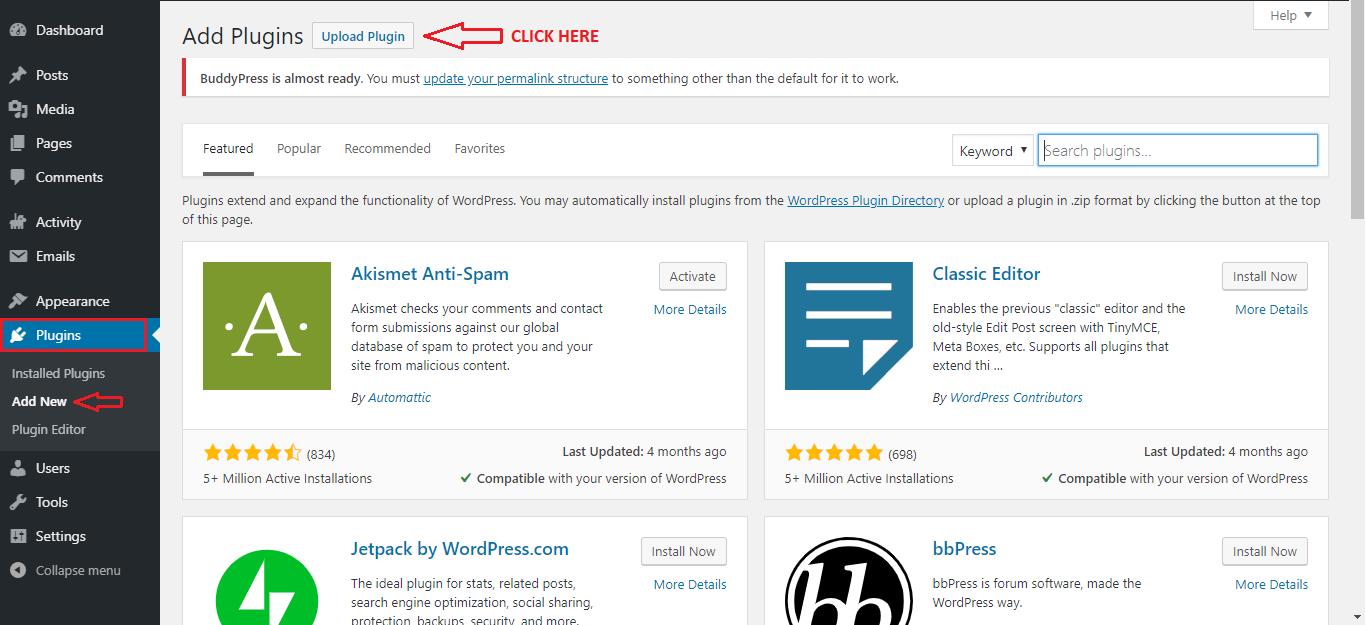
Installation using WordPress upload plugin function
This option can be used to install free as well as paid and licensed WordPress plugins. The paid plugins can be downloaded from their respective sources as a ZIP archive.
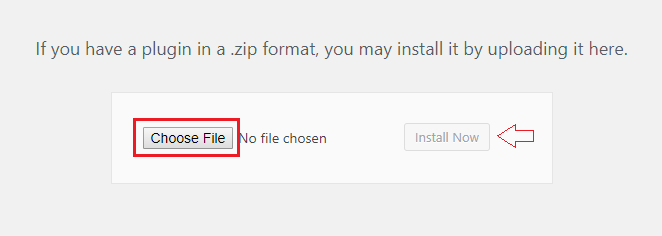
Click on Plugins and then Add New options inside WordPress admin dashboard, afterward click on Upload Plugin.
On the plugin upload page, click on Choose File and select the locally saved ZIP archive file of the plugin. Once this has been done, click on Install Now to install the plugin.
Once installed, you need to activate the plugin and configure it as per your needs.
Manual installation using FTP
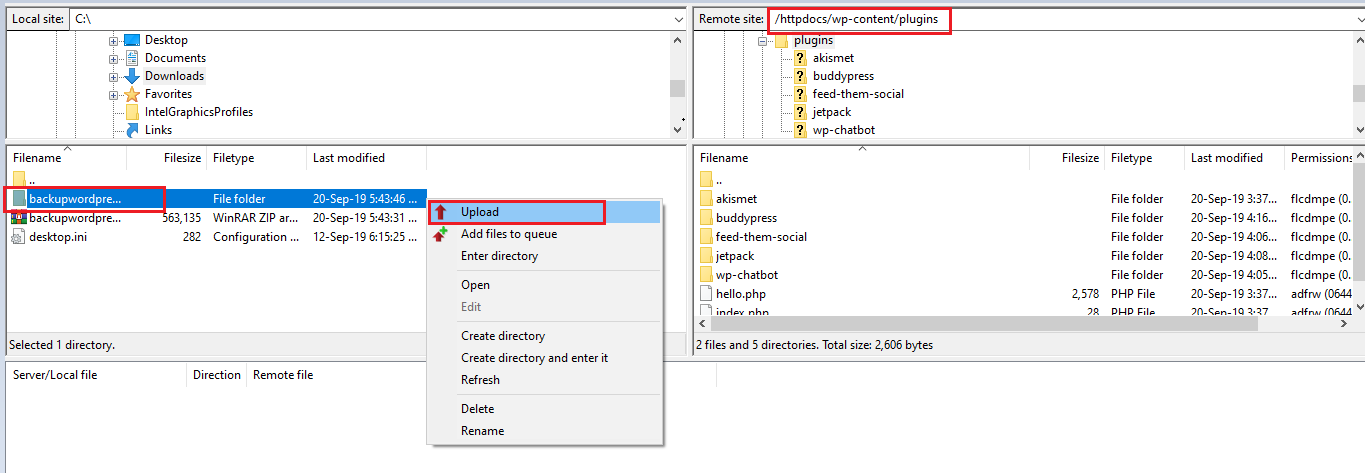
This method is useful when plugin installation through the panel has certain limitations. You would need to have the FTP credentials for your website in hand in-order to proceed with the manual installation of the plugin.
Download and extract the source ZIP archive of the plugin to the local computer. Once the plugin has been extracted, a new folder with the same name as the plugin containing all its related files will be created.
Using any FTP client such as FileZilla, upload this plugin folder to the **/wp-content/plugins/ path under the website.
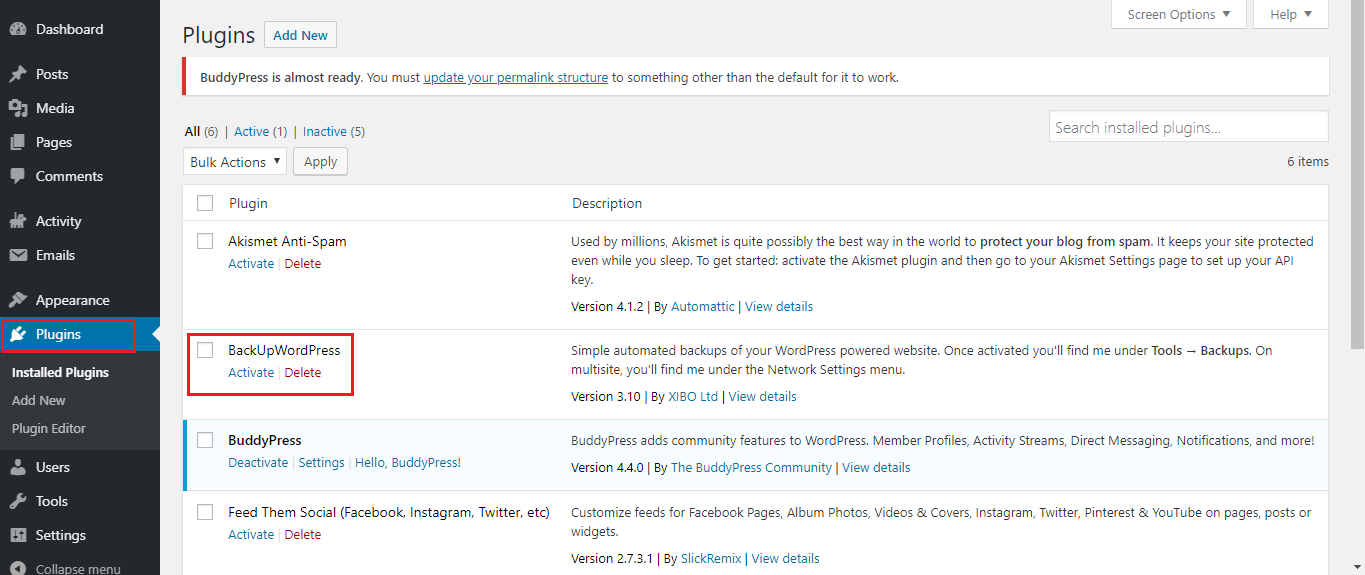
Once the folder has been uploaded, access the WordPress admin dashboard. Under Plugins section, you would be able to see the uploaded plugin successfully installed. Afterward, you can activate the plugin and configure it as per requirements.
Related Tutorials
