The website name is an Internet address of a website that can be used to reach the website. In short, the DNS/Domain Name System means, the conversion of human-readable names into machine-readable ones is carried out. The DNS settings for the domain should be correct, otherwise, the operations of the website services may be disrupted. For example, if the domain mail server's DNS record is not the correct one, then the emails may fail to reach the correct mail server.
The DNS records for a domain can be set up from control panels such as Plesk if the domain uses the nameservers of the server itself. However, before setting up the DNS records for a domain on the server-side, it is important that the nameservers that the domain uses are set up correctly at the domain registrar panel. It is only through these nameservers that the DNS records set up for a domain in the server will resolve correctly. For reading more on this, the below guide can be referred to:
How to update NameServer and DNS record for LayerStack Cloud Servers
The Plesk provides a function to manage the DNS of the domains, from there can easily manage the domain DNS. If the domain is using third-party name servers, then we can disable the DNS service for the domain from the Plesk.
This guide outlines the general steps for managing the domain DNS from the Plesk control panel.
Access to DNS Zone Files
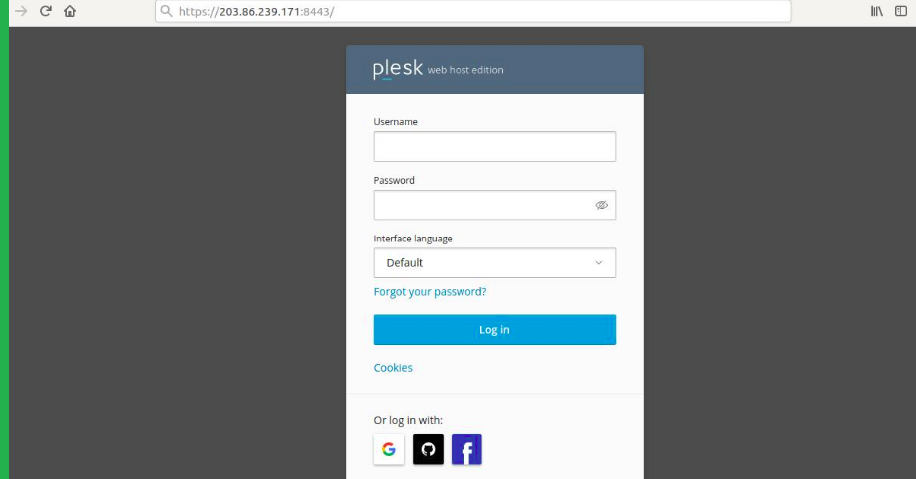
Log in to the Plesk control panel.
*Simply go to http://YourHostname:8443 and enter your login information.
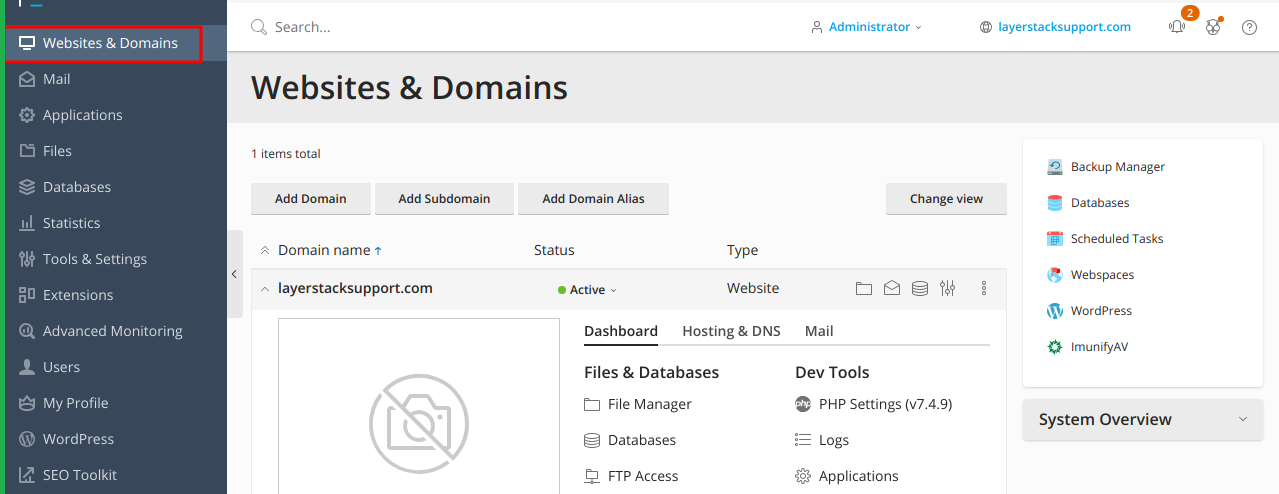
Click on the Websites & Domains and related domains option.
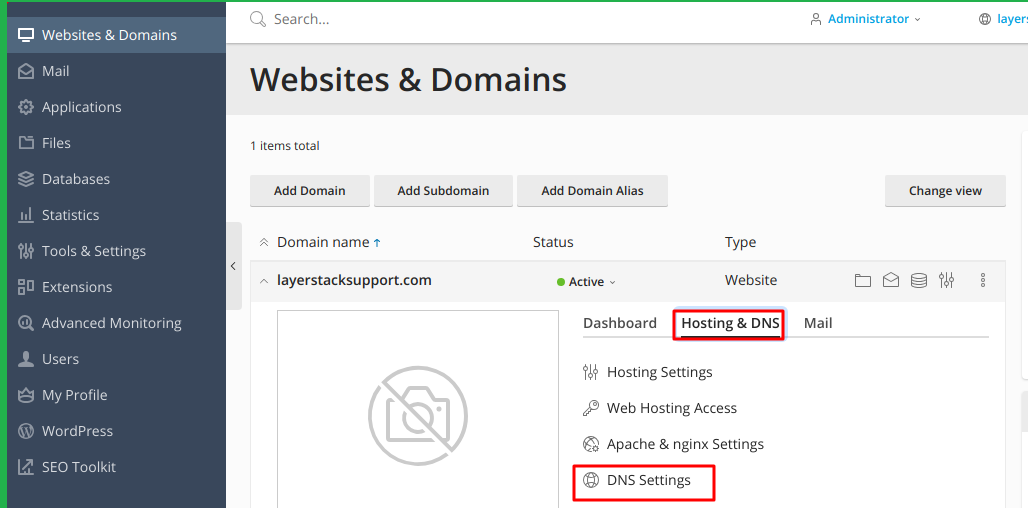
Click on Hosting & DNS and choose DNS settings.
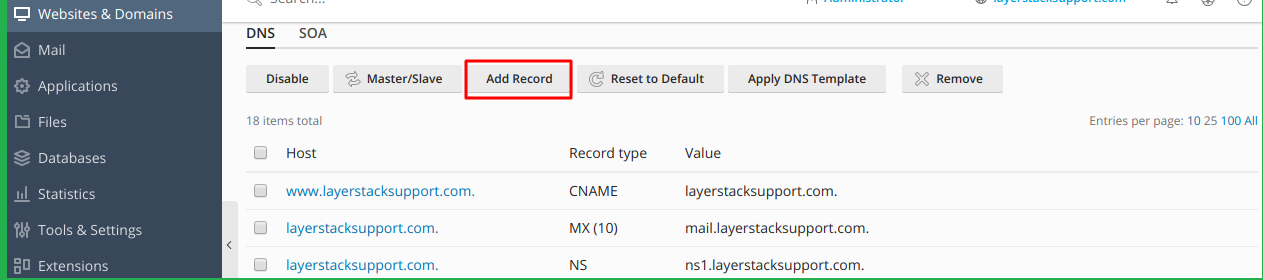
Choose Add Record option to add or modify any DNS records.
Demonstration for adding A record & MX record
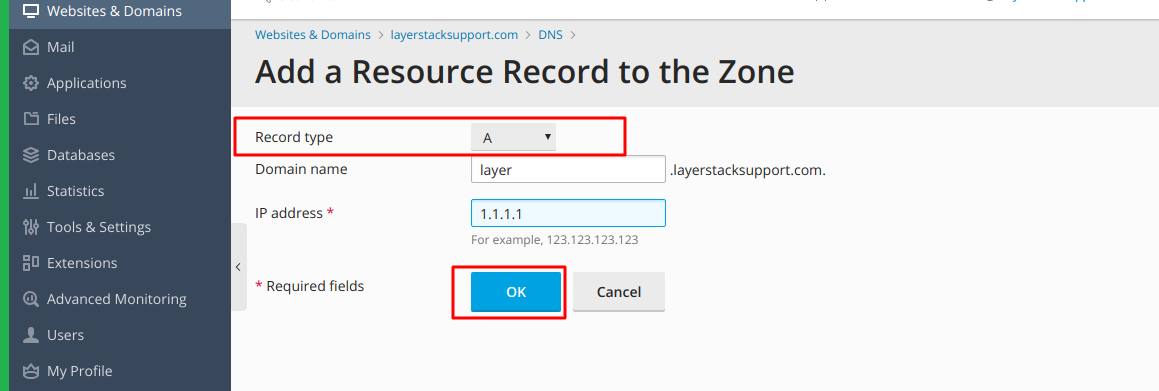
Adding A record for the domain:
Choose record type as A record.
Type Domain name.
Type IP address (E.g. Web server's IP).
Click OK.
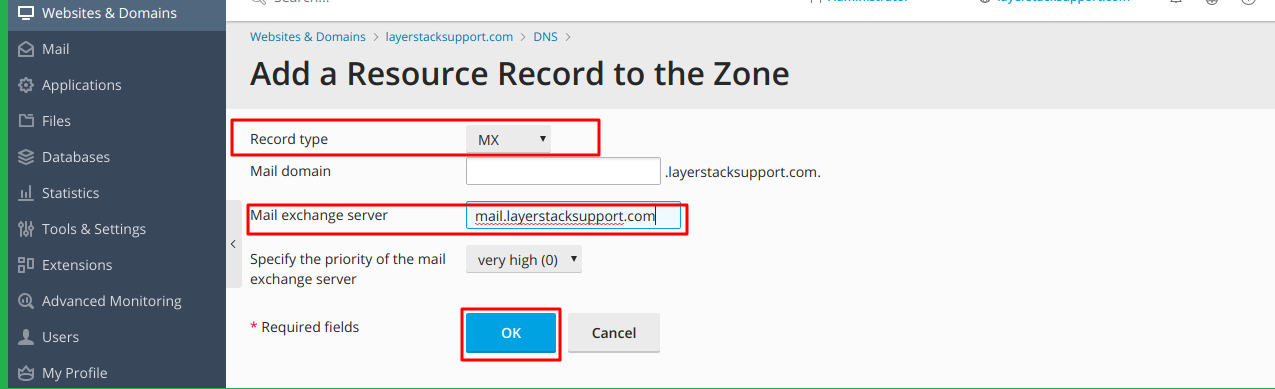
Adding MX record for the domain:
Drop down the record type and choose MX record.
Mail domain should be blank.
Set the mail exchange server to the name of your mail server (E.g. mail.layerstacksupport.com).
If you were given a mail exchange server name, a priority number may have been provided, if not very high, (0) is fine.
Click OK.
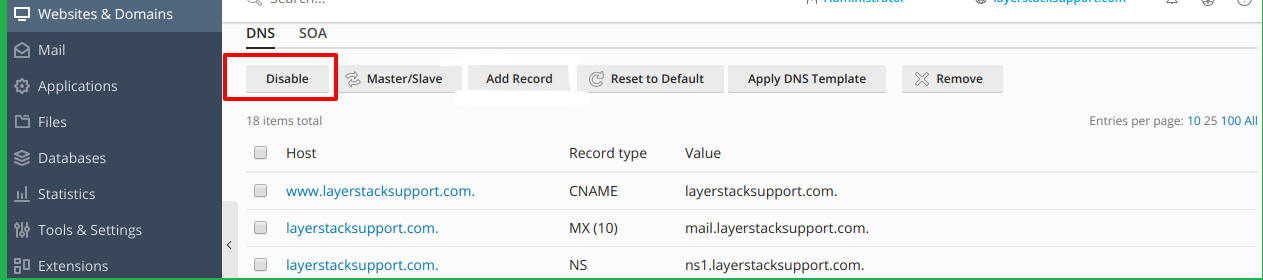
Disable non-necessary DNS records
If you need to disable DNS services for a domain served by external name servers, then we can disable the DNS service for the domain from the Plesk.
Go to Websites & Domains > Click on Hosting & DNS and choose DNS settings, then click Disable.
Related LayerStack Product
Related Tutorials
