How to set up DNS Server on Windows Cloud Servers
Domain Name System (DNS) is one of the standard set of protocols that includes TCP/IP. The DNS Client and the DNS Server together provide a mechanism of the server name to IP address mapping name resolution services for servers and their users. Microsoft DNS is the most common domain name system service provided in Microsoft Windows operating systems.
Setting up a DNS server on Windows involves installing the DNS Server Role, which can be done through both the GUI method as well as through Windows PowerShell. This guide will outline the basic steps in setting up the DNS server on a Windows machine.
Installing DNS Server through GUI
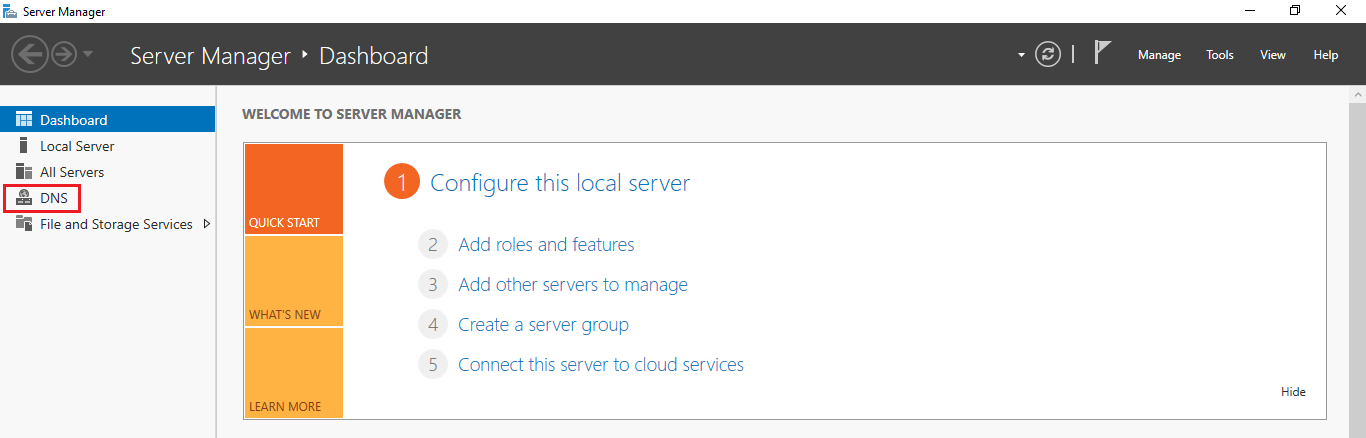
Click on
Starticon and then click onServer Managerto open the dashboard.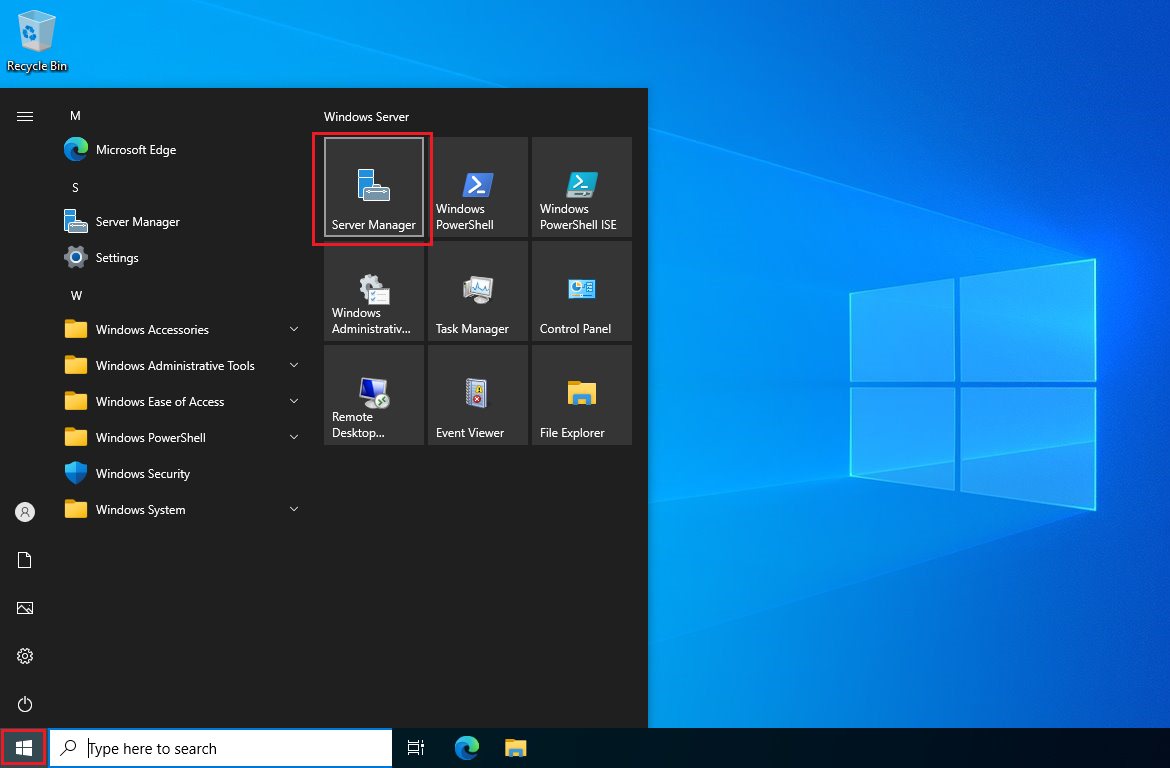
From the Quick Start section, click on
Add rolesandfeatures.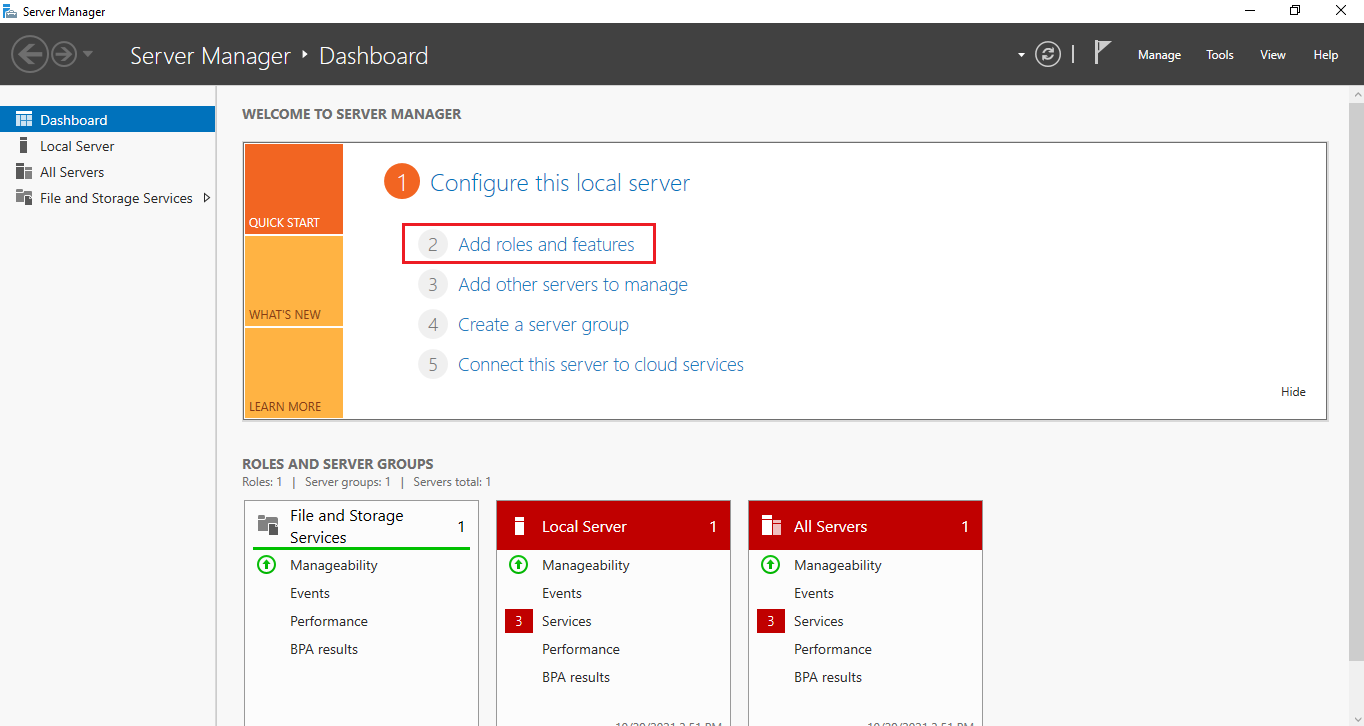
In the
Add Roles and Features Wizardwindow, click onNextunder Before You Begin section.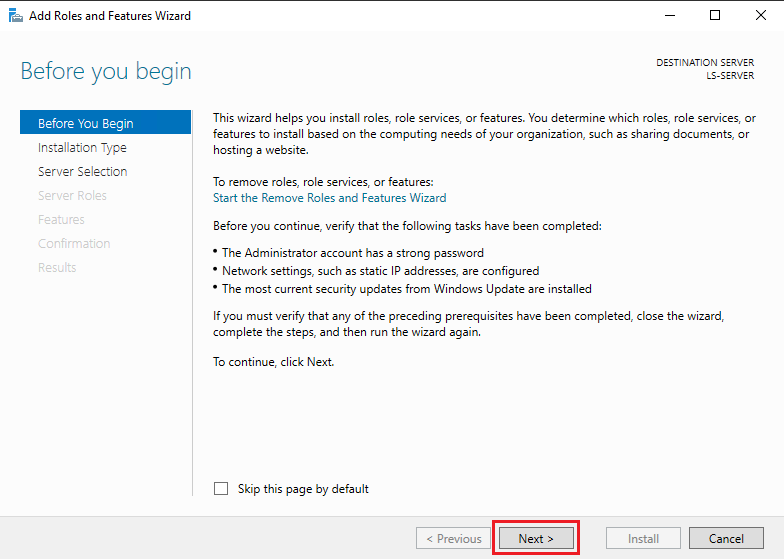
In the Installation Type section, select the radio button for
Role-based or feature-based installationand then click onNext.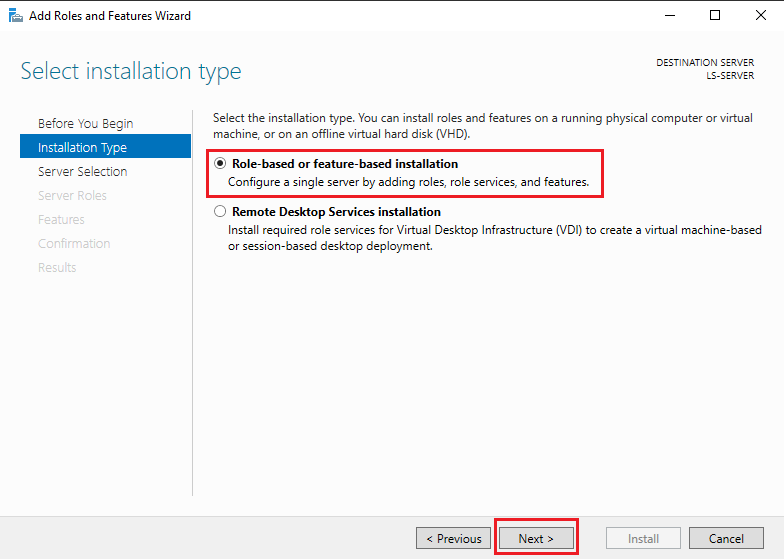
Under Server Selection, choose the server name on which the role/feature is to be installed from the
Server Poollist, and then click onNext.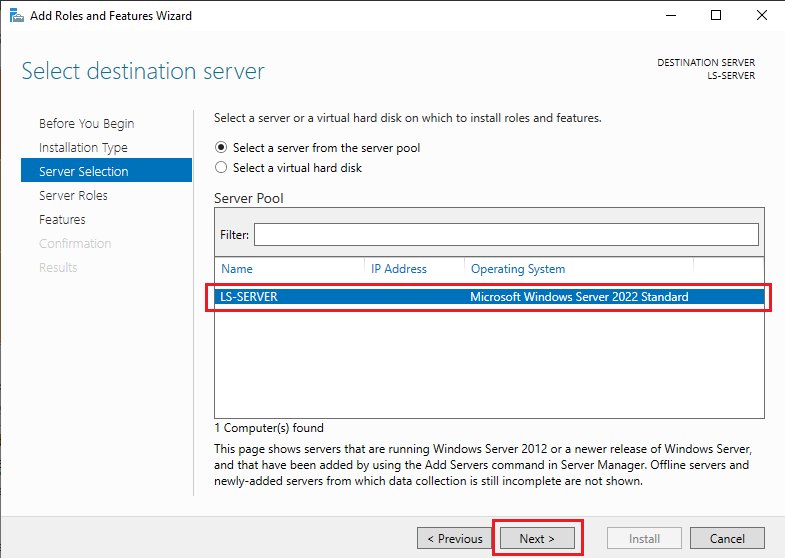
From Server Roles section, select the check-box near to
DNS Server.A separate window will show up from which additional features required for the DNS Server can be selected. Make sure that
Include management toolsoption is selected in this window. Click onAdd Features.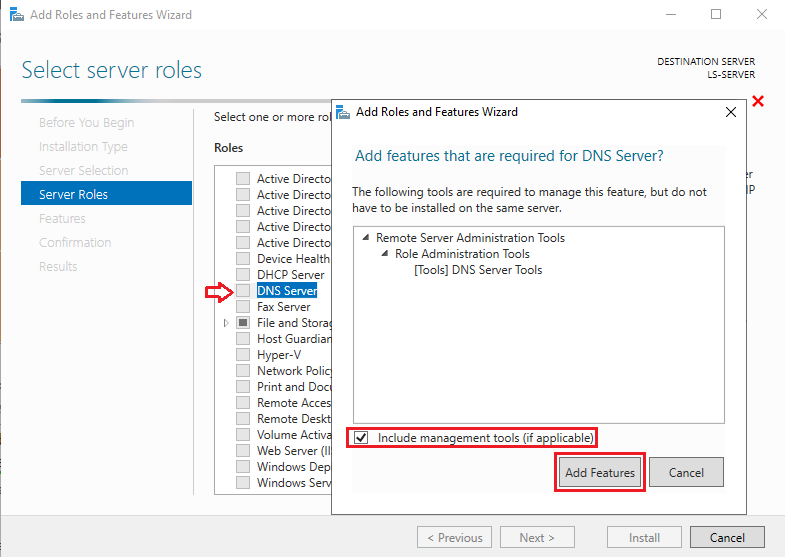
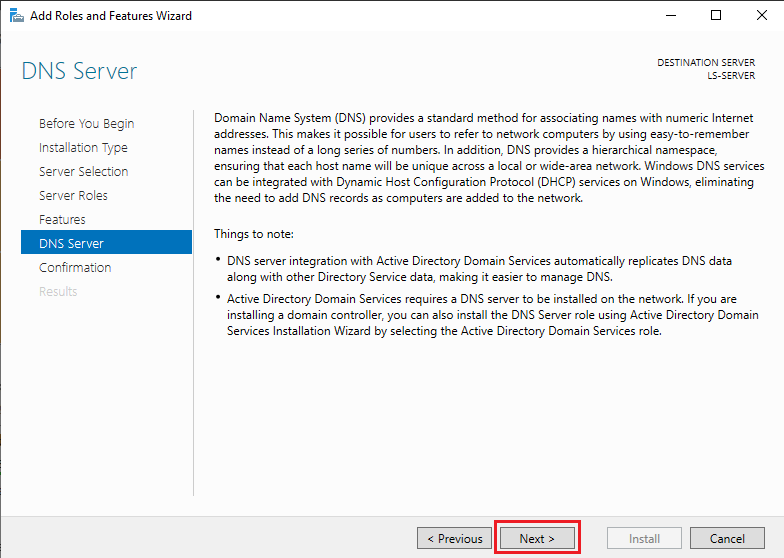
Click on
Nextafter making sure that theDNS Serveroption is checked.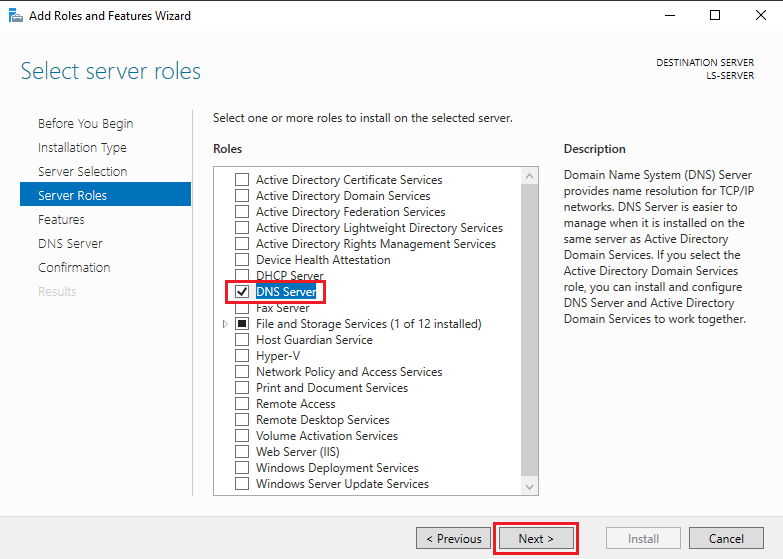
Click on
Nextin the next two sections forFeaturesandDNS Server, without making any changes.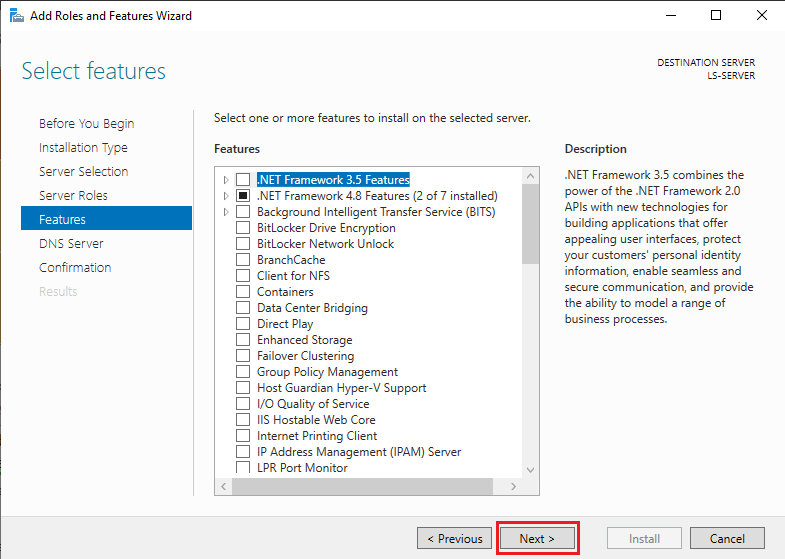
In the Confirmation window, click
Installto start the installation of the DNS server.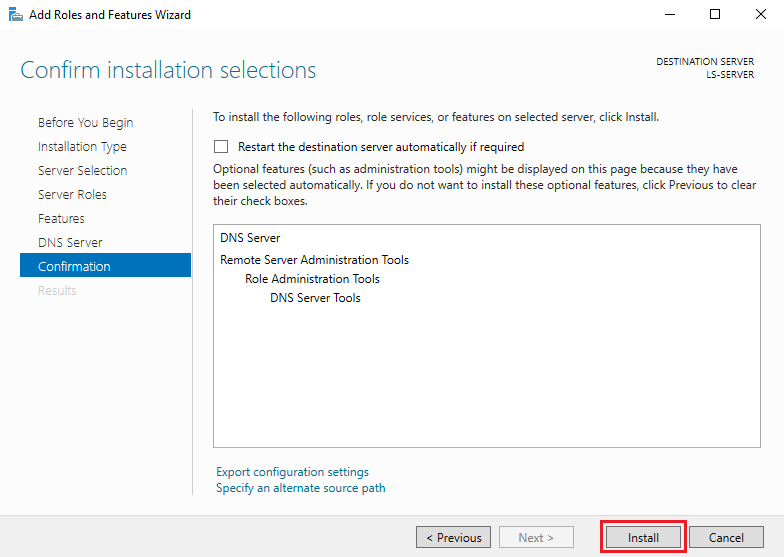
The installation process will take some time. Once it is completed, a message confirming that the installation has been successful will show up. Click on
Closeto exit the wizard.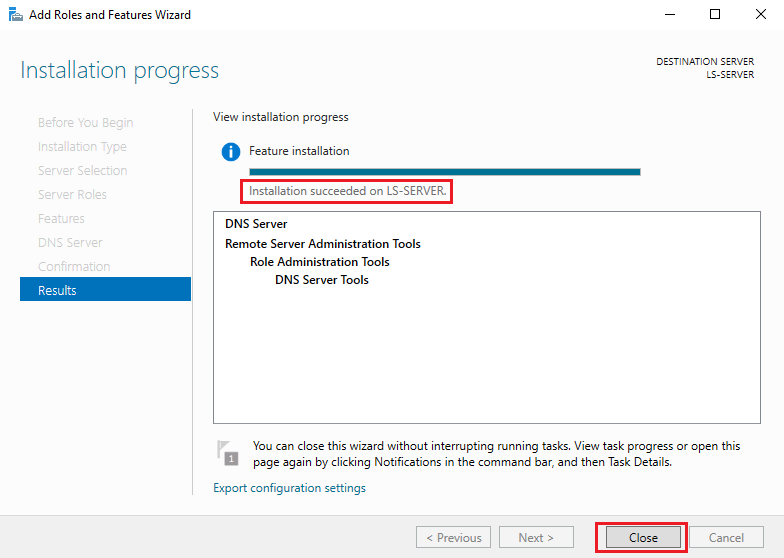
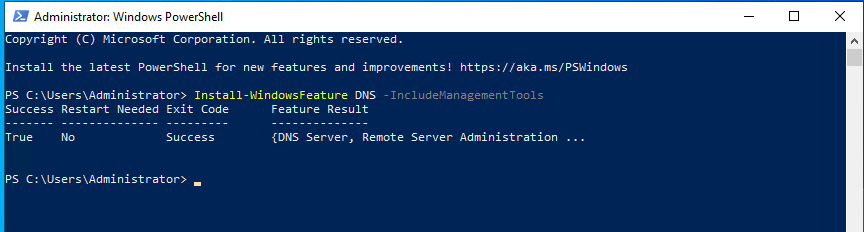
Installing DNS Server through Windows PowerShell
Installing the DNS Server through Windows PowerShell is pretty much an easier process, which requires executing the below command through PowerShell.
Install-WindowsFeature DNS -IncludeManagementTools
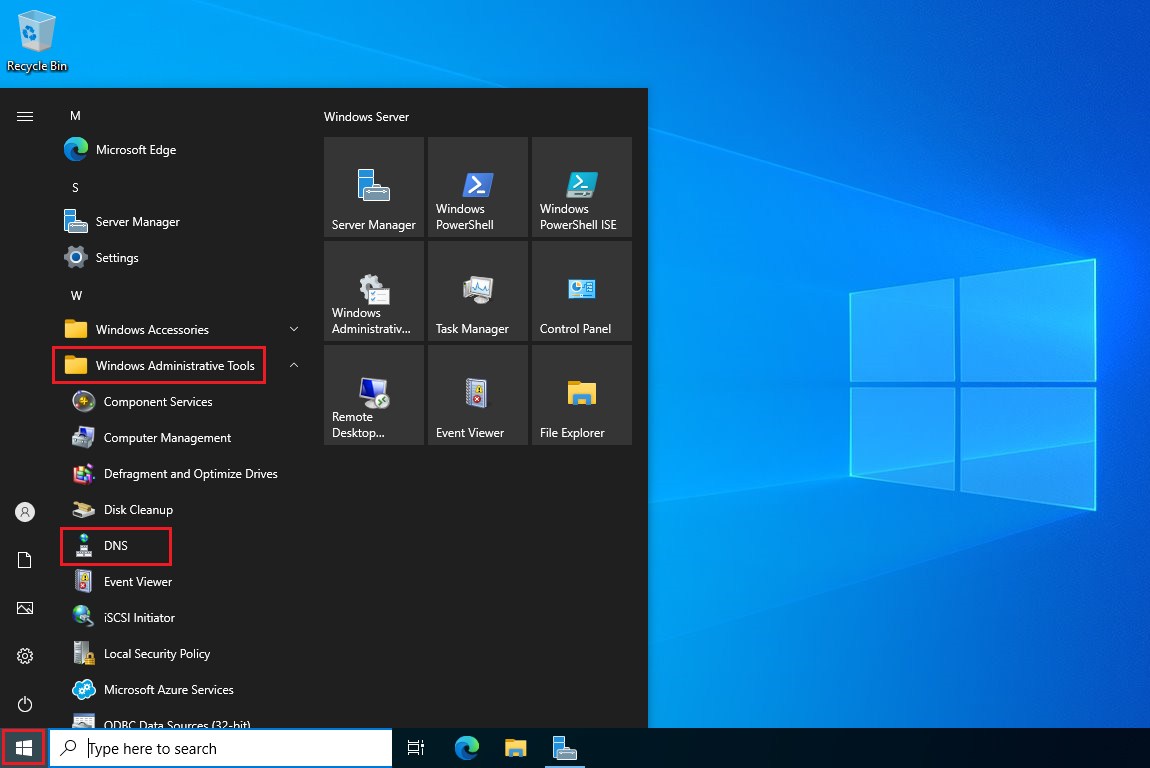
Accessing DNS Server management console
Once the installation has been completed, the DNS Server console can be accessed from either Server Manager or from under Windows Administrative Tools.
The DNS Server console can be used to create DNS zones for websites, containing the DNS records associated with the website. The below steps can be followed for creating a forward lookup zone for a website. The DNS server used in this context is named LS-SERVER and the sample website that has been used is lssupport.com.
Open the
DNS Managerconsole.
Expand the DNS Server from the left panel, right-click on
Forward Lookup Zonesand then click onNew Zone….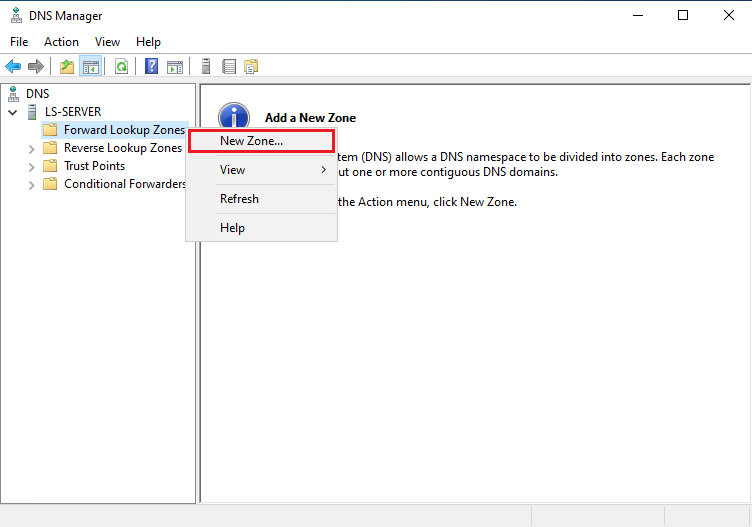
Click
Nextin the New Zone Wizard.
Primary Zonewill be selected as the default option; this can be changed accordingly. Click onNext.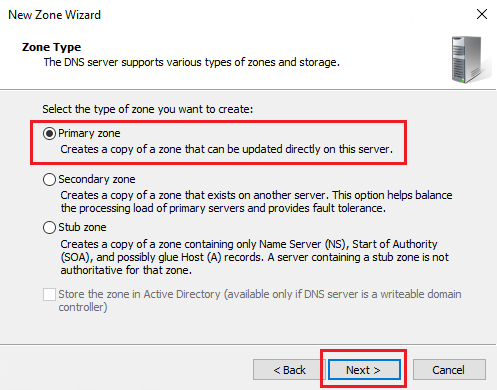
Type in the website name in the
Zone namefield and then click onNext.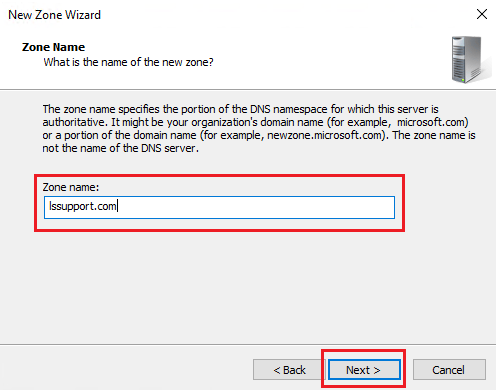
Click on
Nextto create a new zone file for the website. The zone file will be named as<websitename>.dns.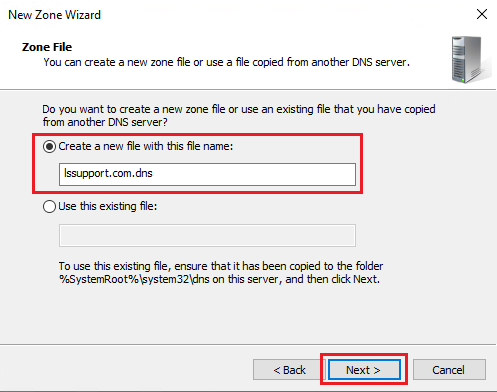
Select the zone update type in the next window. The default setting for this would be
Do not allow dynamic updates. Click onNext.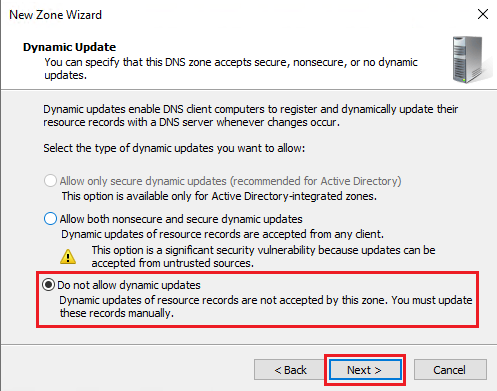
A new zone for the website will now be created. Click on
Finishto close the wizard.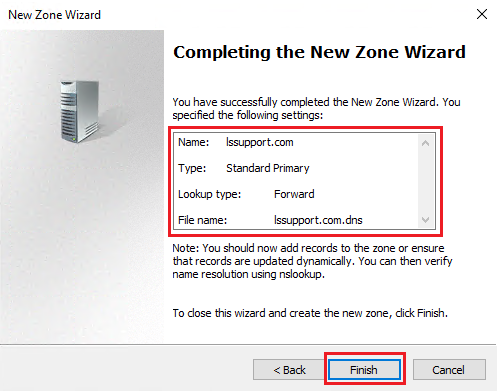
Once the zone has been created, right-click on the
website zone nameto add the required DNS records (E.g. A, CNAME & MX, etc.) for the website.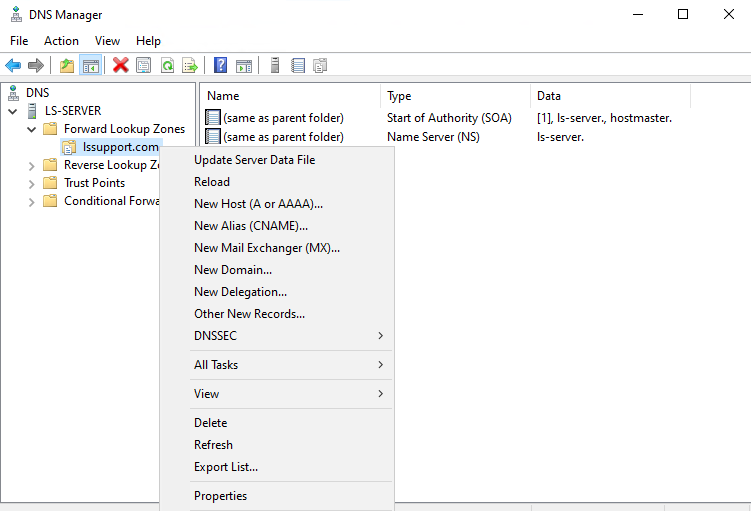
Related Tutorials
