How to update NameServer and DNS record for LayerStack Cloud Servers
Domain Name System (DNS) is one of the standard set of protocols that includes TCP/IP. The DNS Client and the DNS Server together provide a mechanism of the server name to IP address mapping name resolution services for servers and their users.
Name servers and DNS records are a part of DNS. Name servers are servers on the internet, that helps in handling queries regarding the different services of a domain name. They help in identifying the current DNS provider of the domain. In plain simple words, name servers translate domain names to plain IP addresses.
A domain name usually has at least two name servers and the usual format of name servers will be in the form of ns1.layerstacksupport.com & ns2.layerstacksupport.com. The name servers can be the default ones provided by the domain registrar, or they can also be custom setup name servers using a domain name.
DNS records are used to link domains to IP addresses. Different DNS records exist, such as A, MX, TXT, CNAME etc, which links the domain name to its web hosting or email hosting service providers.
Suggested procedure:
- Choosing or Setting up NameServer record
- Updating DNS record
- Updating Name Servers record
Choosing or Setting up NameServer
Scenario 1 - Use 3rd-party Registrar's NameServer
When a domain is purchased from a third-party domain registrar, the domain will usually be provided with the registrar's default name servers. The DNS records for a domain using third-party domain registrar name servers need to be updated/modified from the domain DNS zone provided by the registrar itself.
Scenario 2 - Use Plesk/cPanel NameServer
Updating/Modifying DNS records of a domain using its own hosting name servers, set up through Plesk/cPanel is quite much easier. All it requires is proper access to the control panel, and the DNS zone is readily available in the panel to make the changes to the domain zone. Using private name servers has also further benefits, which include making it easier to remember the name servers if they use the same domain name as well as a sense of security using the same domain name for the website as well as a name server.
Plesk:
cPanel:
Scenario 3 - Set up Custom NameServer inside your server
Windows: How to set up DNS Server on Windows Cloud Servers
Linux: Configuring DNS NameServer on Linux Cloud Servers
Updating DNS record
Relevant DNS records for the domain can be propagated from the DNS zone created at the DNS service provider end.
Scenario 1
If your domain uses remote third-party name servers, the DNS records must be updated at the remote DNS service provider.
Scenario 2
If your domain uses your own Cloud server name servers (name servers set up in the control panel installed in the server), the DNS records can be updated in the domain DNS zone from Plesk/cPanel.
Updating DNS records from Plesk
For updating the DNS records through the Plesk panel, the below steps can be followed.
Log in to the Plesk panel of your server.
Click on
Domainsin the left panel and then click on the domain name for which the DNS record is to be added/updated.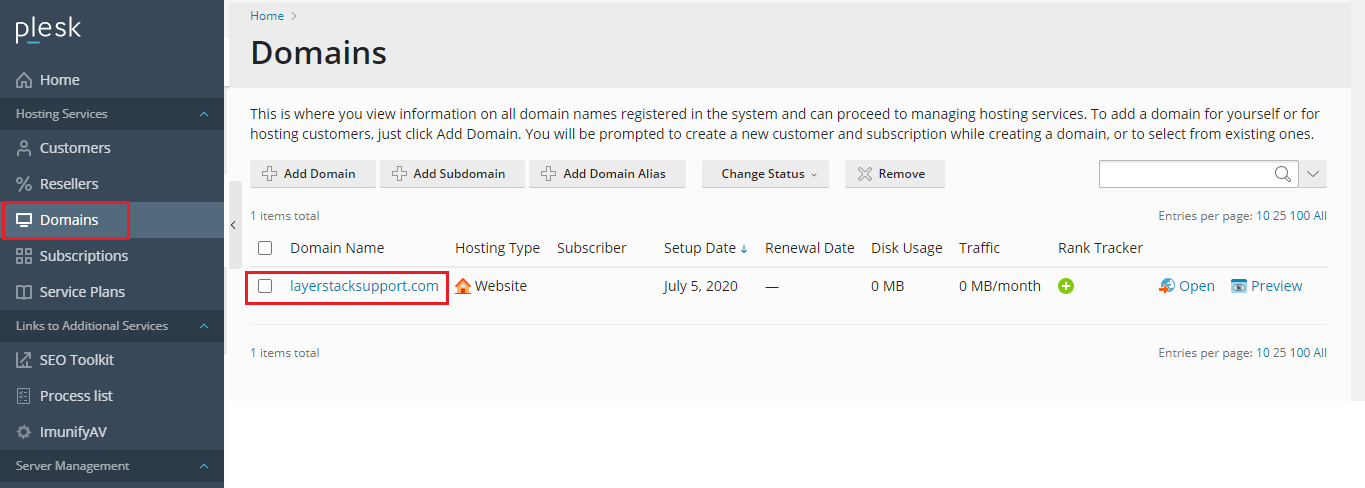
Scroll down and click on the option named
DNS Settings.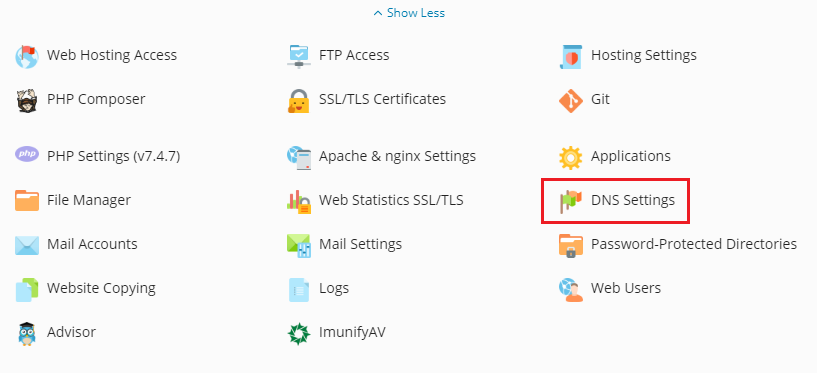
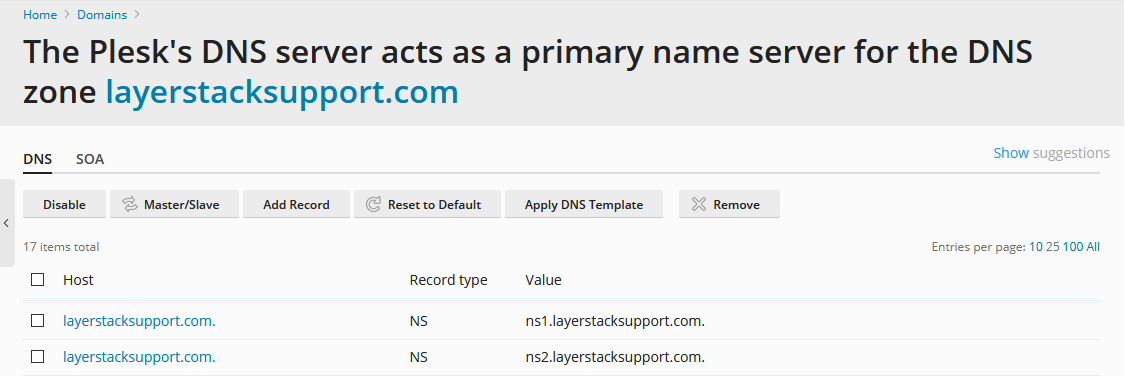
The DNS zone shows the default DNS records that have been added for the domain. Click on
Add Recordto add any new DNS record for the domain.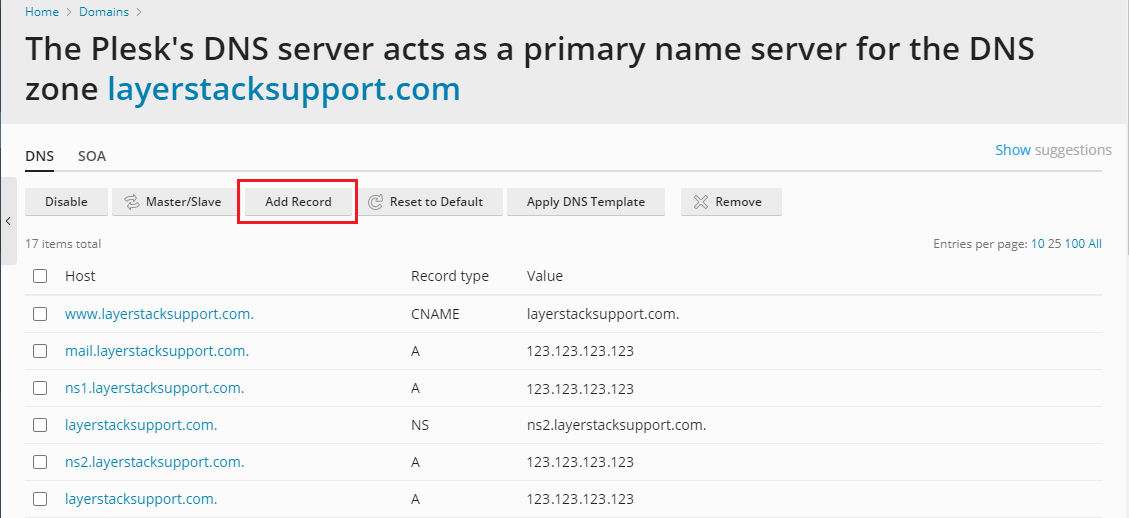
The required DNS record can now be added from the
Add a Resource Record to the Zonepage.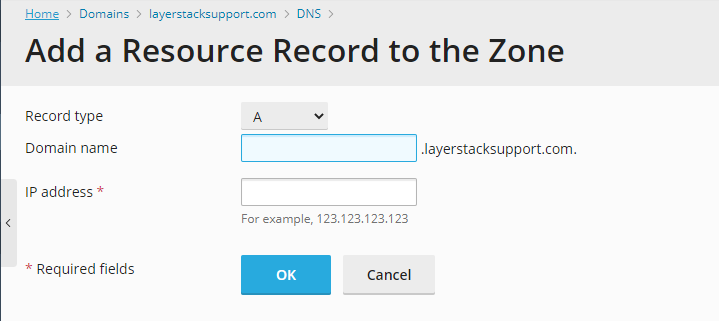
Record type: Select the type of DNS record that needs to be added for the domain.
Domain name: The exact additional hostname relative to the domain name for which the DNS record is to be added.
IP address: The IP address to which the hostname is to be pointed.
Updating DNS records from WHM/cPanel
For updating the DNS records through WHM/cPanel, the below steps can be followed.
Log in to the WHM panel of your server.
Search for
DNSin the search bar on the left panel and then click onEdit DNS ZoneunderDNS Functions.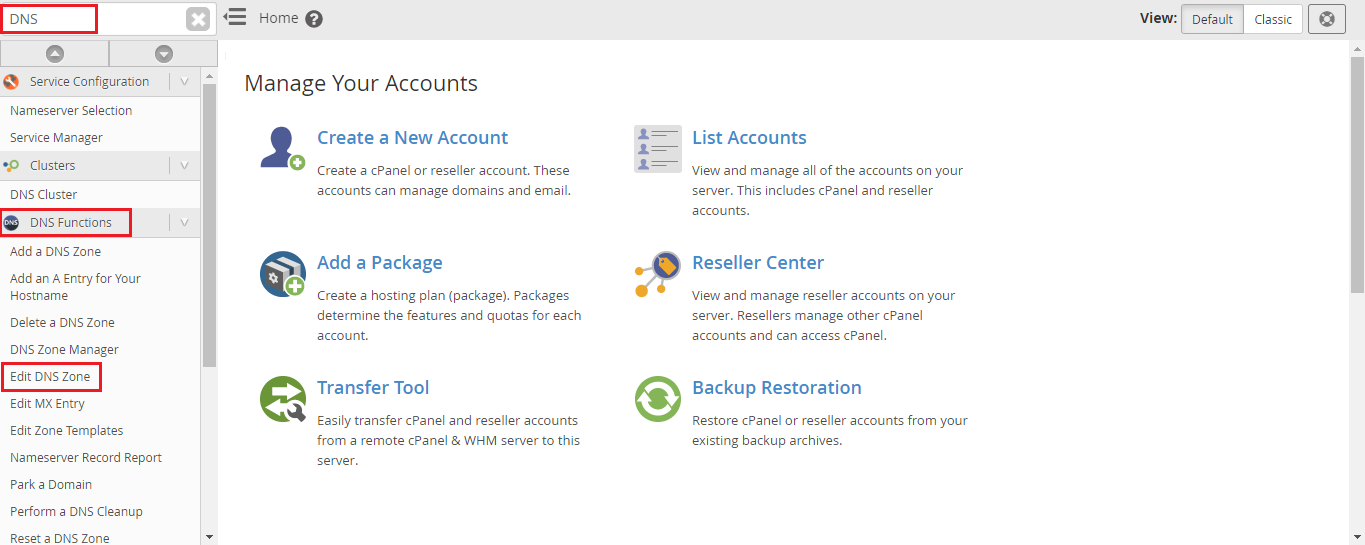
Select the
radiobutton to the left of the domain name for which the DNS records are to be added/modified and then click onEdit.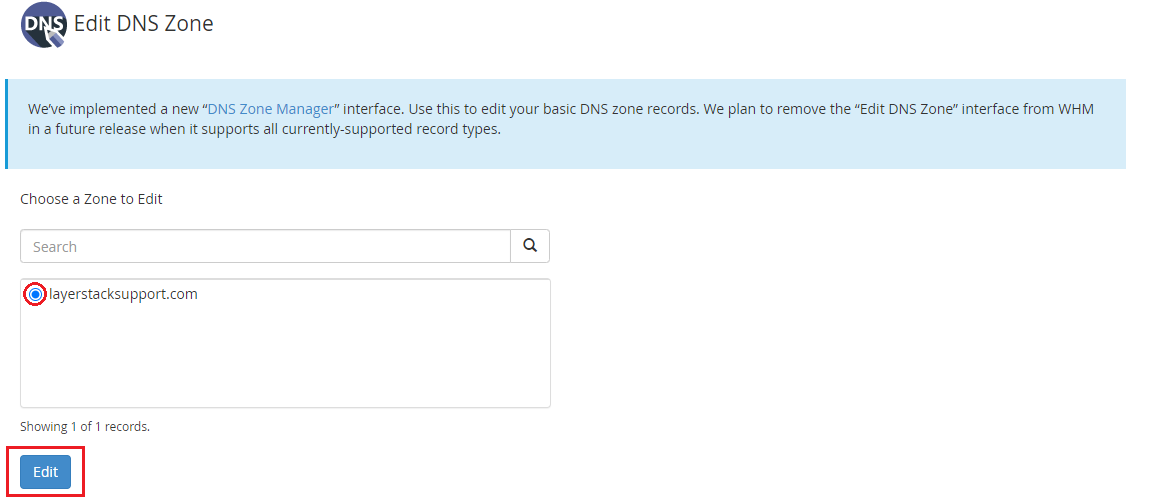
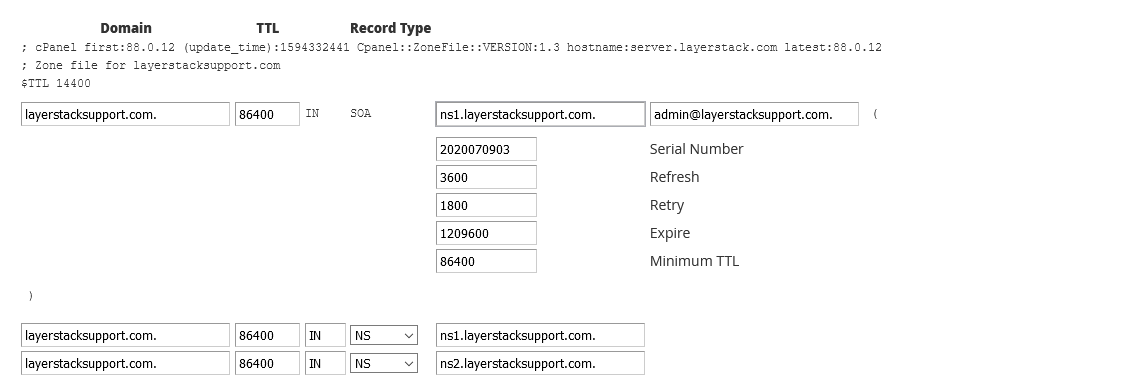
The DNS zone shows the default DNS records that have been added for the domain. Scroll down the page and add in the required DNS records under the section
Add New Entries Below this Line.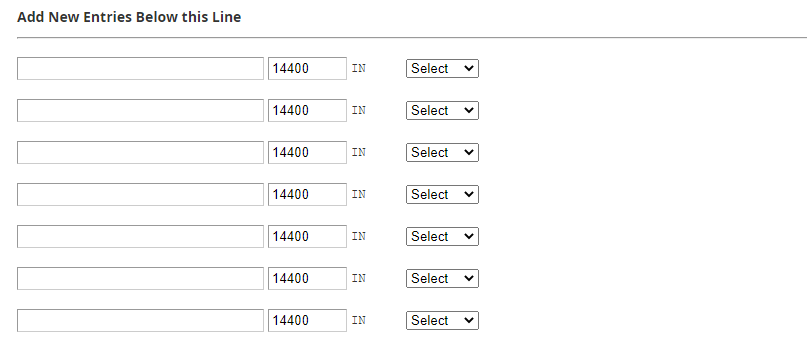
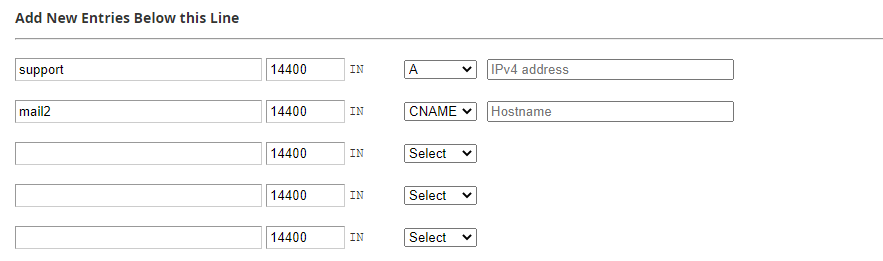
The first blank field represents the exact additional hostname relative to the domain name for which the DNS record is to be added. The second field is the TTL value for the DNS record and the drop-down field can be used to specify the type of DNS record that needs to be added.
Once the type of record is selected, a new field will show up which needs to be filled with the DNS record (IP/hostname) to which the host should be pointed.
Click on
Savebutton at the bottom of the page for saving the newly added DNS records.
Updating NameServer record
Scenario 1
If you have your domain registered through the LayerStack service team, you can submit a ticket to Technical Department through HelpDesk for requesting the name server's update for your domain.
Scenario 2
If your domain is registered with any other third-party registrars, you would need to log in to their portal for updating the name servers directly.
Related Tutorials
