Custom ISO features has been officially activated on LayerPanel 2 in all regions. Custom ISO is usually used for installing custom operating systems or booting custom rescue disks on Cloud Servers. With using the Custom ISO feature, user can be benefited from saving download and setup time while installing identical OS and applications in different computing server or VPS. In fact, some industrial software solutions are only compliable to specific operating systems which is supported by LayerPanel 2 from now on.
The process involves the uploading of an ISO file through FTP or HTTP. The LayerPanel offers this uploading feature where a user can upload one ISO file per client as a default limit. The following steps will give user the correct method to upload and run a custom ISO.
1. Upload Custom ISOLog in to LayerPanel 2, go to the Services section and click Cloud Servers, then choose the Cloud Servers that you want to detach ISO file.
2. Click the ISO button.
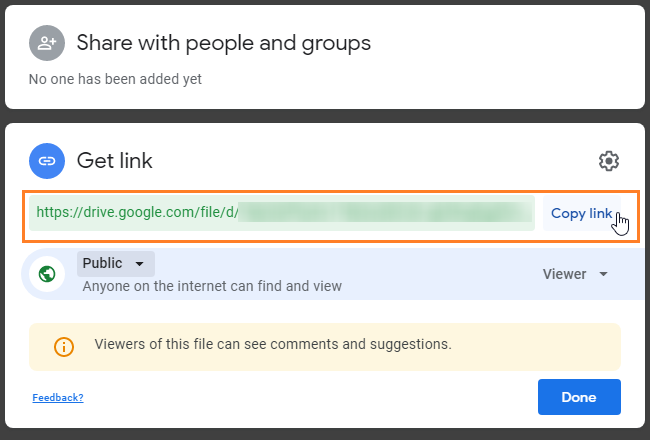
3. Click the Upload option and choose from 3 options – FTP / HTTP / Google Drive URL for ISO uploading process. For more details: https://bit.ly/2LVOYKA
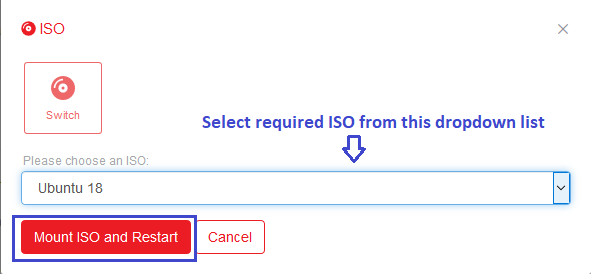
4. Once the upload process is completed, please click Switch, choose your custom ISO file and click Mount ISO and Restart for mounting this ISO into your Cloud Servers.
5. Click Console button to access the server console.
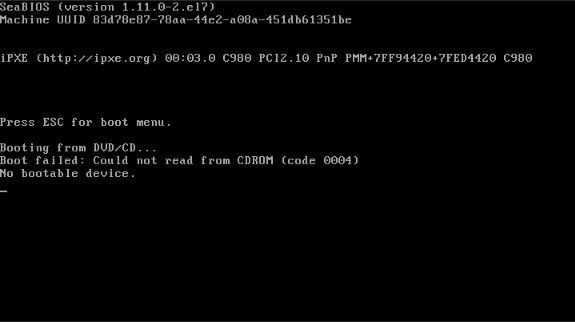
6. Click the Send CtrlAltDel button in the Console window, then immediately left-click inside the Console window, press the Escape key (ESC) as soon as the “Press ESC for boot menu” message appears in order to access the boot menu for the server. Lastly, press 4 to boot the server from DVD/CD (boot from ISO)
* If the Escape key (ESC) is not pressed on time, the below screen will pop-up when user accessing Console.
7. You may detach & delete ISO file after all installation is completed.