How to set up & configure firewall using FirewallD for CentOS 8
Firewall is an integral part of any system and can be used to protect a server against unauthenticated access from the outside world. It helps to prevent hackers from logging into servers on the network. Firewall can also be used to set up specific rules in-order to restrict access to specific ports of the system based on IP address.
The basic functionality of a firewall is to control the incoming and outgoing traffic and choose whether to block a particular connection or let it through based on the defined set of security rules.
Steps to set up FirewallD on CentOS 8
FirewallD uses concepts of services and zones instead of iptables rules and chains. Using that you can configure which traffic should be allowed or disallowed to and from the system. FirewallD is using the firewall-cmd utility to manage your firewall configuration.
In CentOS 8 FirewallD uses the concept of services and zones instead of iptables rules and chains and by using this you can configure which traffic is allowed or not in and out of the system. FirewallD uses the firewall-cmd utility to control the firewall configuration.
Run the below command to install FirewallD on CentOS 8. By default, it is available on CentOS 8.
# yum install firewalld
Now start and enable the FirewallD with the below commands.
# systemctl start firewalld

# systemctl enable firewalld
Run the below command to check the FirewallD service state.
# firewall-cmd --state
Below are the predefined zones included in FirewallD:
drop – Dropped all incoming connections without any reply and only allowed outgoing connections.
block – It is the same as the zone drop, but all incoming connections are blocked with an
icmp-host- prohibitedoricmp6-adm-prohibitedmessages.public – It represents unreliable public areas.
external – External networks in the event that the firewall uses as the gateway. Because it is configured for NAT masquerading and internal network will remain private but accessible.
internal – Only accepted the selected incoming connections and it’s for the internal network.
dmz – Demilitarized zone is publicly accessible to the internal network with limited access and accepted only selected incoming connections.
work – Using for work machines.
home - Using for home machines.
trusted - Accept all network connections.
Configuration of the firewall with FirewallD
By default, the public zone is the default zone after the firewall service is enabled.
The below command is used to get the list of the default zone.
# firewall-cmd --get-default-zone
Run the below command to get the list of all available zones.
# firewall-cmd --get-zones
Run the below command to see what zones are used by the network interface.
# firewall-cmd --get-active-zones
The below commands are used to change the default zone and verify.
# firewall-cmd --set-default-zone=home

# firewall-cmd --get-default-zone
NOTE: Replace the zone name with the original zone name that needs to be set as default.
Example of open HTTP port 80 and HTTPS port 443
Below commands are used to open temporarily.
# firewall-cmd --zone=public --add-service=http

# firewall-cmd --zone=public --add-service=https
Below commands are used to open permanently.
# firewall-cmd --zone=public --permanent --add-service=http

# firewall-cmd --zone=public --permanent --add-service=https

OR

# firewall-cmd --zone=public --permanent --add-port 80/tcp

# firewall-cmd --zone=public --permanent --add-port 443/tcp

Run the below to reload the service.
# firewall-cmd --reload
Check for open ports/services.
# firewall-cmd --list-all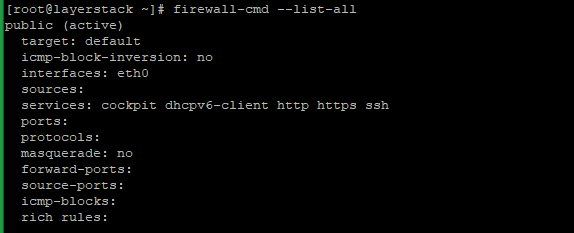
Example of close HTTP port 80 and HTTPS port 443
Below commands are used to open permanently.
# firewall-cmd --zone=public --permanent --remove-service=http

# firewall-cmd --zone=public --permanent --remove-service=https

OR

# firewall-cmd --zone=public --permanent --remove-port 80/tcp

# firewall-cmd --zone=public --permanent --remove-port 443/tcp

Run the below to reload the service.
# firewall-cmd --reload
Disable/Stop FirewallD service
If there arises any need to stop or disable the FirewallD service in the server, this can be done by executing the below commands.
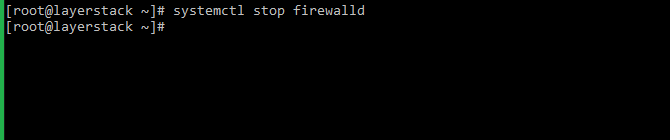
Stop the FirewallD service first with:
# systemctl stop firewalld
Then disable the FirewallD service with:
# systemctl disable firewalld

Related Feature on LayerPanel
Related Tutorials
How to set up & configure Ubuntu Firewall (UFW) for Ubuntu 18
How to test Firewall Configuration with Nmap on Linux Cloud Servers
How to check if TCP / UDP port is open on Linux & Windows Cloud Servers
How to Enable & Disable Ping (ICMP Echo Requests) in Windows Server 2019 Firewall
How to Enable & Disable Ping (ICMP Echo Requests) from IPTables on Linux Cloud Servers
Setting up Windows Firewall for your Windows Cloud Servers 2016
