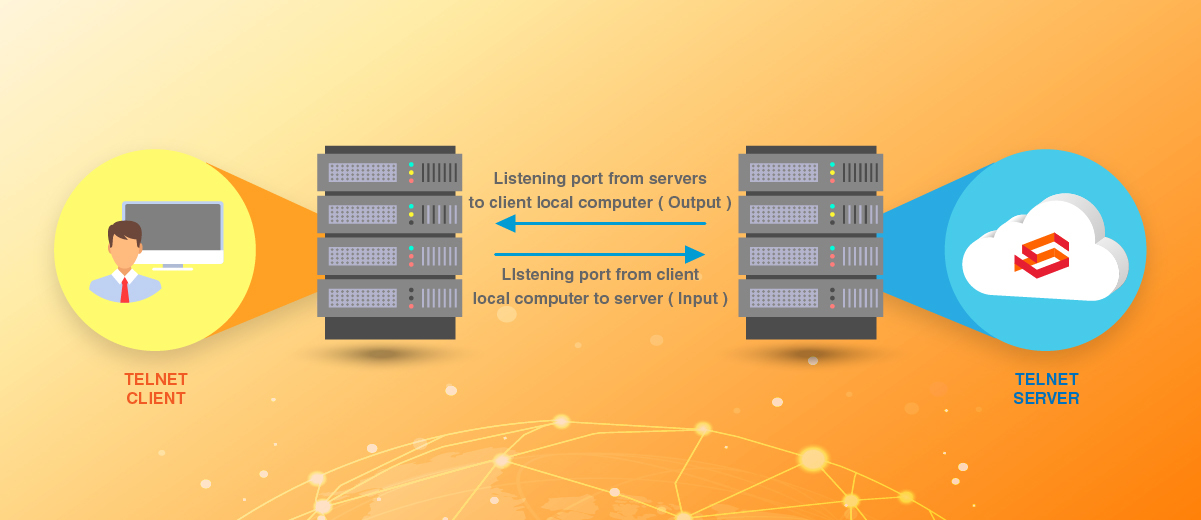
Telnet is a command protocol that allows a user to connect to a remote host. It makes use of TCP/IP protocol to establish a connection with the remote computer.
This command is a valuable tool that allows for troubleshooting and testing of various services in a server. One of the main uses of the telnet command is to check if a particular port is listening on a server. The general format of the telnet command is as below:
telnet [hostname/ipaddress] [port number]
The below example command tests if port 22 is listening for the server's IP address 123.123.123.123.
telnet 123.123.123.123 22
By default, the Telnet client is not installed in any Linux/Windows distributions. This guide outlines the general steps to install telnet commands in both Linux and Windows servers.
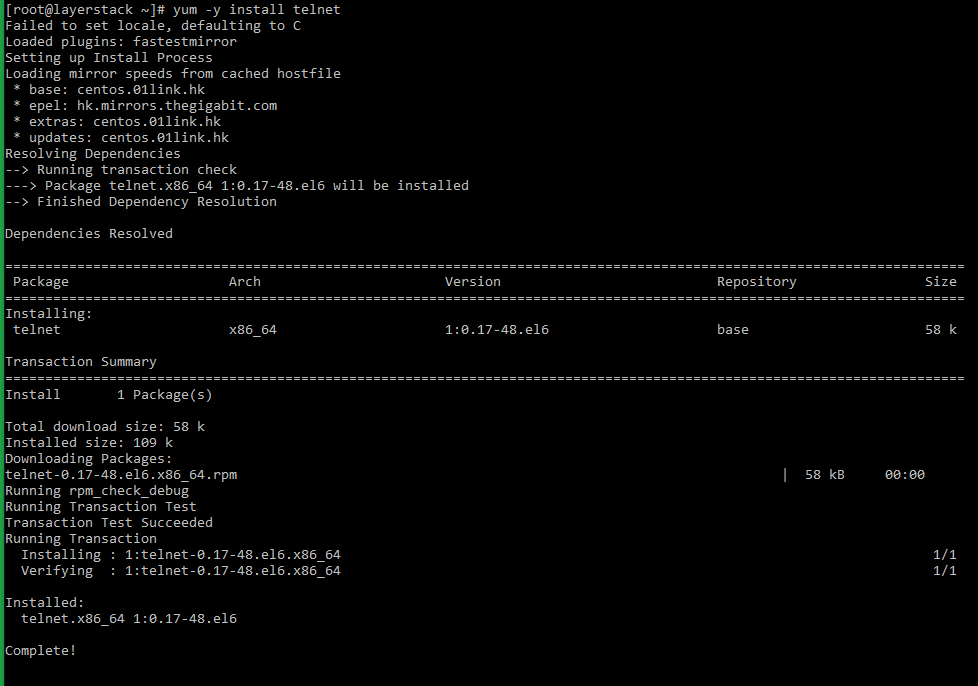
AlmaLinux / Rocky Linux / CentOS / Fedora
Telnet command can be installed using YUM in all CentOS and Fedora distributions.
Execute the below command to install telnet.
# yum -y install telnet
Verify that the command is installed successfully.
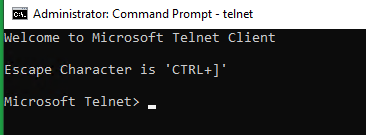
# telnet localhost 22
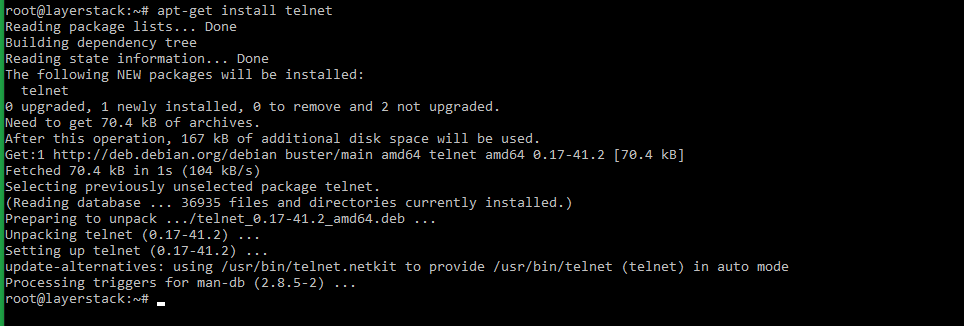
Ubuntu / Debian
Telnet command can be installed both in Ubuntu and Debian systems using the APT command.
Execute the below command to install telnet.
# apt-get install telnet
Verify that the command is installed successfully.
# telnet localhost 22
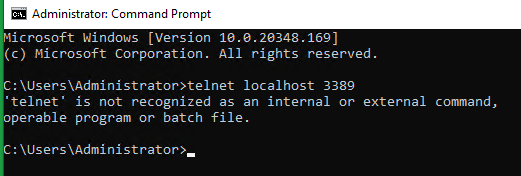
Windows OS
If the Telnet command is not installed in a Windows server, an output similar to below will be received when trying to use telnet.
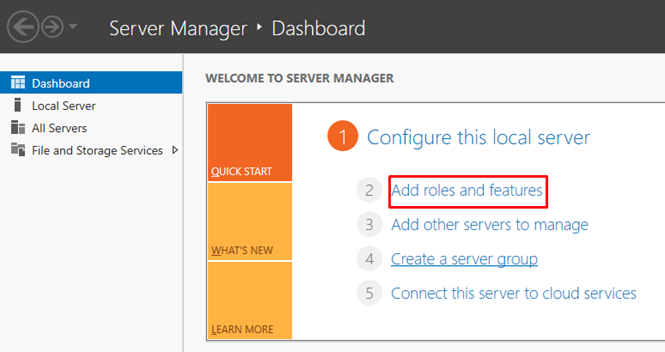
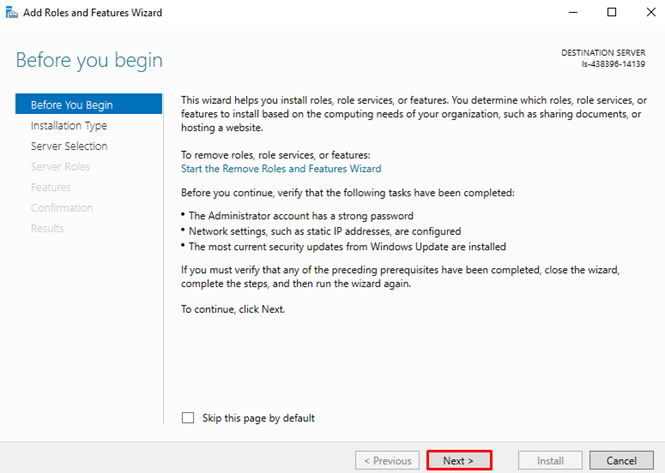
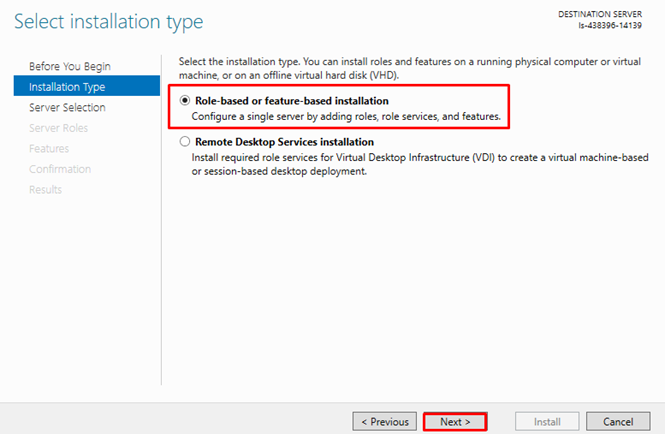
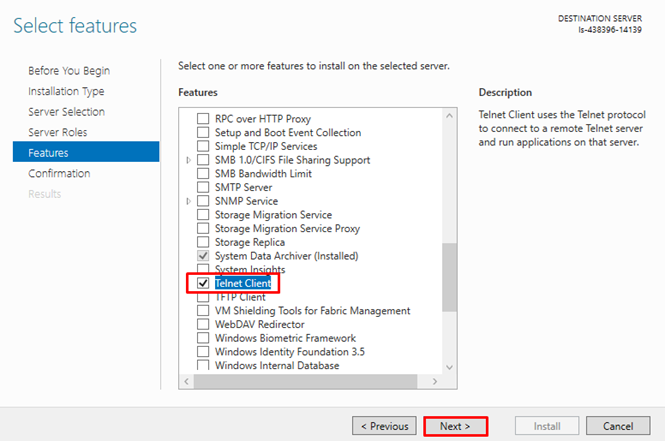
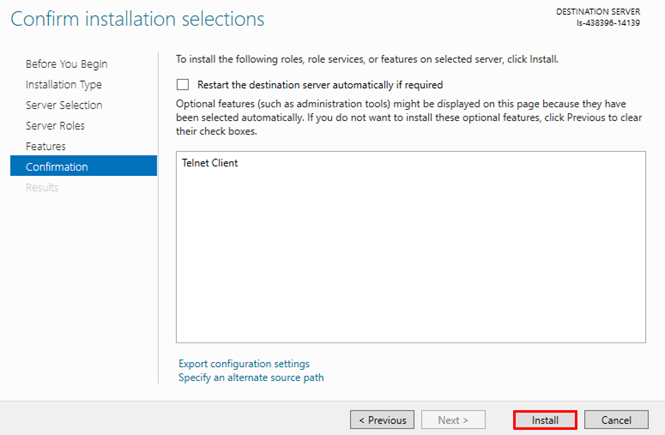
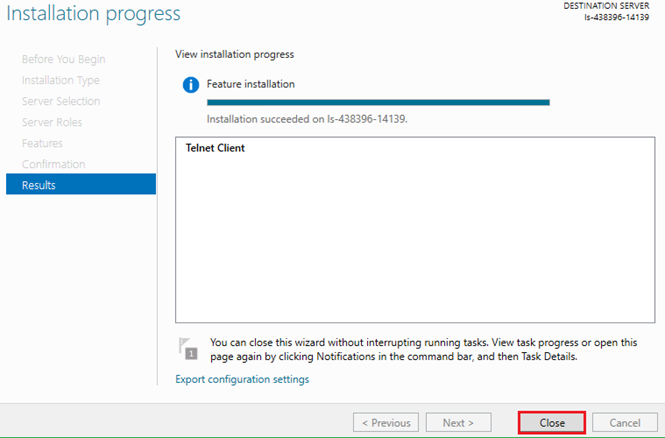
In this situation, the Telnet command can be installed either through the command prompt or the Server Manager graphical interface.
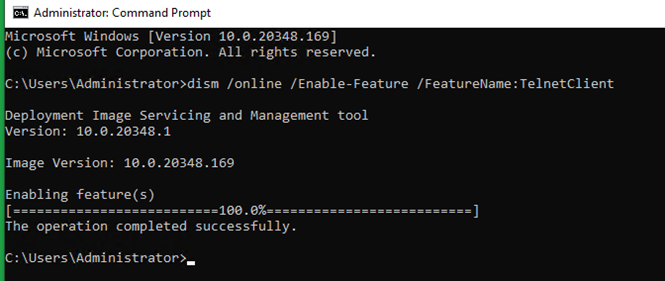
Installing telnet client through command prompt
To install telnet client, run the below command in the command prompt with administrator permissions.
We hope you’ll give the new products and updates a try. If you have an idea for improving our products or want to vote on other user ideas so they get prioritized, please submit your feedback on our Community platform. And if you have any questions, please feel free to ask in the Community or contact our Technical Support team.