How to install an SSL certificate on cPanel
In order to purchase a certificate, you need to give Certificate Signing Request (CSR) to the Certificate Authority. It contains the information about organization's name, domain name, and location. This information is used to verify and create the SSL certificate. After that, you may purchase a certificate from any Certificate Authority.
Once the SSL certificate files are received from the Certificate Authority as the zip file, unzip the files and copy them into the directory where need to keep and then process further procedure.
This article will guide you on how to create CSR and install the SSL certificate via cPanel.
Create "Certificate Signing request (CSR)" from cPanel
Log in to the cPanel account using the below link.
https://IP address:2083/NOTE: Replace the
IP addresswith your real IP address.Once logged in to the cPanel account, click on the
SSL/TLSmenu under the security section.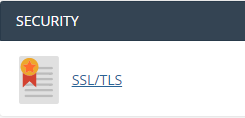
Click on the
Generate, view, or delete SSL certificate signing requestsoption under theCertificate Signing Requests (CSR)section.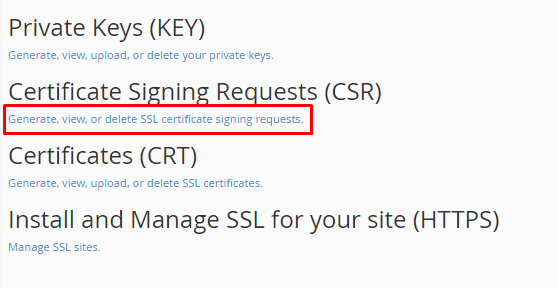
Select
Generate a New 2048-bit keyand enter the other details by using only alphanumeric characters. Once entered the details, click onGeneratebutton that is shown in the below image.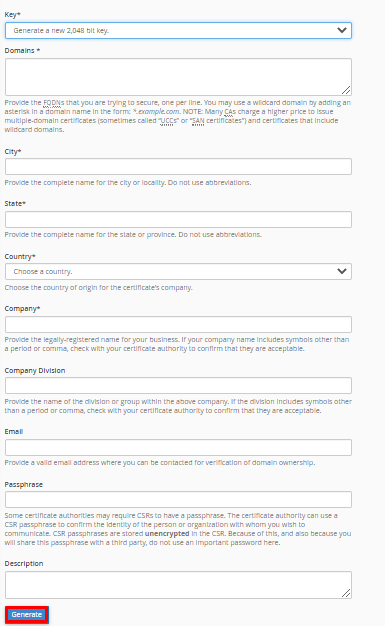
Now it will redirect to another page and will show the newly created
Certificate Signing Request (CSR). Please copy them into the directory well where need to keep, and need to submit this toCertificate Authorityfor SSL certificate order.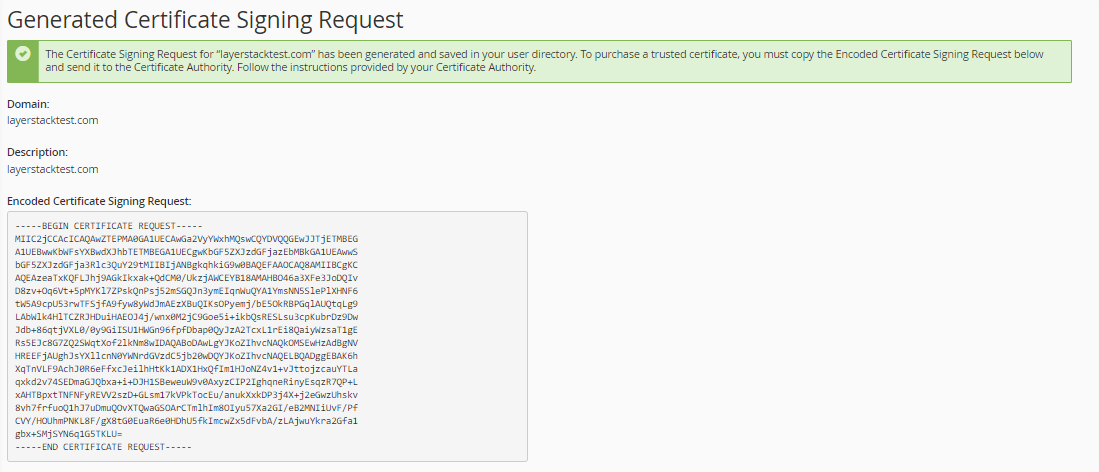
Start to install "SSL certificate" on cPanel
Log in to the cPanel account using the below link.
https://IP address:2083/NOTE: Replace the
IP addresswith your real IP address.Once logged in to the cPanel account, click on the
SSL/TLSmenu under the security section.
To initiate the installation process, click on
Manage SSL sitesunder theInstall and Manage SSL for your site (HTTPS)section.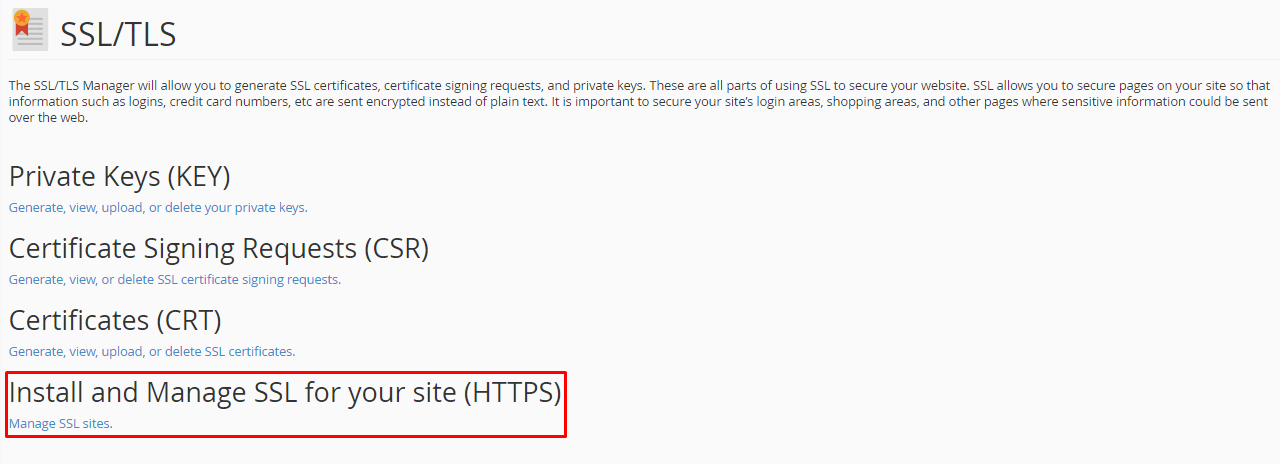
Now you will get the page to fill the certificate files, change the domain drop-down to the
exact domain namein which need to install the SSL certificate.
Open the certificates files in any text editor like Notepad, then Copy and paste the full text including the header and footer
—–BEGIN CERTIFICATE—–and—–END CERTIFICATE—–in the appropriate text box(s).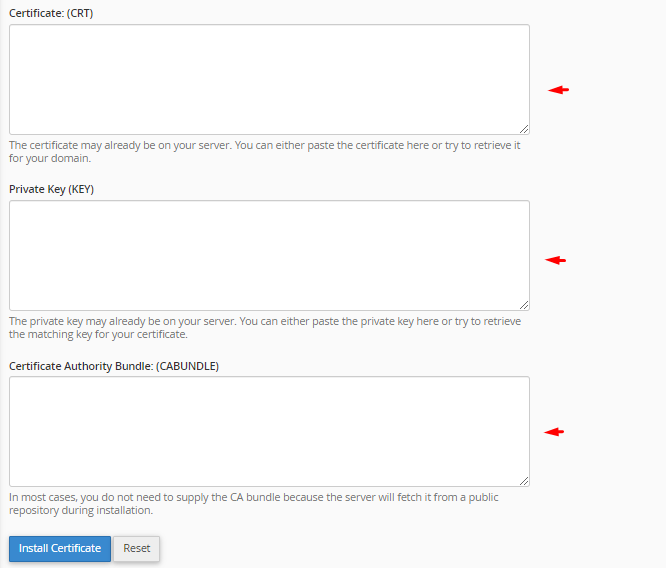
Certificate (CRT): This is the server certificate that was issued for the domain.
cPanel should fetch the certificate automatically from the "
Autofill by Domain" option if it is uploaded previously from the optionGenerate, view, upload, or delete SSL certificatesunder theCertificates (CRT)section.
Back to
SSL/TLSmenu under the security section: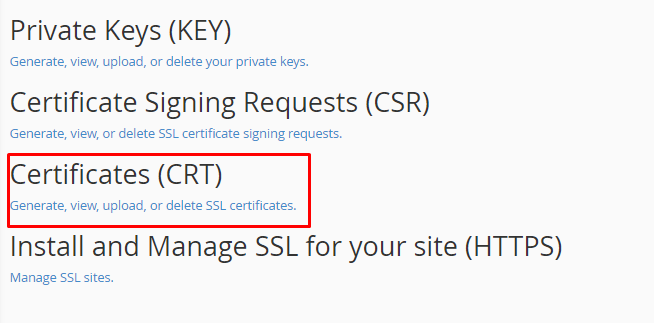
Once clicked on the
Generate, view, upload, or delete SSL certificatesoption, then click onchoose fileoption that shown in the below image to locate your SSL Server Certificate and then click on theUpload Certificateoption to upload the SSL certificate to the cPanel.
Private Key (KEY): This is the Private Key (KEY) that was created during the SSL certificate generation. If the Certificate Signing Request (CSR) is created on the same cPanel server, then cPanel should fetch automatically. Otherwise, paste it manually.
Certificate Authority Bundle (CABundle): It is the intermediate certificate that allows browsers and devices to understand who issued the trusted certificate. In most cases, there is no need to give the CA bundle because the server will fetch it from a public repository during installation.
Click
Install Certificateto complete the installation.
Once the installation is completed, you will get a message that the certificate was successfully installed.
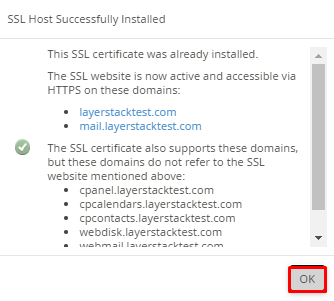
Now click on
OKbutton and verify from the below link that the SSL certificate was installed correctly for the domain.https://www.sslshopper.com/ssl-checker.html
