How to install Let's Encrypt SSL certificate on cPanel
In WHM, the manage AutoSSL interface allows the management of the AutoSSL feature, which automatically installs domain-validated SSL certificates. In the AutoSSL feature, the Let's Encrypt Plugin allows retrieving certificates from the Let’s Encrypt™ provider.
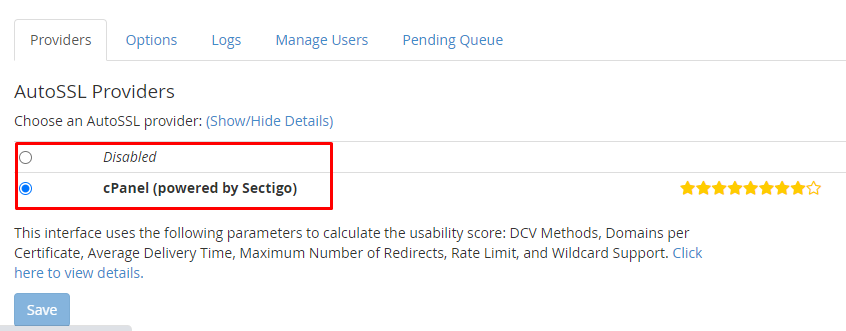
By default, the Let's Encrypt Plugin will not be enabled in WHM and only the cPanel’s default provider will be present as shown.
Installing Let's Encrypt plugin in WHM
The below steps can be followed to install the Let's Encrypt plugin first in WHM.
Execute the below command from the server command prompt.
# /usr/local/cpanel/scripts/install_lets_encrypt_autossl_provider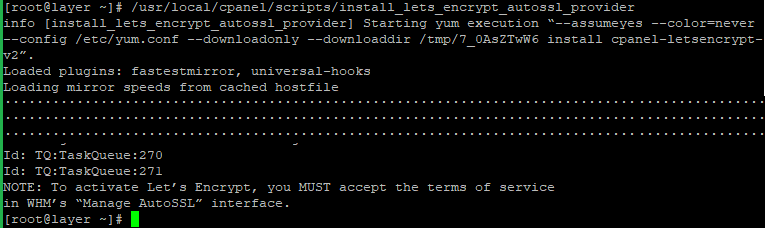
Log in to the server WHM panel by using the below URL.
https://IP address:2087NOTE: Replace the
IP addresswith the actual IP address of the server.Once logged in to the WHM, navigate to the
Manage AutoSSLthat is under theSSL/TLSsection and select theLet’s Encrypt™option under the Providers tab.
Once the
Let’s Encrypt™option is selected, theTerms of Servicesection will be shown. The terms can be reviewed from the link of the PDF file shown. Once this is done, select theI agree to these terms of serviceoption and then click onSave.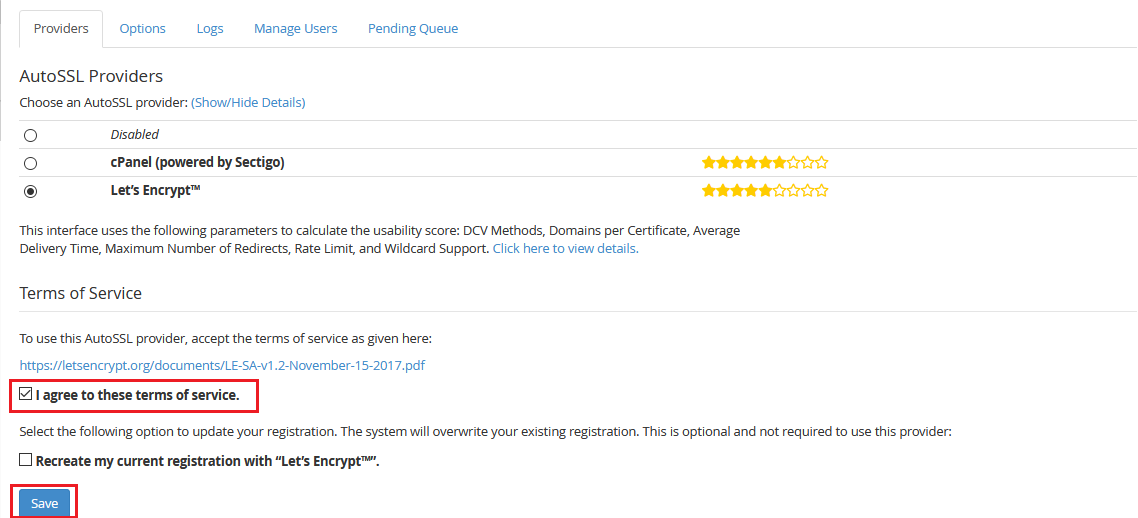
Once it is saved successfully, a prompt will be displayed notifying that the AutoSSL has been configured to use the
Let's Encrypt™provider.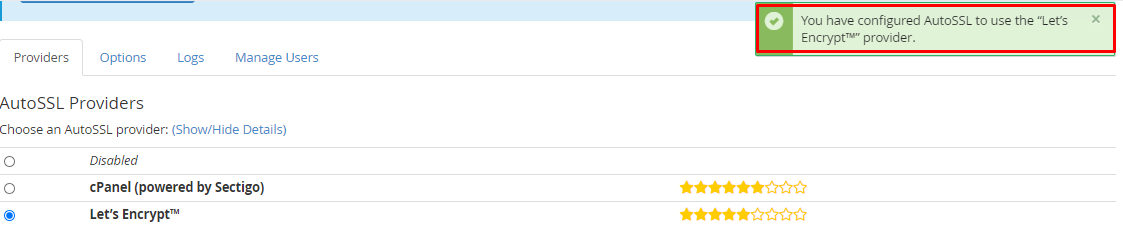
The current AutoSSL provider will be displayed as
Let's Encrypt™. If the Let's Encrypt is selected and set as the default provider on WHM, it will provide all future SSL and Wildcard SSL certificates.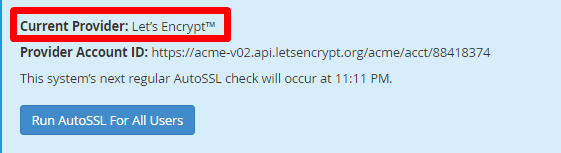
Installing Let’s Encrypt SSL Certificate for an account
Once the Let’s Encrypt SSL plugin has been installed and enabled in WHM, the Let’s Encrypt SSL can now be enabled for individual accounts on the server.
Click on the
Manage Userstab from the sameManage AutoSSLpage in WHM.
Select the check-box to the left of the cPanel user account for which the Let’s Encrypt AutoSSL feature is to be enabled and then click on the
Enable AutoSSL on selected userbutton.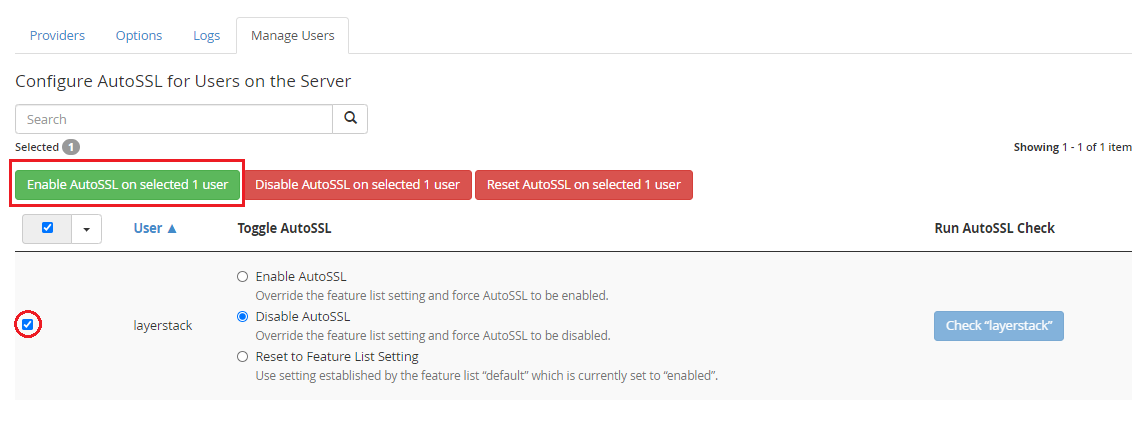
Note: In the above example, the domain
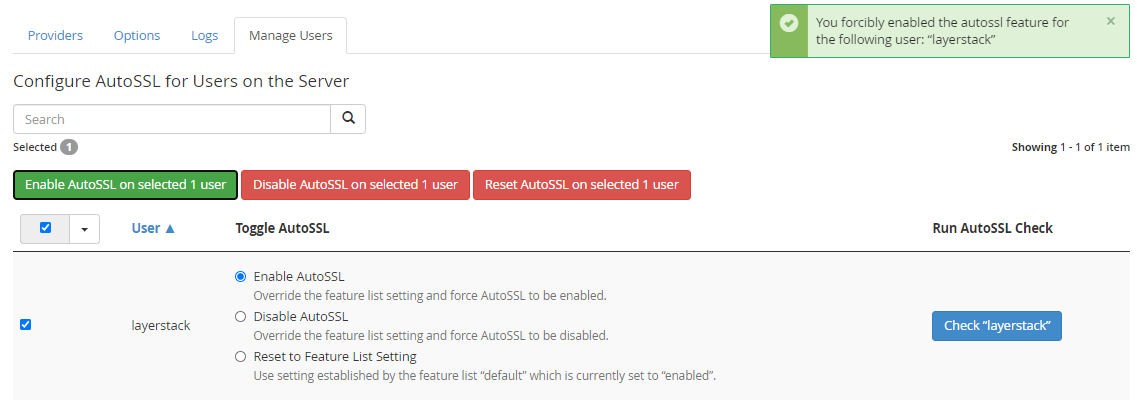
layerstacktest.comhas been used with the cPanel user account beinglayerstack.Once it is successfully enabled, a message prompt will be displayed that the AutoSSL feature has been enabled for the selected cPanel user.
The
Logsoption can be used to check if the Let’s Encrypt™ SSL has been installed for the default domains of the cPanel account. The basic default domains include the main domain name, cpanel, webmail, webdisk, mail, www, cpcontacts, cpcalendars and * (wildcard) associated with the main domain name.
Uninstalling Let's Encrypt plugin from WHM
If the Let’s Encrypt plugin is no longer required to serve the AutoSSL feature in WHM and needs to be removed from the server, the below steps can be followed.
Execute the below command from the server command prompt.
# /usr/local/cpanel/scripts/uninstall_lets_encrypt_autossl_provider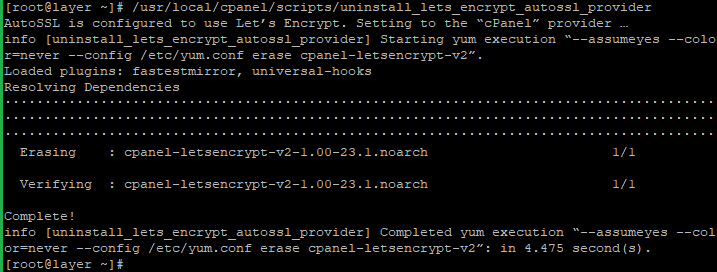
Once the plugin has been removed, this can be verified by logging into WHM and navigating to
Manage AutoSSLoption under theSSL/TLSsection. TheLet’s Encrypt™option will no longer be shown under theProviderslist confirming its removal.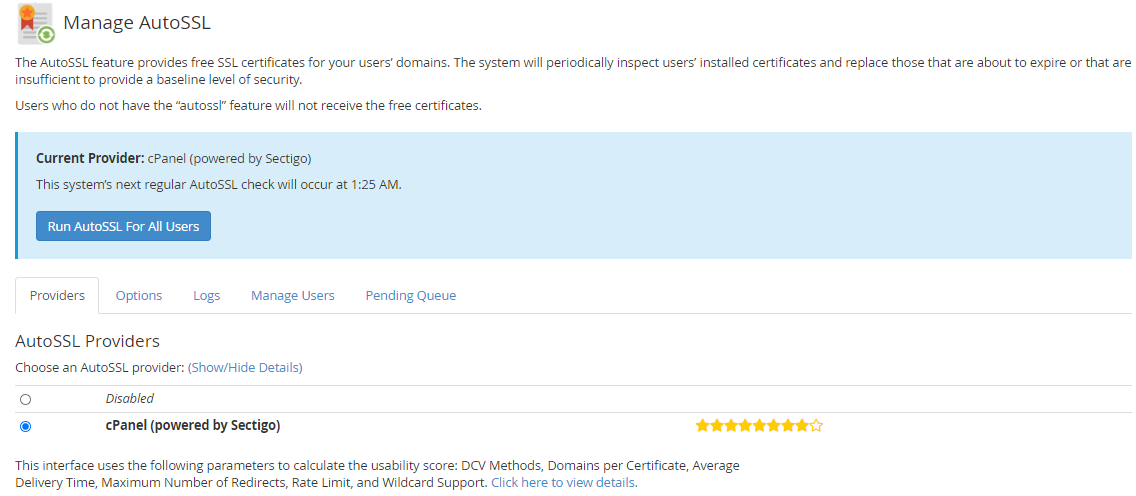
Related LayerStack Products
Related Tutorials
