How to connect to a MySQL Managed Database
To connect to a MySQL Managed Database, it is essential to have specific details readily available, including the username, password, and host (or IP address). Additionally, it is necessary to have a MySQL client installed. The following guide provides detailed instructions on how to access your MySQL database using commonly used tools.
Getting Connection Details of Managed Database
Log in to the LayerPanel2 and navigate to the Database section.
Select your Database subscription from the list, which will open the detail page for that database.
The Connection Details section contains the information and credentials needed for you to connect to the database:
Username: The default user for all MySQL Managed Databases is
lsadmin, which has admin privileges (this replaces the root user, which is not accessible).Password: The password for the database has been set when deploying the service. Click
Reset Passwordif you wish to change it.Host: The fully qualified domain name you can use to reach your database through the public network.
Private Network Host: The LayerStack Private Network service can be supported for connecting to the database.
Port: The default port for the database is
13306.SSL: This field is set to ENABLED, which means that it is required to use an encrypted TLS/SSL connection. Under the Connection Details section, there is a
Download CA Certificateoption, which allows you to download the CA (Certificate Authority) certificate. This certificate file can be used if you wish to verify the CA certificate when connecting to the database.
Connecting Using MySQL (CLI)
To connect directly to your database from the command line, utilize the MySQL tool:
Ensure that your server's IP address is included in your database's access controls (ACL). If not, refer to the tutorial of Manage Access Controls for guidance.
Verify if the
MySQL toolis installed on your server by executing the following command:# mysql --version
If not installed, follow the installation steps outlined in the Installing MySQL guide.
Once installed, use the following command to connect to your database, replacing
hostandusernamewith the respective values from theConnection Detailssection:# mysql --host=[host] --user=[username] --port=13306 --password --ssl-mode=required E.g. mysql --host=hk03.8fc4f16206ec.db.layermdb.com --user=lsadmin --port=13306 --password --ssl-mode=required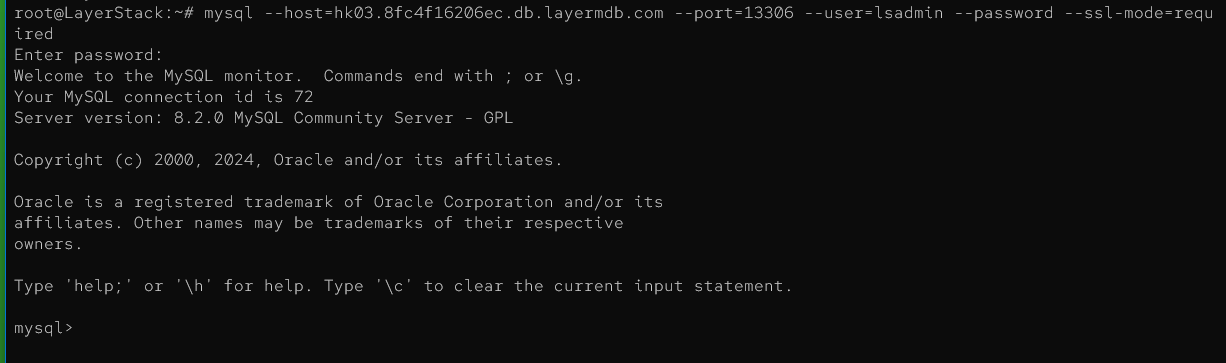
Enter your password at the prompt.
Once your connection is established successfully, you'll see the MySQL prompt, indicating that you're ready to input SQL queries.
Connecting Using MySQL Workbench (GUI)
MySQL Workbench offers a user-friendly graphical interface for connecting to MySQL databases. With this tool, users can easily visualize their database's structure and data.
Ensure that the IP address assigned to your server is included in your database's access controls. If not, refer to the tutorial of Manage Access Controls for guidance.
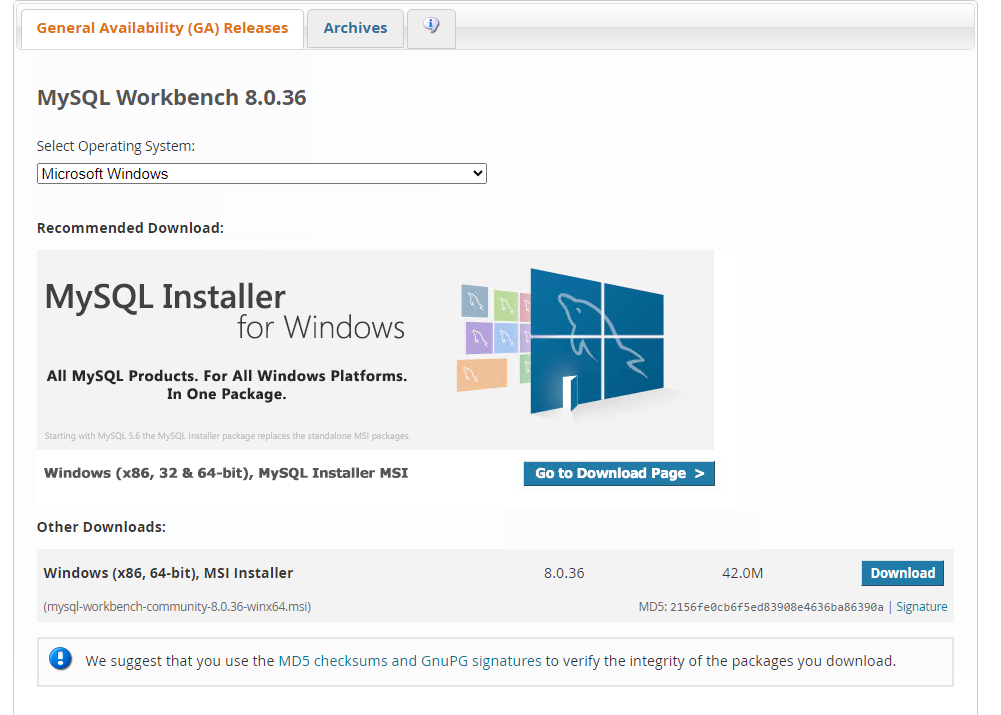
Download and install the MySQL Workbench software from the MySQL Community Downloads page, making sure to choose the version compatible with your operating system.
Once installed, open the software and navigate to
Database>Manage Connectionsin the menu to access the Manage Server Connections window.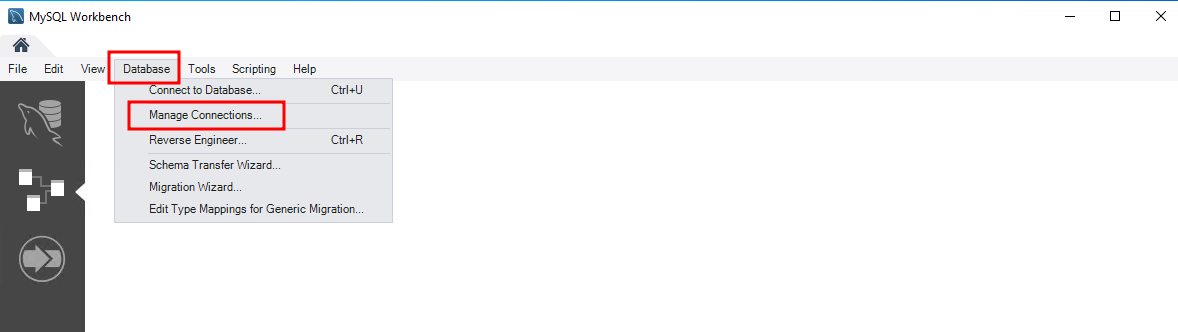
Provide a name for the new connection you're creating.

Under the Parameters tab, fill in the necessary details for your connection, such as Hostname, Username, and Port. You have the option to securely store your password by using the
Store in Keychain…feature. However, for security reasons, it's generally recommended not to store passwords.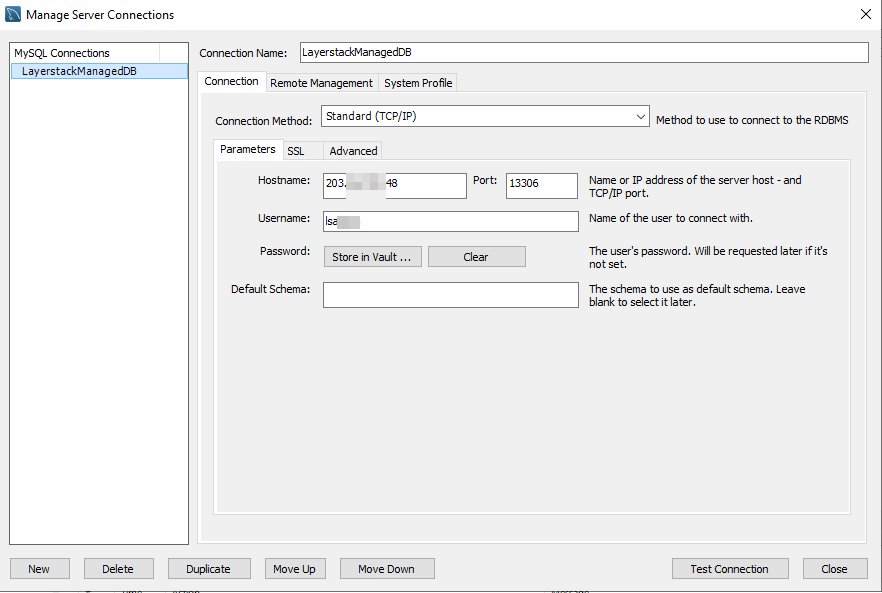
In the SSL tab, set
Use SSLtoRequirefor enhanced security. Optionally, you can choose to verify the Certificate Authority (CA) certificate each time you connect by selectingRequiredandVerify CA. If you opt for this, download the CA certificate from the Cloud Manager and specify its location in theSSL CA Filefield.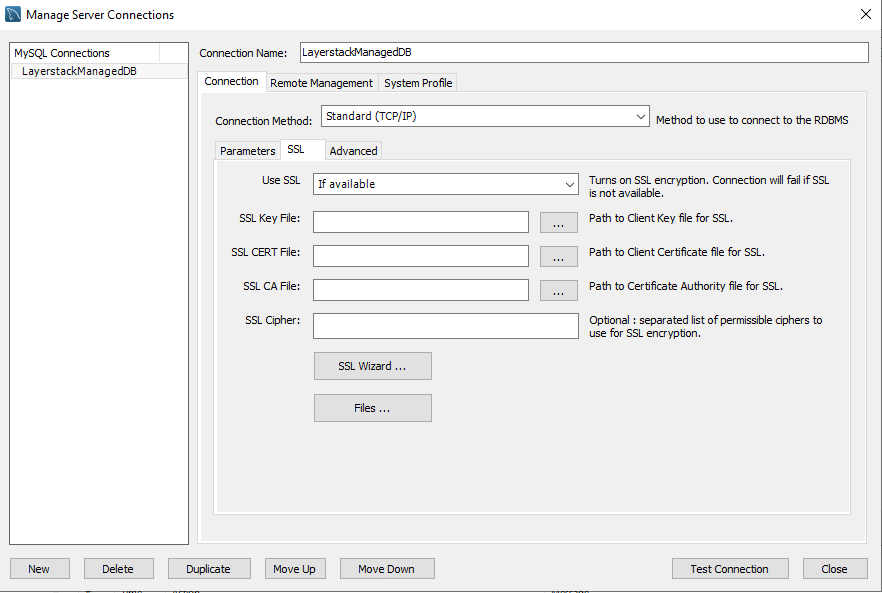
After configuring the connection settings, click
Test Connectionto ensure successful connectivity. Once verified, clickCloseto save the settings and return to the main screen.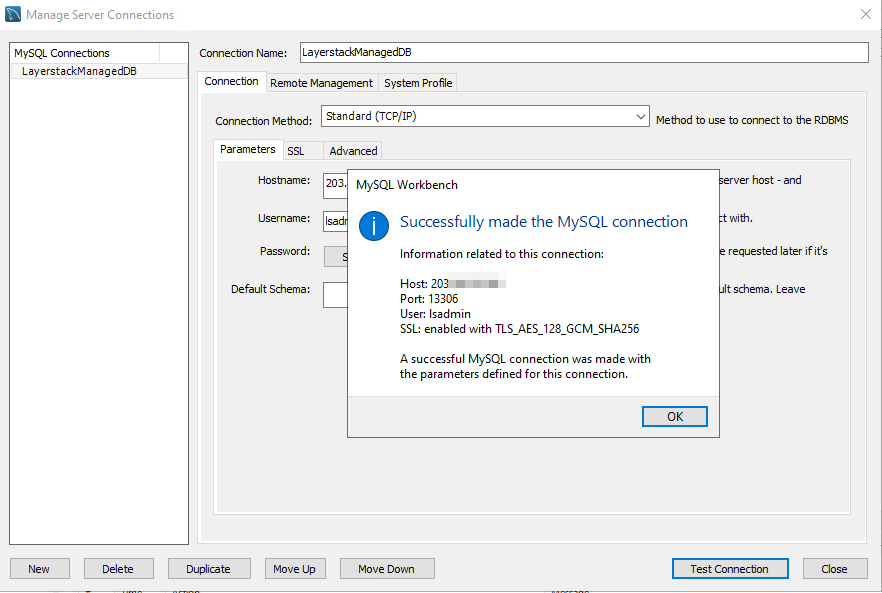
To establish a connection to the database, go to
Database>Connect to Databasefrom the main menu. Then, select the stored connection you created earlier and clickOK.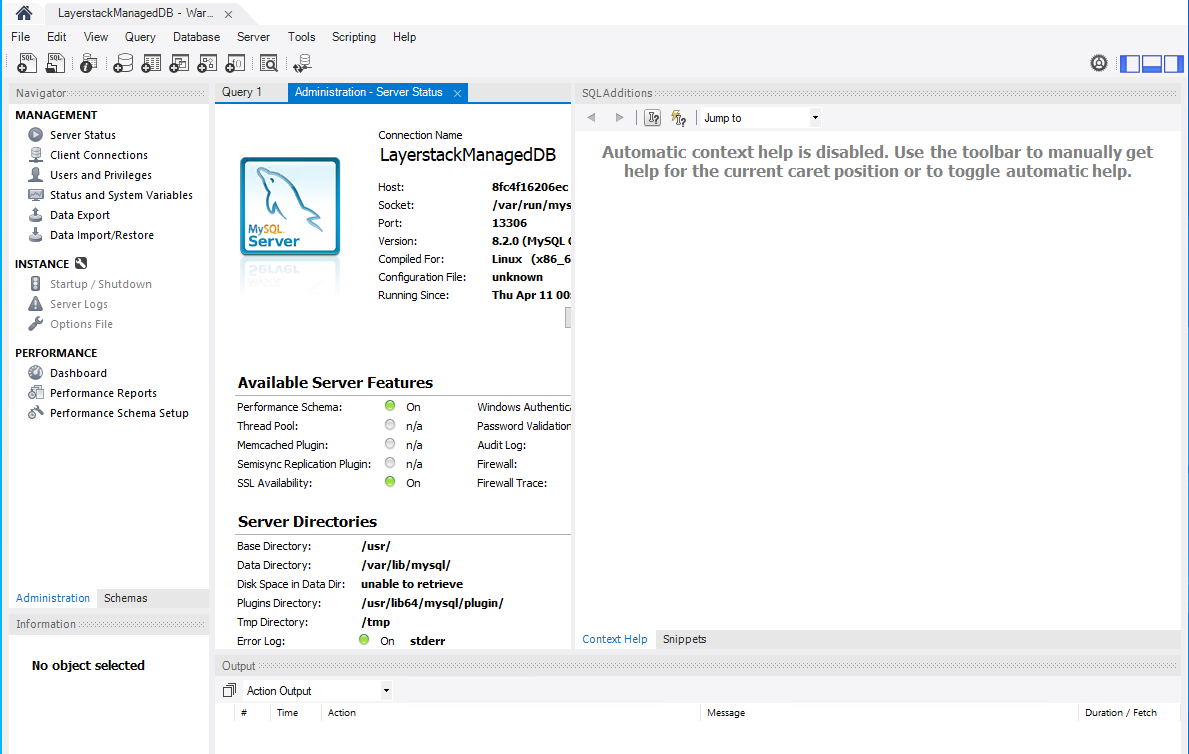
Connecting Using DBeaver
DBeaver, a free and open-source universal database tool, can be used to connect to your MySQL database. Here's how:
Ensure that your system's IP address is included in your database's access controls. If not, refer to the tutorial of Manage Access Controls for guidance.
Download and install the
DBeaver Community (or Pro)software from the DBeaver Downloads page, selecting the version compatible with your local operating system.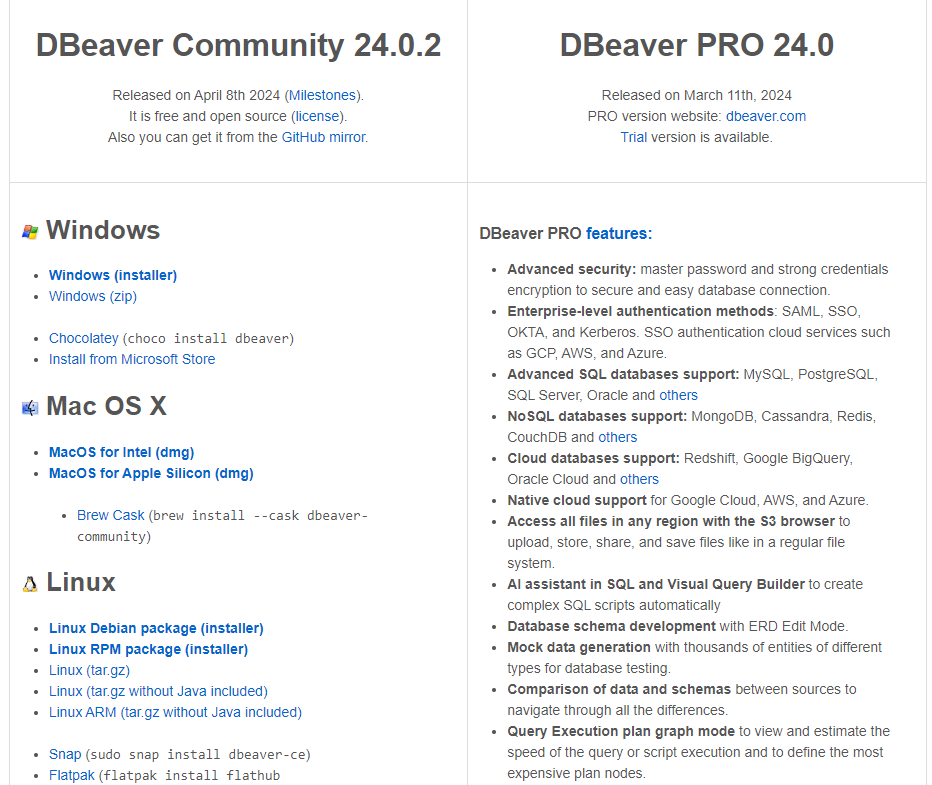
Open DBeaver and navigate to the Database menu dropdown, then select
New Database Connection.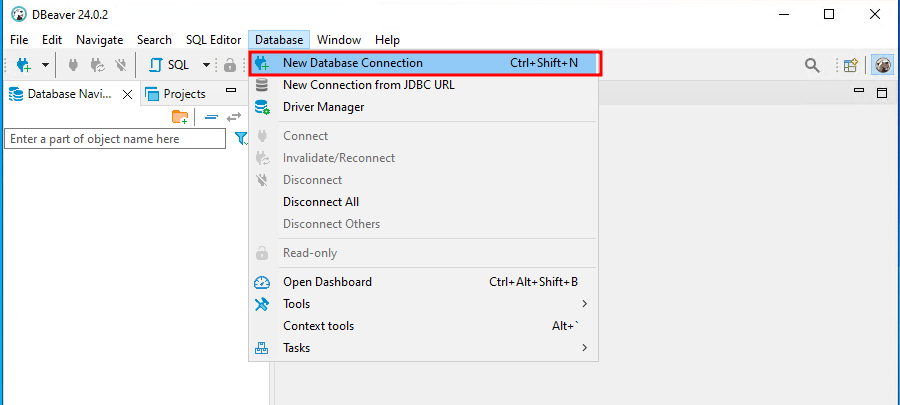
In the
Connect to a databasewindow, chooseMySQLand clickNextto proceed.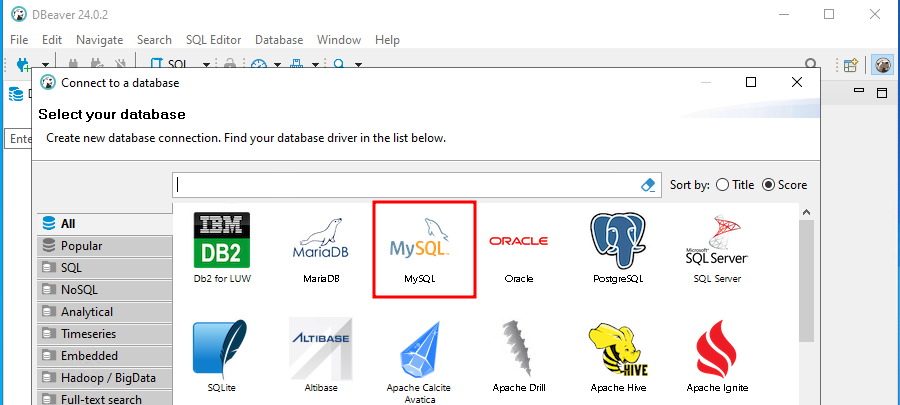
Within the Main tab, provide the connection details including Server Host (hostname), Port, and Username. Optionally, you can store your password locally by entering it and clicking the
Save password locallybutton. However, for security reasons, it's generally recommended not to store passwords.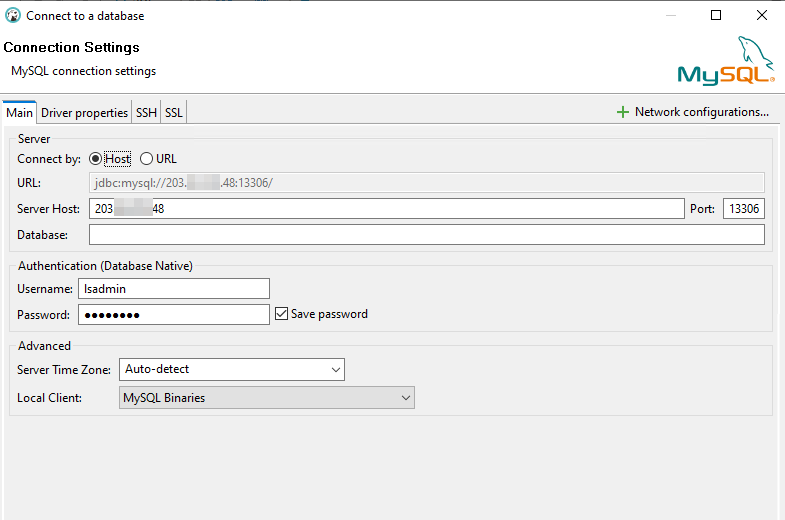
In the SSL tab, enable
Use SSLandRequire SSL, while disabling Verify server certificate.Click the
Test Connectionbutton to verify if the connection is successful.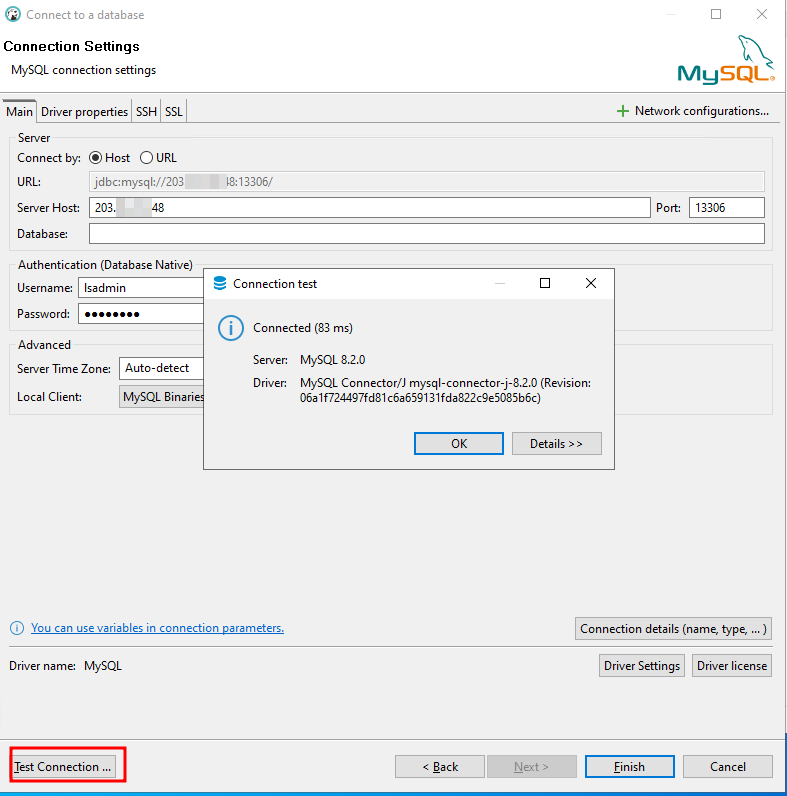
Related Tutorials
