When deploying Managed Database instances (after choosing the DB engine), the database system will have its own Access Controls List (ACL). This will allow an IPv4 or a range of IPv4 addresses to connect to the database.
By default, all connections to the database IP are allowed. If you allow certain IP or range of IPs, implicitly all other ranges will be denied.
Managed Database Settings
Log in to the LayerPanel2.
From the left-hand side menu, select Services >> Database >> Click on the Database subscription. This will enter into the DB management detail page.
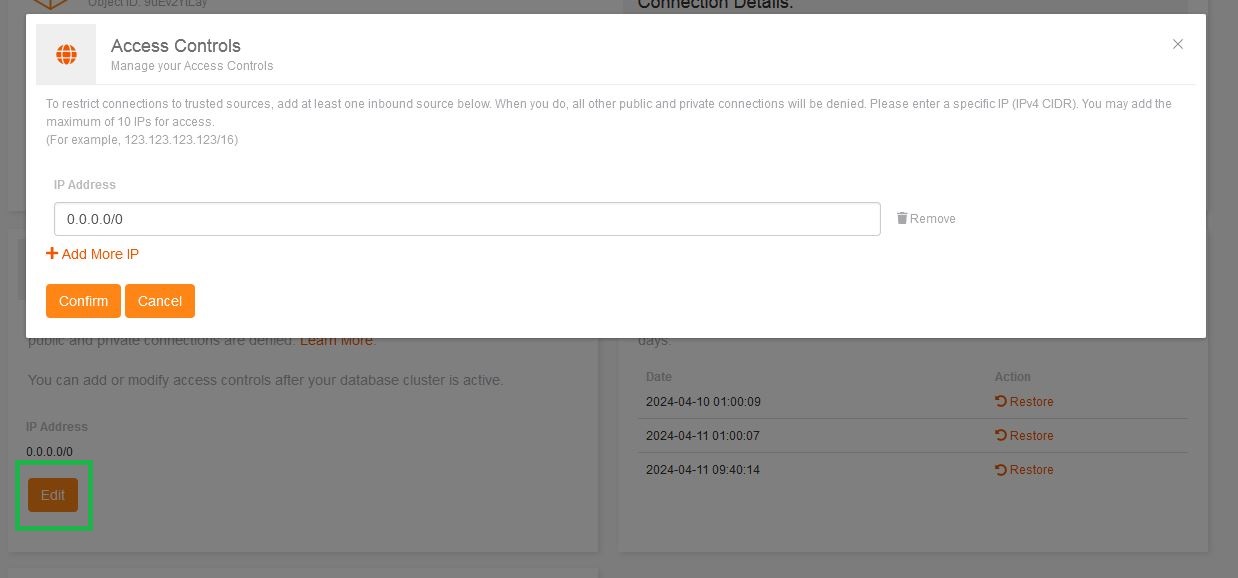
On the Custom tab, in the Access Controls, you can view the list of already entered IP/range of IP addresses specified. Customize by adding/removing the entries by clicking Edit option.
Customize the Access Type
By default, the entry will be simply blank – Allow all incoming/outgoing connections.
Full Access to all incoming and outgoing connections – When you enter 0.0.0.0/0, it ensures full access to the database connection.
Allowing a single IP address (*Only Public IP) – To allow a single IP address to grant access to the database, for example enter 123.123.123.123/32.
Allowing a range of IP addresses (*Only Public IP range) – To allow a range of IP addresses to grant access to the database, for example specify the network prefix, i.e., enter 123.123.123.0/24. The sample entry will allow all IPs from 123.123.123.1 to 123.123.123.255 to access the database.
Adding or Updating the IP Address Entries
The database detail page consists of different options, where you can click on the Edit option. Here you can view the entries already made.
To add a new entry, click on the Add More IP option and enter the desired IP or range of IPs.
To remove an entry, click on the Remove option for unnecessary IP or range of Ips.
Once all desired changes are made, to save them, please click on the Confirm option to finalize them.
Related Tutorials
