Installing MySQL on Linux Cloud Servers
MySQL is an important part of almost every PHP application. It is an open-source database management system that uses a relational database and SQL (Structured Query Language) to manage its data.
The below guide will explain how to install MySQL specifically on a different OS distribution.
CentOS 8
To install MySQL, you will need to make use of the RPM installation method.
Download the RPM of the required MySQL version from the MySQL community Yum Repository.
In this context, installing MySQL version 8.0 is an example.
# rpm -ivh https://dev.mysql.com/get/mysql80-community-release-el8-1.noarch.rpm
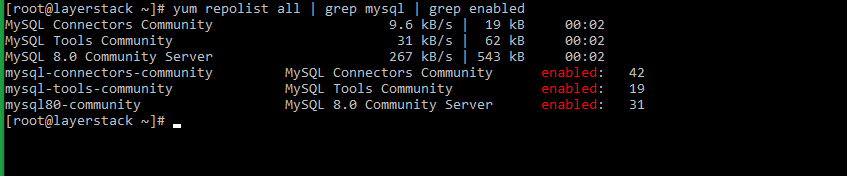
To enable MYSQL repository using the following command.
# yum repolist all | grep mysql | grep enabled=> This adds the required MySQL yum repositories to the server.
Install MySQL server.
# yum --disablerepo=AppStream install -y mysql-community-server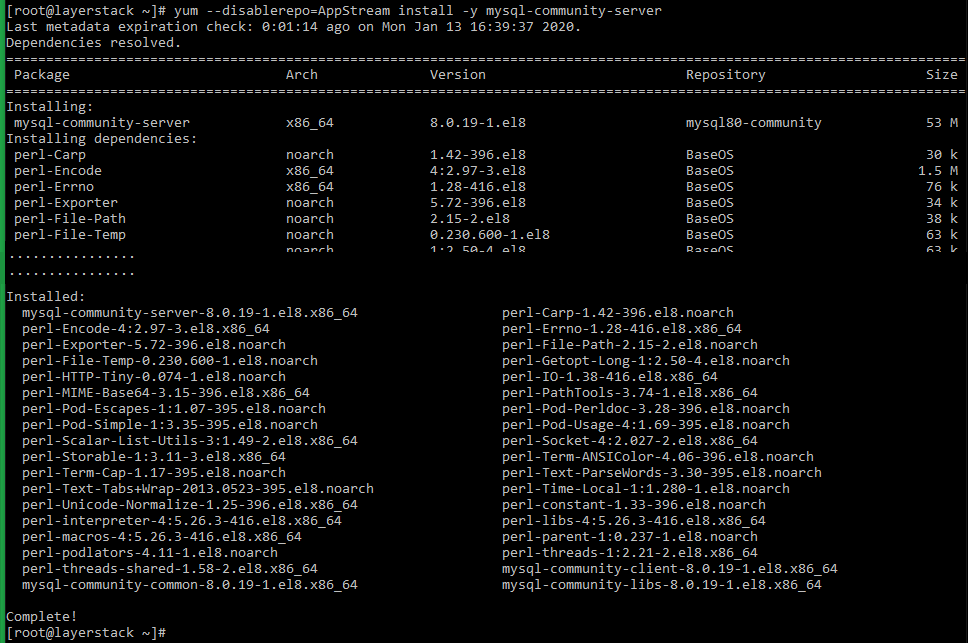
Once the MySQL server has been installed, start the MySQL service.
# systemctl start mysqldVerify the status of the MySQL service.
# systemctl status mysqld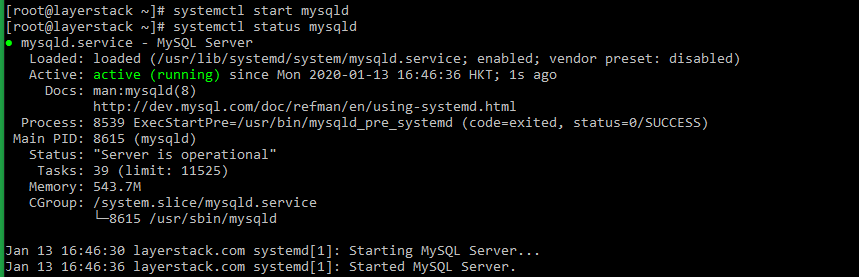
Once the MySQL service is confirmed to be running, please set the
root passwordfor the MySQL service. This can be done using the inbuilt MySQL security script.Before running the security script, please retrieve the default root password, which can be done by executing the below command.
# grep 'temporary password' /var/log/mysqld.log
Once getting the default password, run the MySQL security script.
# mysql_secure_installation=> You will be prompted to enter the default password. Once it is entered, you will once again be prompted to set up a new strong password.
[root@layerstack ~]# mysql_secure_installation
Securing the MySQL server deployment.
Enter password for user root:

The existing password for the user account root has expired. Please set a new password.

New password:
Re-enter new password:
=> Enter
Yfor all subsequent questions to secure the MySQL service.Test the MySQL service.
# mysqladmin -u root -p version=> Below output would be displayed confirming the successful installation of the MySQL service.
mysqladmin Ver 8.0.18 for Linux on x86_64 (MySQL Community Server - GPL)
Copyright (c) 2000, 2019, Oracle and/or its affiliates. All rights reserved.
Oracle is a registered trademark of Oracle Corporation and/or its affiliates.
Other names may be trademarks of their respective owners.
Server version 8.0.18
Protocol version 10
Connection Localhost via UNIX socket
UNIX socket /var/lib/mysql/mysql.sock
Uptime: 18 min 55 secThreads: 2 Questions: 8 Slow queries: 0 Opens: 129 Flush tables: 3
Open tables: 46 Queries per second avg: 0.007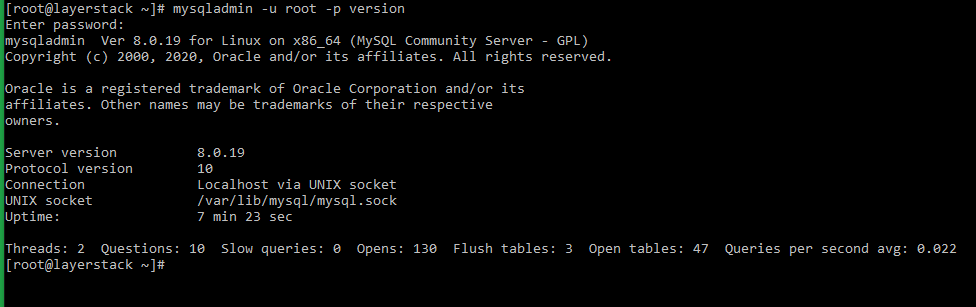
CentOS 6 / 7
By default, MariaDB gets installed in CentOS7 when using YUM. To install MySQL, you will need to make use of the RPM installation method.
Download the RPM of the required MySQL version from the MySQL community Yum Repository.
In this context, installing MySQL version 5.7 is an example.
# wget https://dev.mysql.com/get/mysql57-community-release-el7-9.noarch.rpm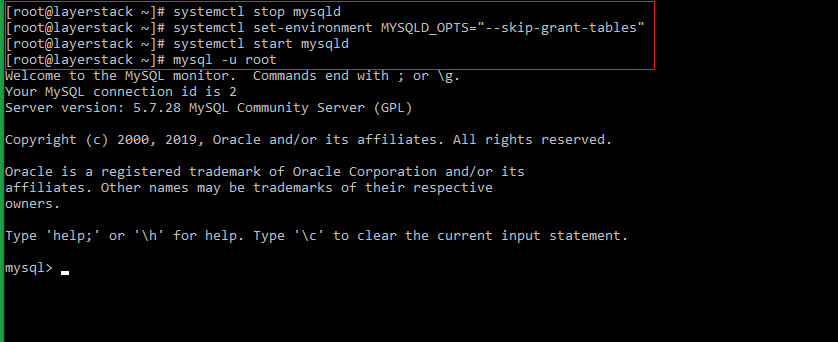
Install the RPM package.
# rpm -ivh mysql57-community-release-el7-9.noarch.rpm
=> This adds the required MySQL yum repositories to the server.
Install MySQL server.
# yum install mysql-server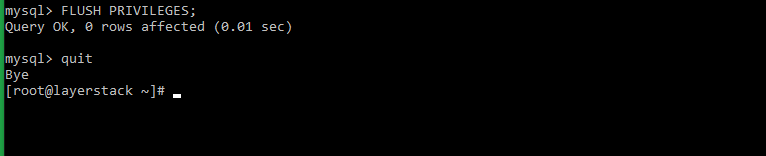
Once the MySQL server has been installed, start the MySQL service.
# systemctl start mysqldVerify the status of the MySQL service.
# systemctl status mysqld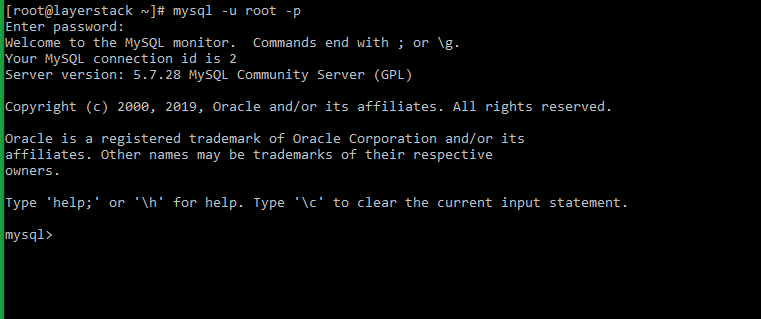
Once the MySQL service is confirmed to be running, please set the
root passwordfor the MySQL service. This can be done using the inbuilt MySQL security script.Before running the security script, please retrieve the default root password, which can be done by executing the below command.
# grep 'temporary password' /var/log/mysqld.log
Once getting the default password, run the MySQL security script.
# mysql_secure_installation=> You will be prompted to enter the default password. Once it is entered, you will once again be prompted to set up a new strong password.
[root@layerstack ~]# mysql_secure_installation
Securing the MySQL server deployment.
Enter password for user root:

The existing password for the user account root has expired. Please set a new password.

New password:
Re-enter new password:
=> Enter
Yfor all subsequent questions to secure the MySQL service.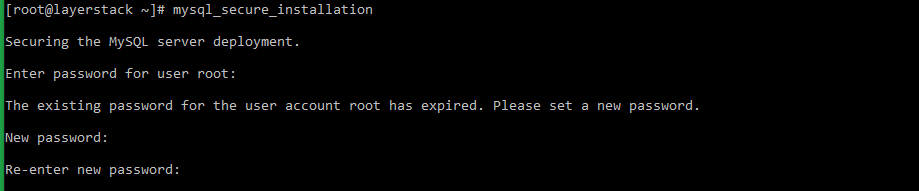
Test the MySQL service.
# mysqladmin -u root -p version=> Below output would be displayed confirming the successful installation of the MySQL service.
mysqladmin  Ver 8.42 Distrib 5.7.27, for Linux on x86_64
Copyright (c) 2000, 2019, Oracle and/or its affiliates. All rights reserved.

Oracle is a registered trademark of Oracle Corporation and/or its
affiliates. Other names may be trademarks of their respective
owners.

Server version  5.7.27
Protocol version  10
Connection  Localhost via UNIX socket
UNIX socket  /var/lib/mysql/mysql.sock
Uptime:  22 min 16 sec

Threads: 1  Questions: 13  Slow queries: 0  Opens: 113  Flush tables: 1  Open tables: 106  Queries per second avg: 0.009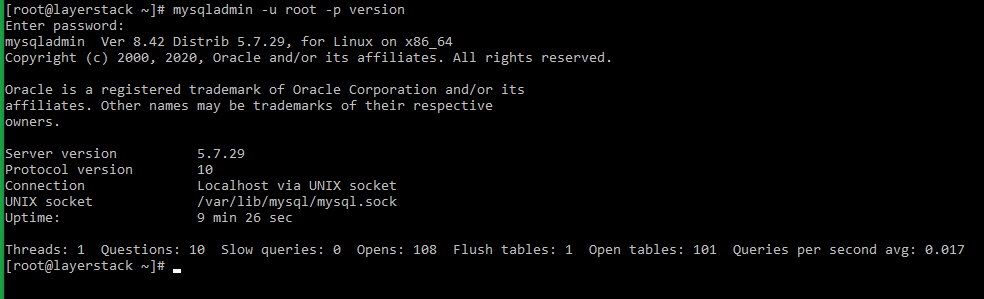
Ubuntu/Debian
The latest version of MySQL is included in the APT package repository by default. Follow the below steps to install MySQL version 5.7 in Ubuntu.
Update the APT package repository index.
# sudo apt updateInstall MySQL server.
# sudo apt install mysql-server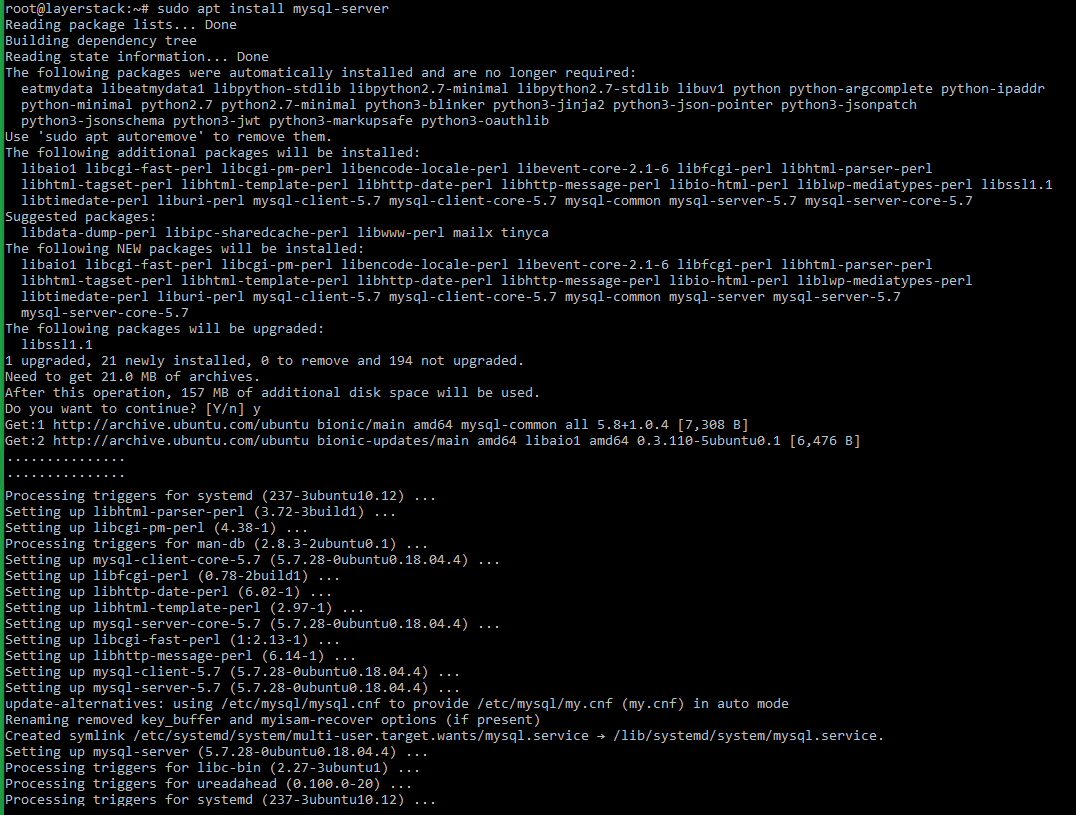
The MySQL service will start automatically, once the installation is completed.
Check the status of the MySQL server.
# sudo systemctl status mysql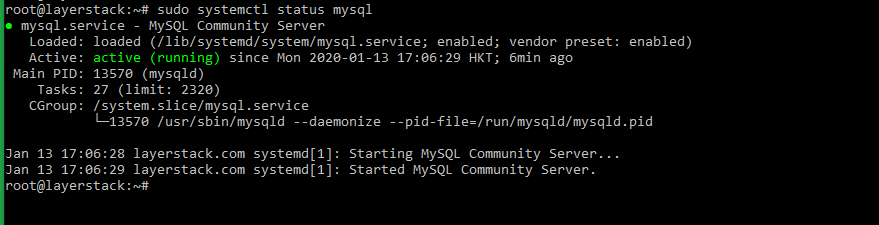
Once the MySQL service is confirmed to be running, please set the root password for the MySQL service. This can be done by running the inbuilt MySQL security script command.
# mysql_secure_installationIn the first prompt, please configure the VALIDATE PASSWORD PLUGIN which is used to test the strength of the MySQL users’ passwords and improve the security. Press ENTER to skip this step.
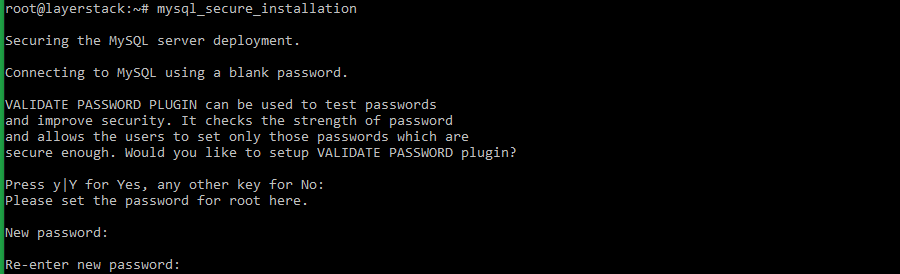
=> Enter
Yfor all remaining subsequent questions to secure the MySQL service.Test the MySQL service by logging in as
rootuser.# sudo mysqlBelow output would be displayed confirming successful installation of MySQL service.
Welcome to the MySQL monitor.  Commands end with ; or \g.
Your MySQL connection id is 4
Server version: 5.7.27-0ubuntu0.18.04.1 (Ubuntu)

Copyright (c) 2000, 2019, Oracle and/or its affiliates. All rights reserved.
Oracle is a registered trademark of Oracle Corporation and/or its
affiliates. Other names may be trademarks of their respective
owners.

Type 'help;' or '\h' for help. Type '\c' to clear the current input statement.

mysql>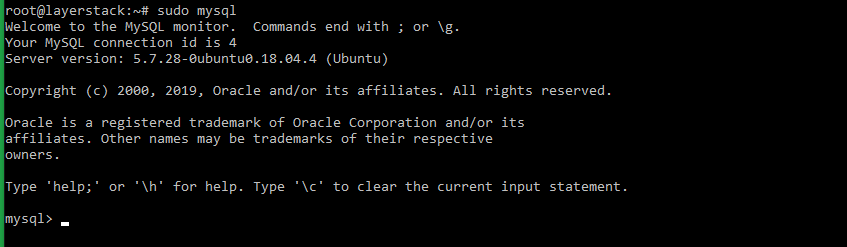
Related Tutorials
