How to upgrade PHP 7.4 to PHP 8.0 on Ubuntu 20.04 with Nginx
PHP (Hypertext Preprocessor) is one of the most commonly used open-source scripting languages that can be easily incorporated into HTML code.
It is necessary that PHP in a server is kept up-to-date with the latest version since the newer versions of PHP provide better security, improved performance for websites, and also several features and improvements from the older versions. Before upgrading the PHP version in the server, it is important that you make sure that all the applications/websites hosted on the server are compatible with the newer version of PHP. It is also important that all the data in the server is backed-up before proceeding with the PHP upgrade.
This guide outlines the basic steps to upgrade PHP v7.4 to PHP v8.0 on an Ubuntu20 server that already has NGINX, MySQL and PHP services running in it.
Prerequisites
1) Latest Snapshot/Templates of the Cloud Servers ensuring the source code and entire thing as backups.
2) Back up the website database as risk mitigation. The database is very important and critical data that needs to be maintained with high integrity and consistency.
Assuming you have a Cloud Servers where the websites are being hosted with PHP version 7.4 as the highest version using LEMP stack or using NGINX.
Steps to upgrade the version of PHP to 8.0
Log in to your server by using the SSH terminal.
List all the
PHP 7.4 packageson the server using the command.# dpkg -l | grep php7.4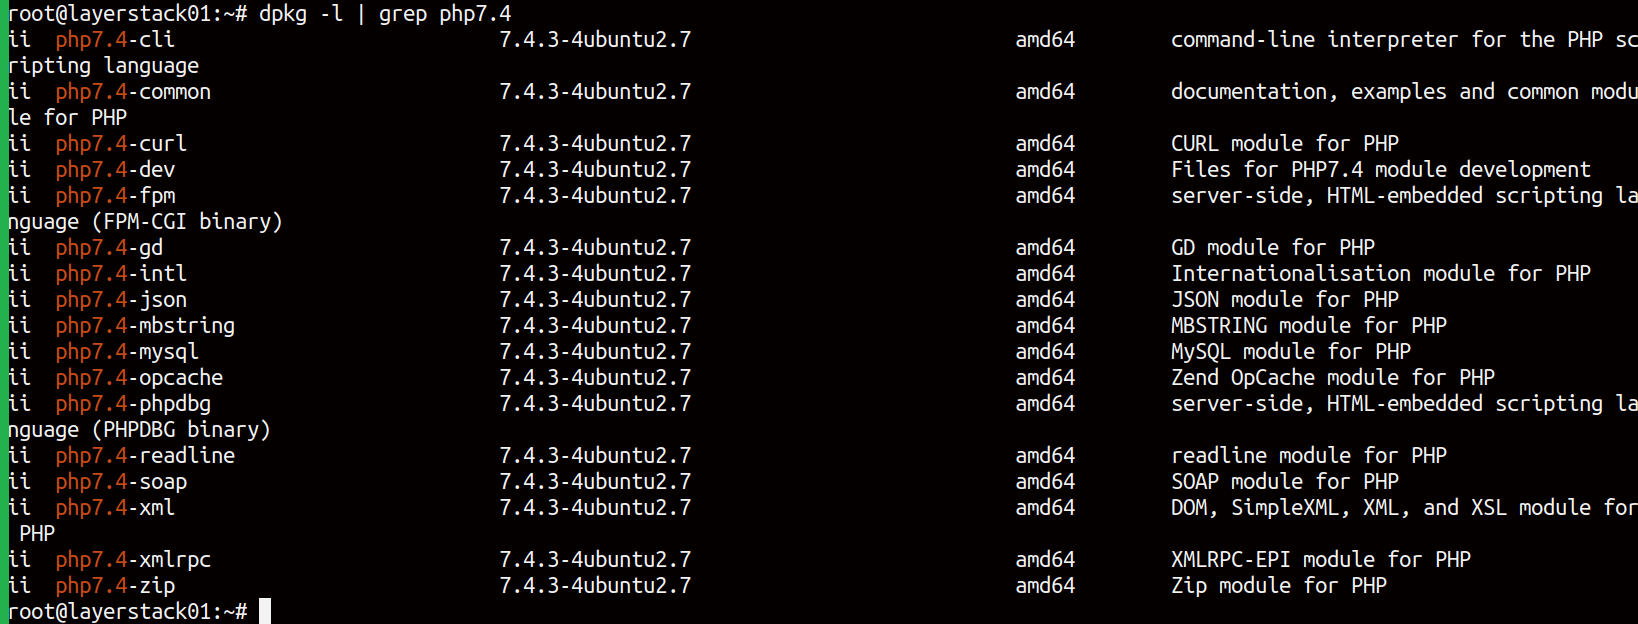
Execute the following command to generate a list of corresponding
PHP 8.0 package.# dpkg -l | grep php7.4 | cut -f3 -d' ' | xargs | sed 's/7.4/8.0/g'
The output shows the list of packages that are being generated for PHP Version 8.0.
Save the existing
PHP-FPM 7.4 modulesinto a file by executing the below command.# php-fpm7.4 -m > ~/php-fpm7.4.modules
After saving the modules, the next step is to install
PHP 8.0 packageson the server. As a first step, it requires adding a repositoryppa:ondrej/php.# sudo LC_ALL=C.UTF-8 add-apt-repository -y ppa:ondrej/php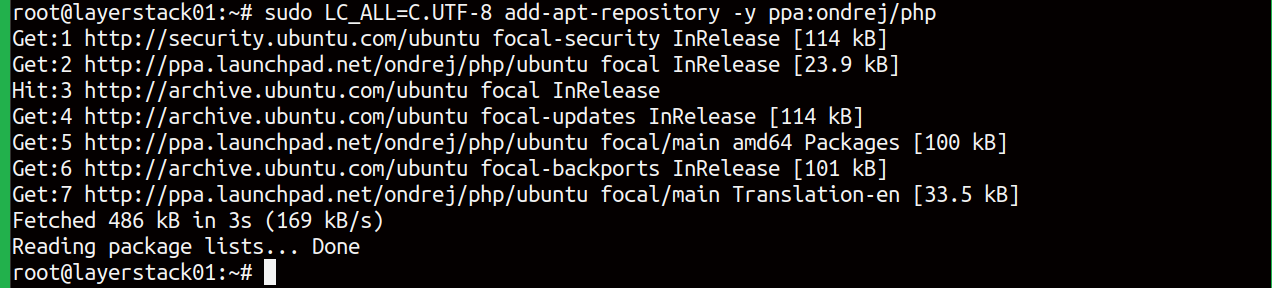
Once it is done, it is advisable to run a
repository update:# apt-get update
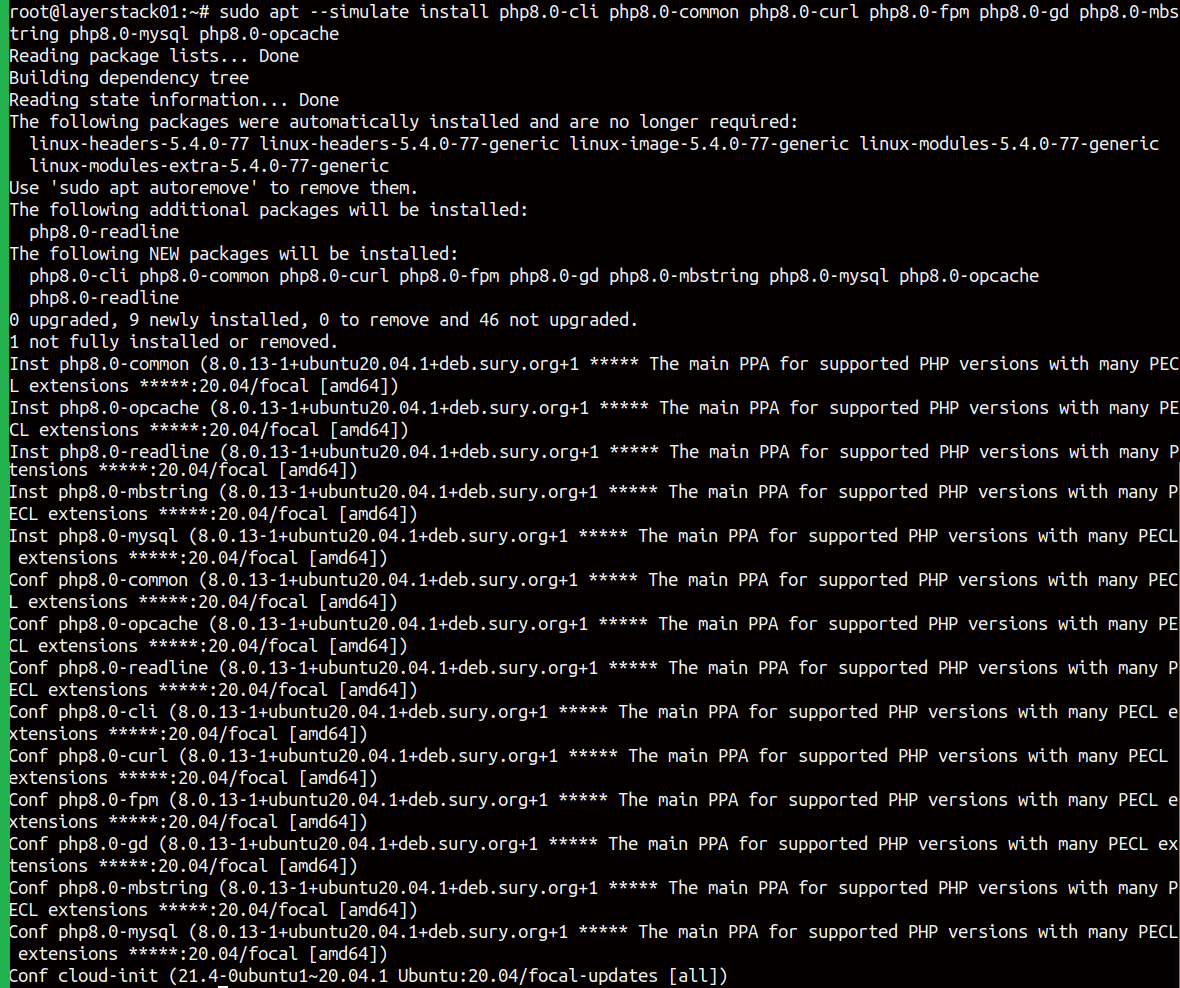
Once it is done, it requires simulating the installation of
PHP 8.0 packagesusing the list generated earlier.# sudo apt --simulate install php8.0-cli php8.0-common php8.0-curl php8.0-fpm php8.0-gd php8.0-json php8.0-mbstring php8.0-mysql php8.0-opcache
You may get the following error while installing the packages:
E Package 'php8.0-json' has no installation candidateIf the above error is shown, it means the package list contains a virtual package named php 8.0-json. Please run the above command after removing the virtual php8.0-json package from the list of packages and run until the list has no virtual packages left.
Now, install the
PHP 8.0 Packages, here we do not simulate the package, but execute them.# apt -y install php8.0-cli php8.0-common php8.0-curl php8.0-fpm php8.0-gd php8.0-mbstring php8.0-mysql php8.0-opcache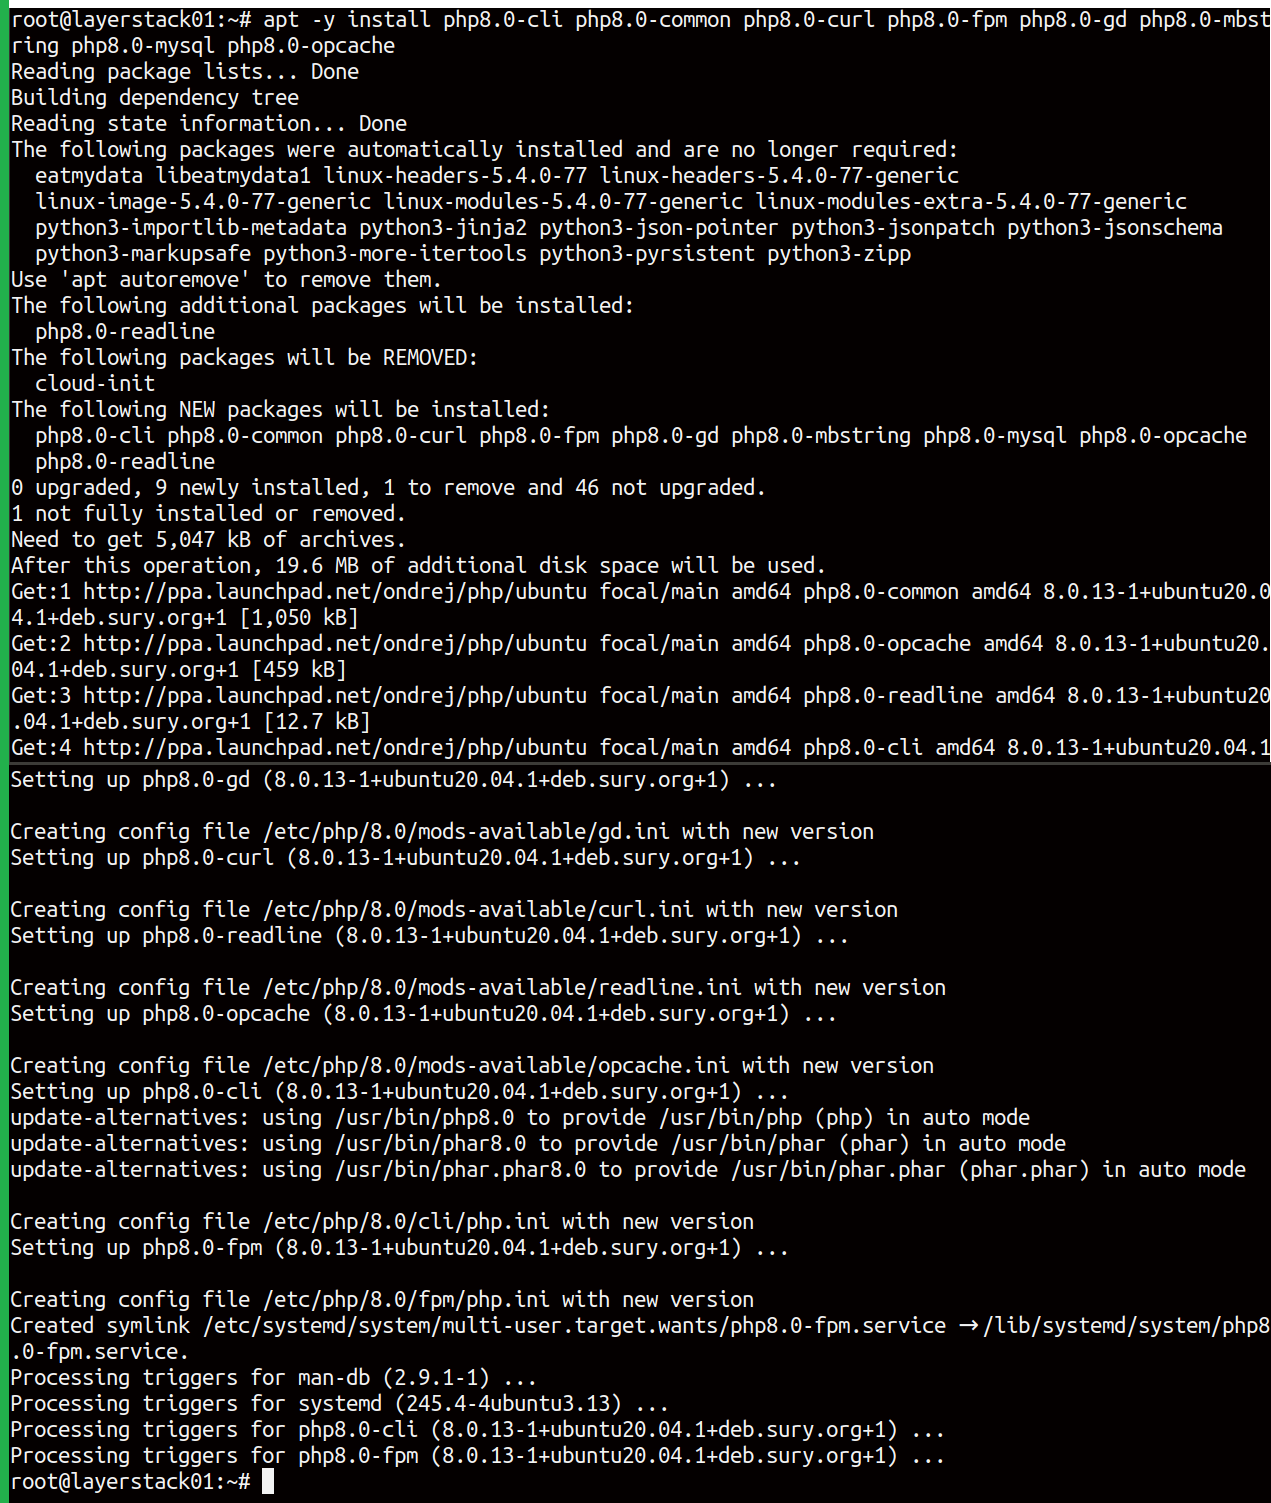
Save the list of current
PHP 8.0 modulesinto a file.# php-fpm8.0 -m > ~/php-fpm8.0.modules
In case if more modules are to be installed in PHP 8.0, the command method is given below as any modules/extensions can be installed for PHP 8.0 manually if requires. Users can try to install any custom modules with the PHP 8.0 version.
# apt install php8.0-[ extension-name]To check the PHP version after the installation, give the following command
# php -v
Configuring Nginx with PHP 8.0
We have managed to install PHP 8.0 on the Cloud servers. Now, the webserver needs to communicate with PHP-FPM 8.0 via the socket. Currently, it is communicating with PHP-FPM 7.4 via the socket created by PHP-FPM 7.4. This section will help to configure a socket for PHP-FPM 8.0 and reconfigure with Nginx with that socket.
To find the socket created by
Old PHP-FPMand theNginx configuration filethat uses, execute the below command.# sudo grep -R fastcgi_pass /etc/nginx/sites-enabled/ | grep -Ev '#\s+fastcgi_pass'The output is like this:
/etc/nginx/sites-enabled/defaultis the configuration file that needs to be edited where/var/run/php/php7.4-fpm.sockis the socket.
Create backup folder inside
/etc/nginxpath to save the existing configuration and copy the configuration files to the backup folder.# mkdir sites-backup # sudo cp -L /etc/nginx/sites-enabled/* /etc/nginx/sites-backup
Edit the configuration file such that the socket name is replaced with the new socket name.
# sudo sed -i --follow-symlinks 's|php7.4-fpm.sock|php8.0-fpm.sock|g' /etc/nginx/sites-enabled/default
Once the steps are done, check for the Nginx configuration check.
# nginx -t
Configuring PHP 8.0
To configure the
PHP 8.0 installation, delete the defaultPHP 8.0 Worker pool configuration.# rm /etc/php/8.0/fpm/pool.d/*Copy the old PHP configuration to the new one as follows.
# cp -rL /etc/php/7.4/fpm/pool.d/* /etc/php/8.0/fpm/pool.d/To locate the old configuration that contains in the new configuration file, execute the command below: The output of the command will be the configuration file path.
# grep -rl 'php7.4-fpm.sock' /etc/php/8.0/fpm/pool.d
Here
/etc/php/8.0/fpm/pool.d/www.confis the path.The configuration path will be available. This has to be edited and can be done using the following command:
# sed -i 's|php7.4-fpm.sock|php8.0-fpm.sock|g' /etc/php/8.0/fpm/pool.d/www.confAfter successful editing of configuration, please check the
PHP-FPM configurationusing following command:# php-fpm8.0 -t
Once done, to finalize, restart the Nginx and PHP-FPM process as given in the screenshot.
Final step: Disable the PHP-FPM 7.4 which is the old version.

To verify, open your website in incognito mode and test it further and check if all the functionalities are working properly.
Related Tutorials
