How to add HTTP2 support to Nginx on Linux Cloud Servers
The Nginx is an open-source, high-performance HTTP server and reverse proxy, caching, load balancing, media streaming, and more.
The HTTP/2 is a new version of the HTTP network protocol. The main use of HTTP/2 is that to reduce the latency, minimize the protocol overhead and add support for request prioritization and make the web applications load much faster. The advantage of HTTP/2 is that it provides high transfer speed for content-rich websites.
This article will help to set up the fast and secure Nginx server with HTTP/2 in the server.
Installing Nginx service
Before proceeding with the installation of Nginx, execute the below command to update all the system packages.
# sudo apt-get update
or
# yum update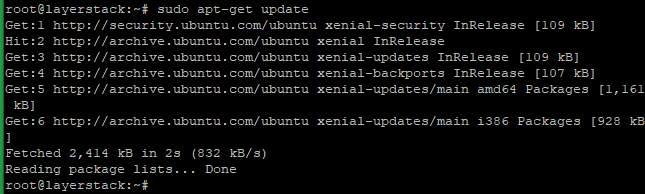
Start to install Nginx:# sudo apt-get install nginx or # yum install nginx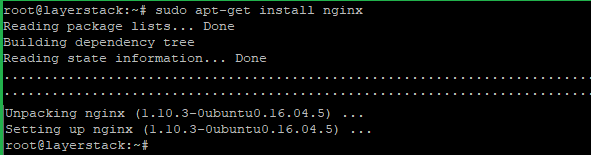
After the Nginx installation, can check the version of Nginx by using the following command:# sudo nginx -v
Changing the Listening Port and Enabling HTTP/2
First, change the listening port from
80 to 443. Normally the Nginx is set to listen the port 80 (standard HTTP port), now needs to modify the listening port to 443, which is used by the HTTPS protocol in the configuration file.# nano /etc/nginx/sites-available/default or # vi /etc/nginx/sites-available/default listen 443 ssl http2 default_server; listen [::]:443 ssl http2 default_server;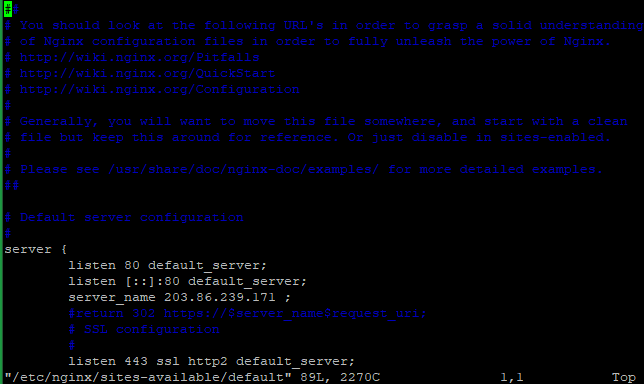
Changing the Server Name
Open the configuration file using the following command.
# nano /etc/nginx/sites-available/default
or
# vi /etc/nginx/sites-available/default
Then update the following and save the file.server_name example.com;NOTE: Replace the
example.comwith the actual domain name or server hostname.
Once the changes have been done in the Nginx configuration files, then should check the configuration for anysyntax errorsin it using the following command.# sudo nginx -t
Configure Nginx to use your SSL certificate
Create a folder to store the SSL certificates inside the Nginx configuration using the following command.
# sudo mkdir /etc/nginx/ssl
Then copy thecertificateand theprivate keyto this location. Please rename the files to show which domain they are associated with.# sudo cp /path/to/your/certificate.crt /etc/nginx/ssl/example.com.crt # sudo cp /path/to/your/private.key /etc/nginx/ssl/example.com.key
Then you need to open the configuration file and update the configure SSL details.# nano /etc/nginx/sites-available/default or # vi /etc/nginx/sites-available/default
Add the SSL configure details inside the server block, define the location of your certificates and Save the file and exit.ssl_certificate /etc/nginx/ssl/example.com.crt; ssl_certificate_key /etc/nginx/ssl/example.com.key;NOTE: Replace the
example.comwith the actual domain name. Here we use self-signed SSL for the same.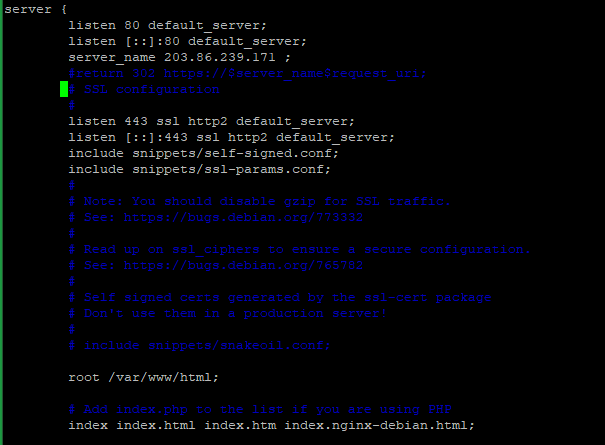
Avoiding Old Cipher Suites
The HTTP/2 has a huge blacklist of old and insecure ciphers, so need to avoid them. The Cipher suites describe how the transferring data should be encrypted.
Open the following nginx configuration file:
# vi /etc/nginx/nginx.conf or # nano /etc/nginx/nginx.conf
Add this line after ssl_prefer_server_ciphers on:ssl_ciphers EECDH+CHACHA20:EECDH+AES128:RSA+AES128:EECDH+AES256:RSA+AES256:EECDH+3DES:RSA+3DES:!MD5;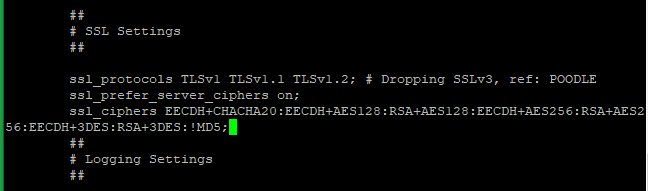
Once this is done, then need to check the configuration forsyntax errorsusing the following command.# sudo nginx -t
Setup Increasing Key Exchange Security
A secure connection can be defined that the exchange of the private keys between the server and client end. Please use the following command for it. This process normally will take some time to complete. You must wait until it is complete.
# sudo openssl dhparam -out /etc/nginx/ssl/dhparam.pem 2048
Once this is done, please add the following inside server block in the default configuration file, define the location of thecustom DHE key.# nano /etc/nginx/sites-available/default or # vi /etc/nginx/sites-available/default ssl_dhparam /etc/nginx/ssl/dhparam.pem;
Setup Redirection from all HTTP Request to HTTPS
Adding the following in the default configuration file.
# nano /etc/nginx/sites-available/default or # vi /etc/nginx/sites-available/default server { listen 80; listen [::]:80; server_name example.com; return 301 https://$server_name$request_uri; }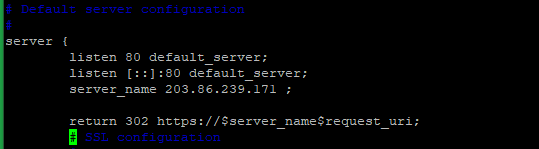
Once it is done, need to check the configuration forsyntax errorsusing the following command.# sudo nginx -t
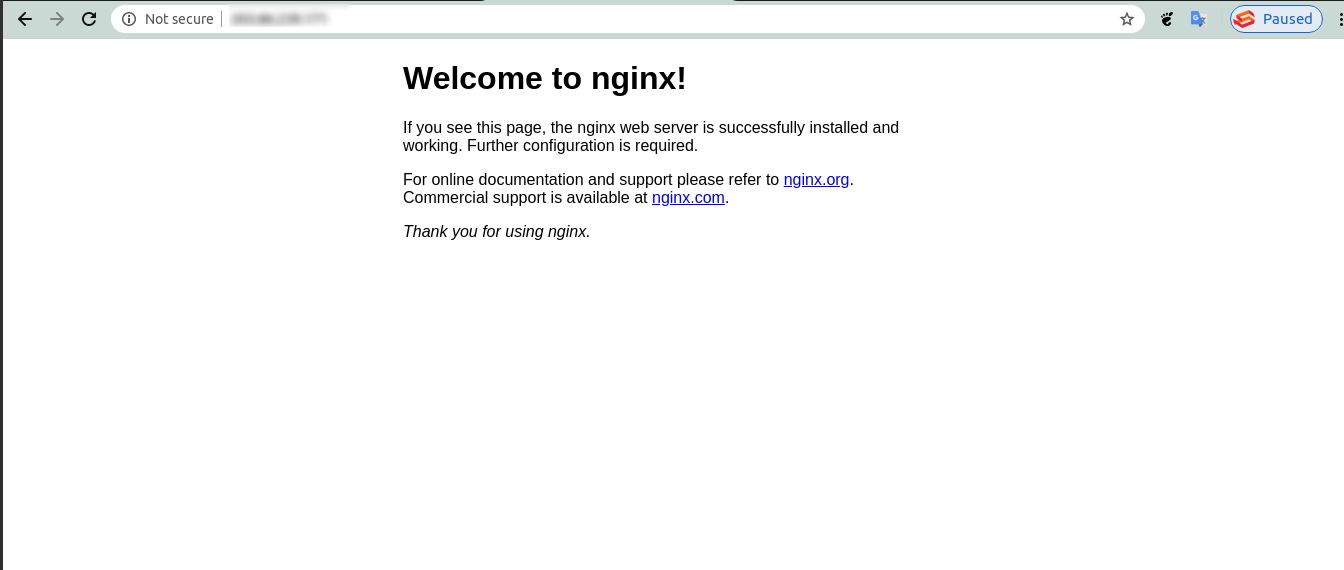
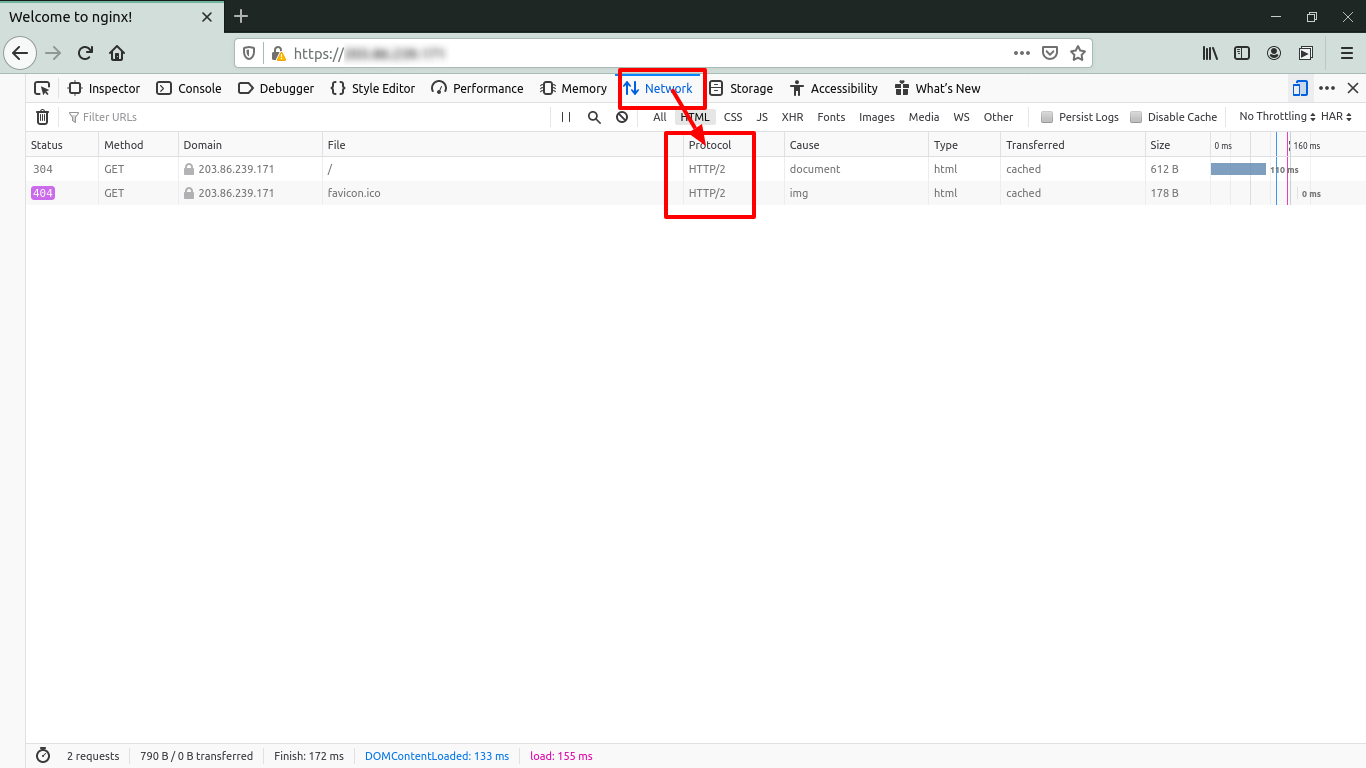
Testing whether the HTTP/2 is enabled
Please open the domain name or server IP in IE/Chrome/Firefox and press
F12. Then go toNetwork taband you will see protocol as HTTP/2.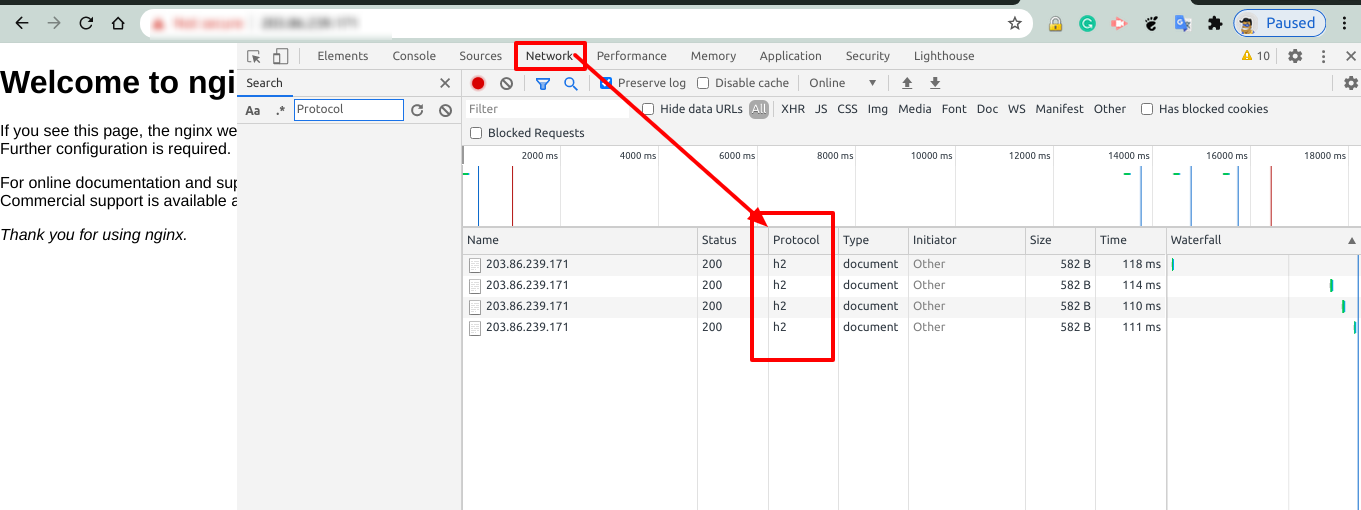
Related Tutorials
