How to Enable & Disable Remote Desktop Protocol (RDP) on Windows Cloud Servers
RDP (Remote Desktop Protocol) is the protocol that allows a user to connect to a Windows Server through a graphical interface over any network.
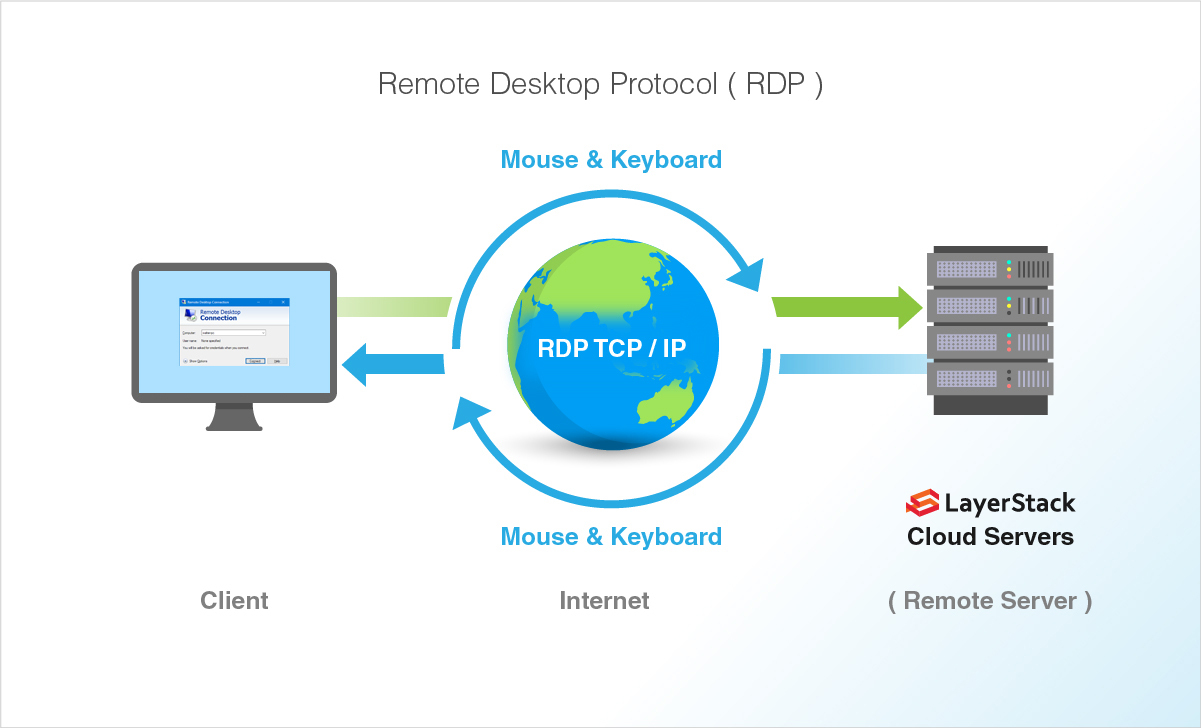
This guide will describe the steps to enable and disable Remote Desktop service in the Windows server through the graphical interface as well as Windows Powershell.
Enable RDP through graphical interface
Click on
Start Menubutton and then onServer Manager.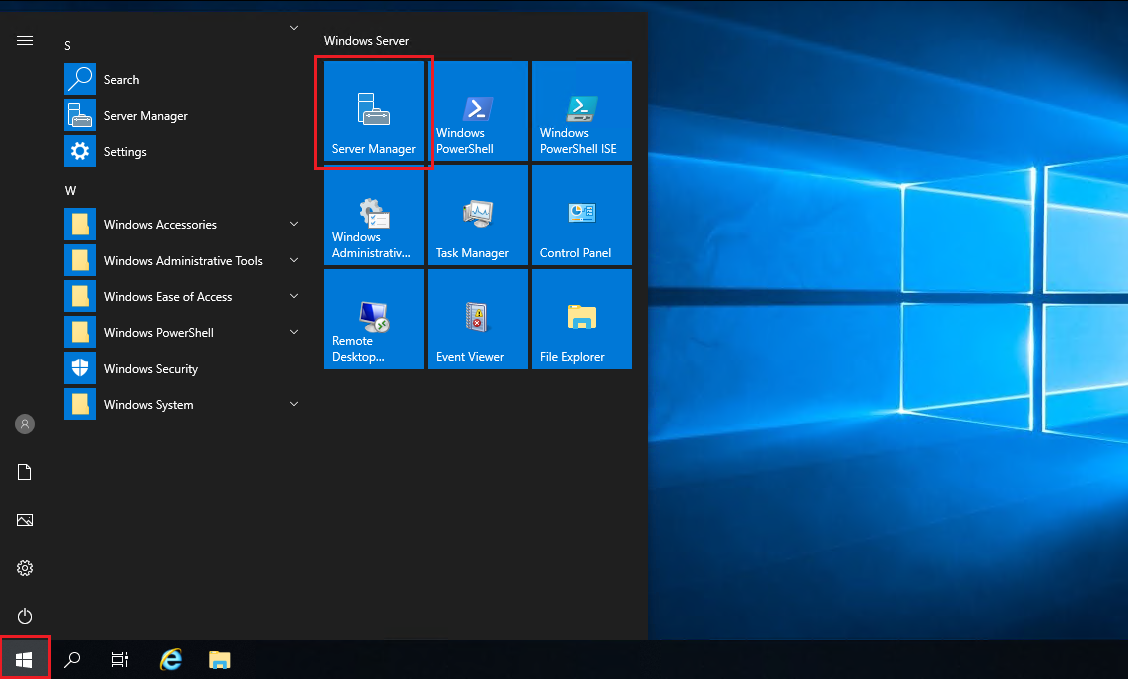
In the
Server Managerwindow, click onLocal Serverin the left side panel and wait for few minutes for the server status to get refreshed. TheRemote Desktopoption will be shown asDisabledin Windows 2019 version.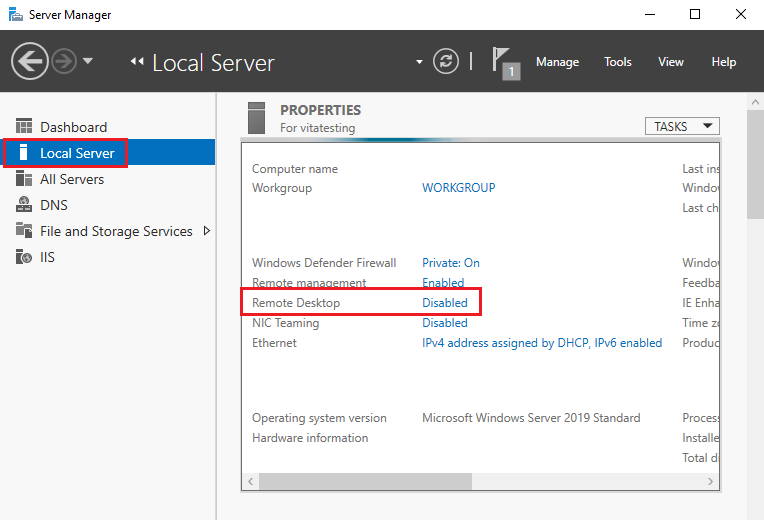
Click on the
Disabledoption and this will open up theRemotetab in theSystem Propertieswindow.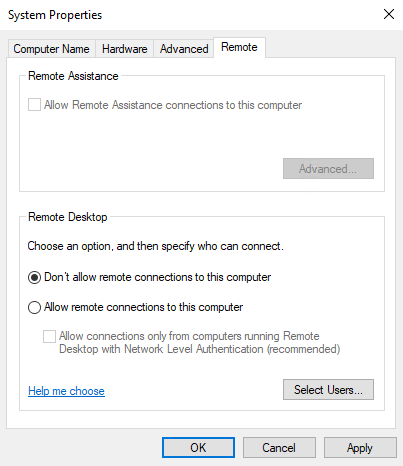
NOTE: The
System Propertieswindow can also be accessed fromControl Paneloption by clicking onSystemand then onRemote settingsin the left panel or from the Windows command prompt by executing the below command.> SystemPropertiesRemote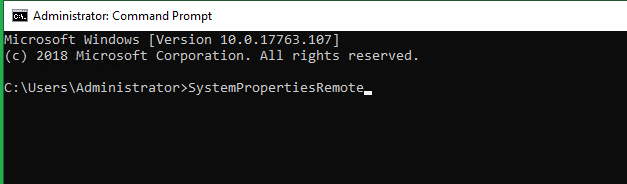

From under
Remote Desktopsection, select the optionAllow remote connections to this computer.The sub-option
Allow connections only from computers running Remote Desktop with Network Level Authentication (recommended)can be left enabled or disabled, depending upon the machines from which Remote Desktop connection is being established to the server. If the local machine is Linux-based, then this option needs to be disabled.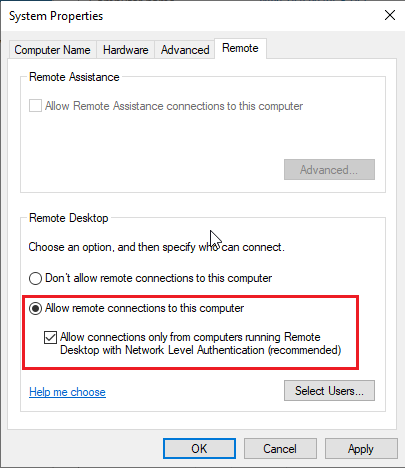
Once this option
Allow remote connections to this computeris selected, a warning message window will appear notifying the user that the required firewall rules will be enabled in the server for allowing Remote connections to the server from any source network. Click onOKto proceed.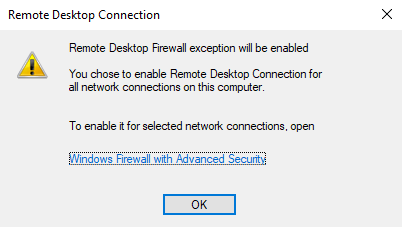
Click on
OKin the System Properties window to complete the process of enabling Remote Desktop in the server.The status of the Remote Desktop service can now be confirmed back from Server Manager, where it will show as Enabled once the Server Manager is refreshed.

Enable RDP through Windows Powershell
The registry value that enables/disables Remote Desktop can be modified using the
Set-ItemPropertycmdlet.> Set-ItemProperty -Path 'HKLM:\System\CurrentControlSet\Control\Terminal Server' -name "fDenyTSConnections" -value 0
Once this is completed, the
Enable-NetFirewallRulecmdlet can be used to set the Windows firewall to allow remote desktop connections.> Enable-NetFirewallRule -DisplayGroup "Remote Desktop"
Testing allowed Remote Desktop connection service
Once Remote Desktop is enabled in the server, remote connections to the server can be tested using the Remote Desktop Connection app (Windows) or the rdesktop command (Linux).
Windows:
Click on
Start Menuoption and search forRemote Desktop Connectionand click on the application.Type in the IP address of the server that needs to be connected to remotely in the
Computerfield and then click onConnect.If the server has any custom RDP port, then the IP needs to be typed in the below format (replace 123.123.123.123 with the exact server IP address and 1234 with the custom port number).
123.123.123.123:1234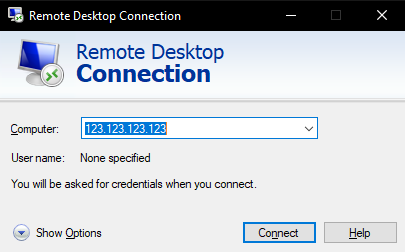
Type in the username and associated password with which the server is to be accessed remotely in the
Windows Securitywindow and then click onOKto connect to the server remotely.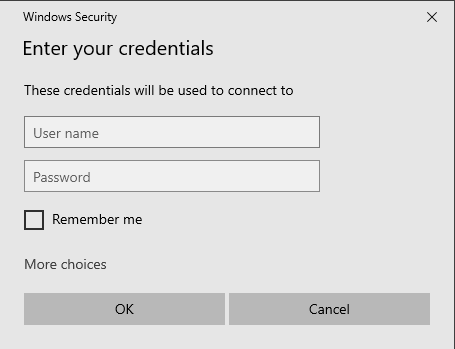
Linux:
In all Linux distributions, the most common command that can be used to connect to the remote desktop of a server is rdesktop. Another command that can be used is xfreerdp.
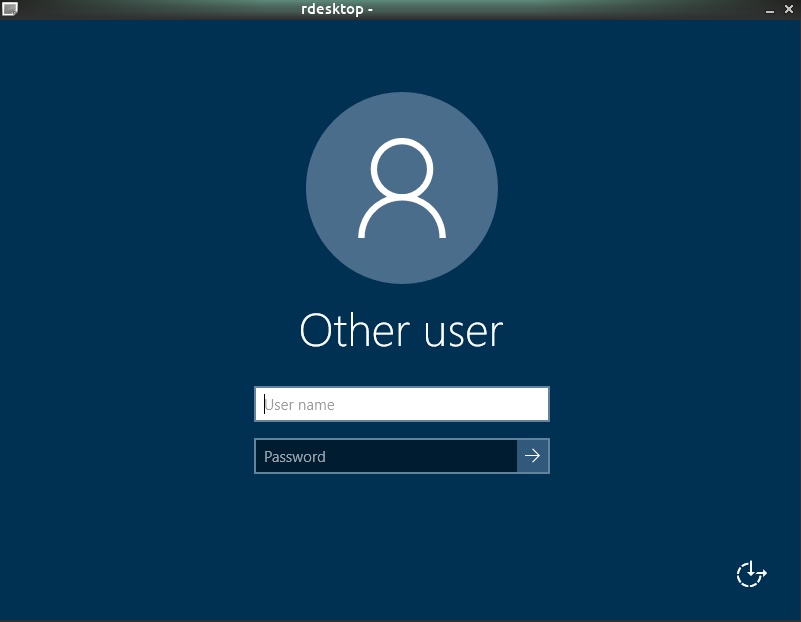
Type in the below command in the Linux command line to remotely connect to a server with the
rdesktopcommand (replace 123.123.123.123 with the exact IP address of the server).# rdesktop 123.123.123.123Once the command is entered, a remote desktop connection window will appear, in which the username and associated password are to be entered to access the server remotely.
Disable RDP through graphical interface
Access the server and Click on
Start Menubutton and then onServer Manager.In the
Server Managerwindow, click onLocal Serverin the left side panel and wait for few minutes for the server status to get refreshed. TheRemote Desktopoption will be shown asEnabled.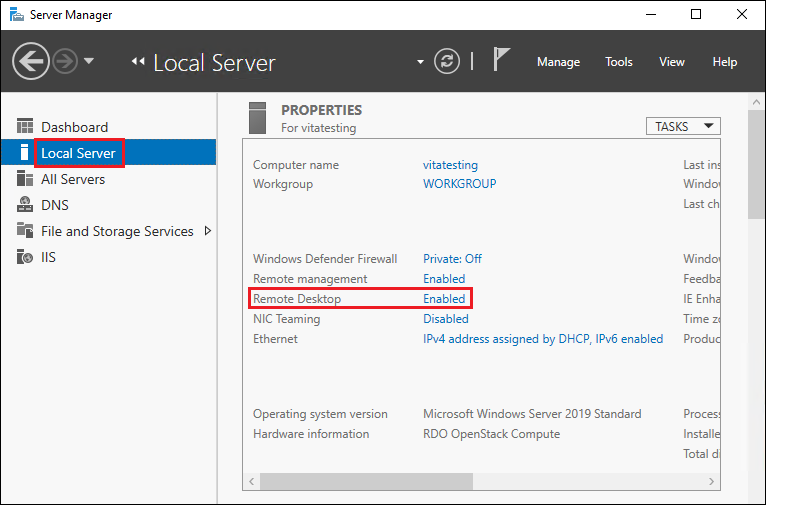
Click on the
Enabledoption and this will open up theRemotetab in theSystem Propertieswindow.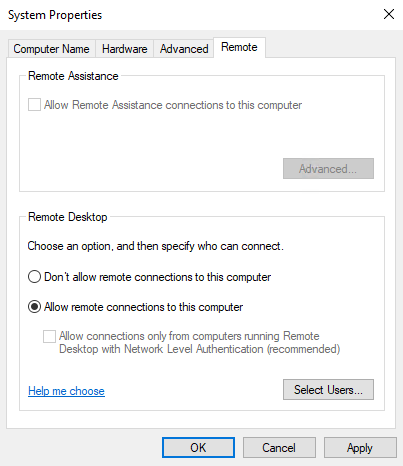
NOTE: The System Properties window can also be accessed from Control Panel option by clicking on System and then on Remote settings in the left panel or from Windows command prompt by executing the below command.
> SystemPropertiesRemote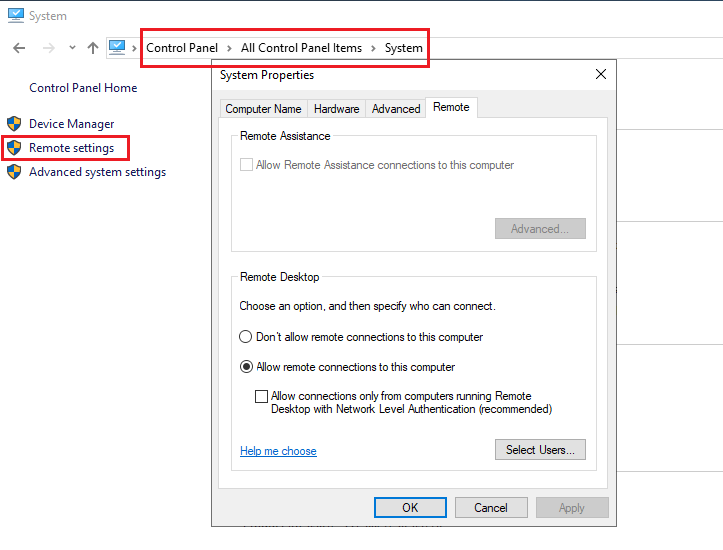
From under
Remote Desktopsection, select the optionDon’t allow remote connections to this computer.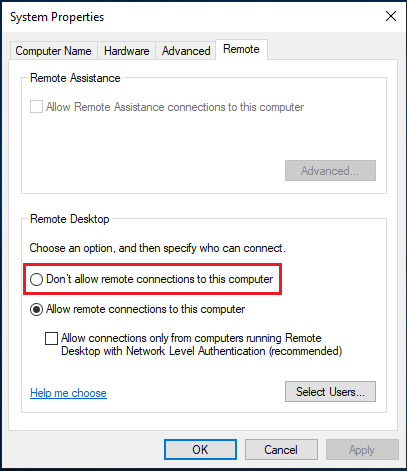
Click on
OKto proceed.The status of the
Remote Desktopservice can now be confirmed back fromServer Manager, where it will show asDisabledonce theServer Manageris refreshed.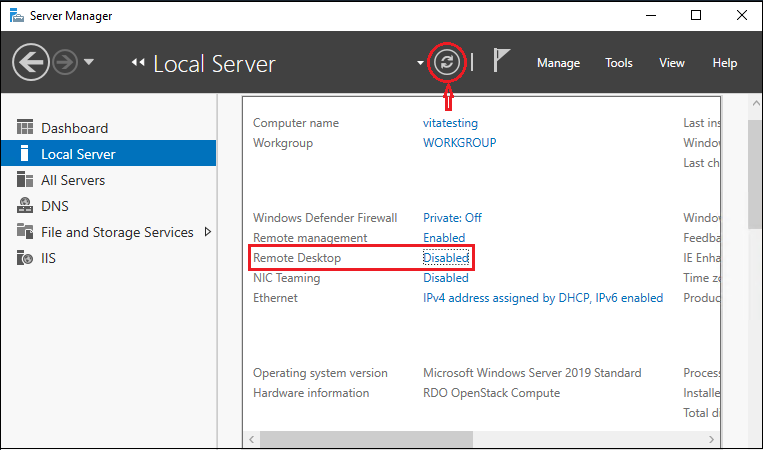
Disable RDP through Windows PowerShell
The registry value that enables/disables Remote Desktop can be modified using the
Set-ItemPropertycmdlet.> Set-ItemProperty -Path 'HKLM:\System\CurrentControlSet\Control\Terminal Server' -name "fDenyTSConnections" -value 1
Testing restricted Remote Desktop connection service
Once Remote Desktop is disabled in the server, remote connections to the server can be tested using the Remote Desktop Connection app.
Windows:
Click on
Start Menuoption and search forRemote Desktop Connectionand click on the application.Type in the IP address of the server that needs to be connected to remotely in the
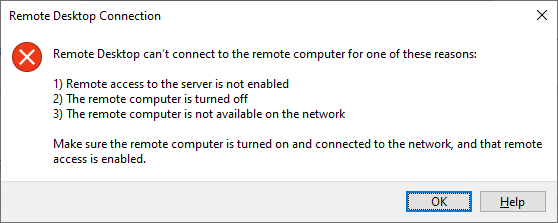
Computerfield and then click onConnect.If the server has any custom RDP port, then the IP needs to be typed in the below format (replace 123.123.123.123 with the exact server IP address and 1234 with the custom port number).
123.123.123.123:1234The warning message will receive as shown below.
Related LayerStack Product
Related Tutorials
How to check if TCP / UDP port is open on Linux & Windows Cloud Servers
How to enable & disable Ping (ICMP Echo Requests) from IPTables on Linux Cloud Servers
How to enable & disable Ping (ICMP Echo Requests) in Windows Server 2019 Firewall
How to Enable & Disable Ping (ICMP Echo Requests) in Windows Server 2022 Firewall
How to change Remote Desktop (RDP) port on Windows Cloud Servers
