Resetting root password by booting into Single User Mode from Linux GRUB
The root is the username or account that, by default, has access to all commands and files on a Linux or other Unix-like operating system. It is also referred to as the root account, root user, and superuser.
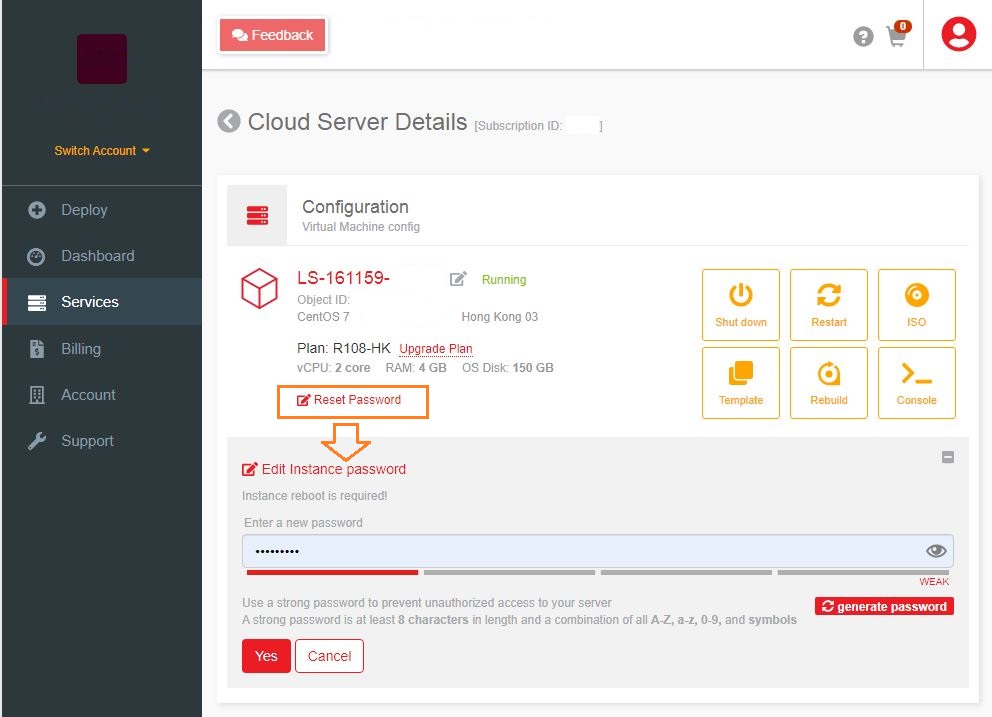
For the LayerStack client, you can use LayerPanel and click Reset Password for resetting the new password directly.
In case if you are using the ISO method for installing the Linux operation system, then you have to use Single User Mode to reset the root password.
This guide outlines the steps to reset root passwords in various Linux distributions such as CentOS, Ubuntu and Debian.
CentOS 8
Log in to the server via
Consoleoption from LayerPanel v2.0 and clickSend CtrlAltDelbutton to reboot the server and access the boot menu.Once the
GRUB boot promptshows up telling topress any key, perform this action to enter the GRUB prompt. (There will only be a few seconds to press a key to stop the automated booting process if this is not done on time, the server would need to be restarted again)From the GRUB boot prompt, press the
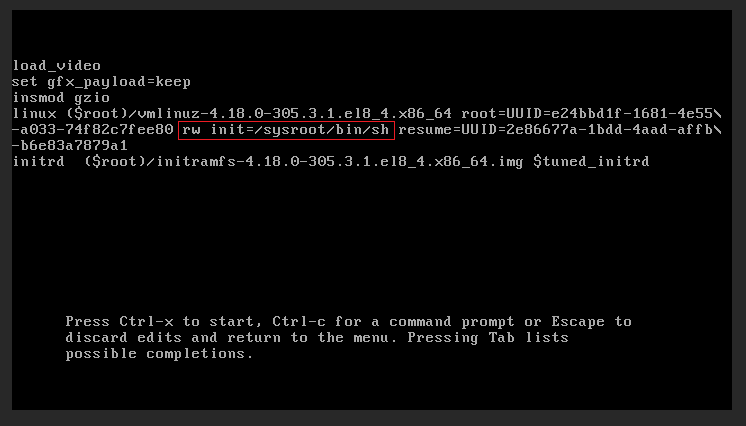
Ebutton to edit the first boot option.Find the kernel line starting with
linuxand changerotorw init=/sysroot/bin/sh.# rw init=/sysroot/bin/sh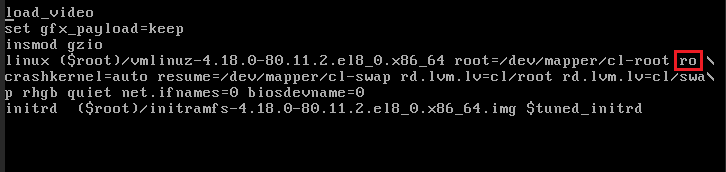
Press
CTRL+XorF10to save the changes and boot the server into single-user mode.Access the system with the below command.
# chroot /sysroot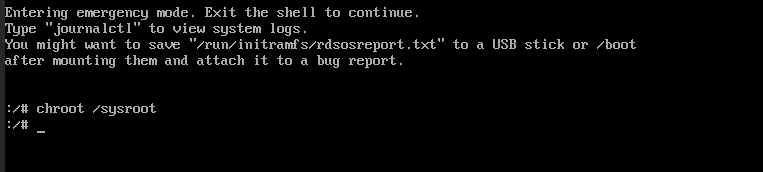
Type in the command
passwdto set the new password. The password would need to be entered twice.# passwd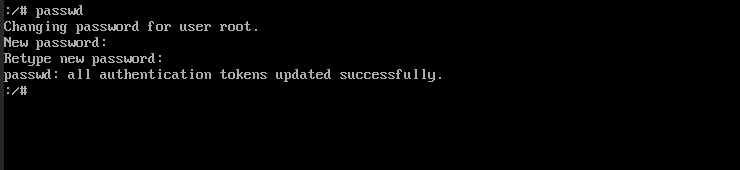
Run the below command to force file-system relabeling.
# touch /.autorelabelReboot the system: reboot -f.
# reboot -fWait for some time, as the relabeling will take a few minutes to get completed. Once this is completed, the server will be restarted once again automatically.
Test the newly reset password once the login screen shows up.
CentOS 7
Log in to the server via
Consoleoption from LayerPanel v2.0 and clickSend CtrlAltDelbutton to reboot the server and access the boot menu.Once the
GRUB boot promptshows up telling topress any key, perform this action to enter the GRUB prompt. (There will only be a few seconds to press a key to stop the automated booting process if this is not done on time, the server would need to be restarted again)From the GRUB boot prompt, press the
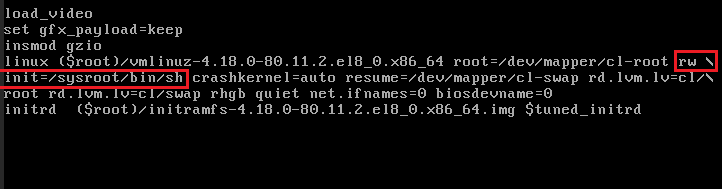
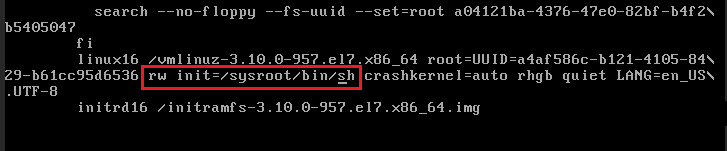
Ebutton to edit the first boot option.Find the kernel line starting with
linux16and changerotorw init=/sysroot/bin/sh.# rw init=/sysroot/bin/sh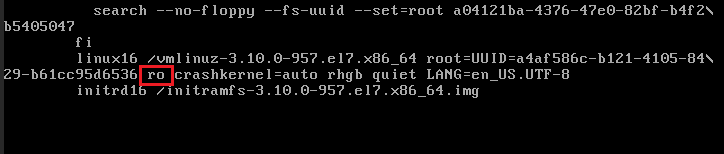
Press
CTRL+XorF10to save the changes and boot the server into single-user mode.Access the system with the command:
chroot /sysrootand pressENTER.# chroot /sysroot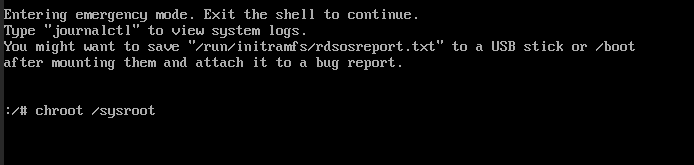
Type in the command
passwdto set the new password. The password would need to be entered twice.# passwd
Reboot the system: reboot -f.
# reboot -fTest the newly reset password once the login screen shows up.
Alternative Method for CentOS 8 & 7
Log in to the server via
Consoleoption from LayerPanel v2.0 and clickSend CtrlAltDelbutton to reboot the server and access the boot menu.Once the
GRUB boot promptshows up telling topress any key, perform this action to enter the GRUB prompt. (There will only be a few seconds to press a key to stop the automated booting process if this is not done on time, the server would need to be restarted again)From the GRUB boot prompt, press the
Ebutton to edit the first boot option.At the GRUB menu, select the kernel line starting with
linux16and pressEND key. This will take you to the end of the line. Here type inrd.break console=tty1.# rd.break console=tty1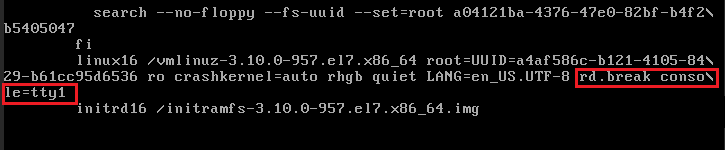
Press
CTRL+XorF10to save the changes and boot the server into single-user mode.The server will be booted into the switch-root prompt.
When using
rd.break, the system will be directly mounted on/sysrootin read-only mode and it needs to be remounted in read/write mode. The below command helps in this.# mount -o remount,rw /sysroot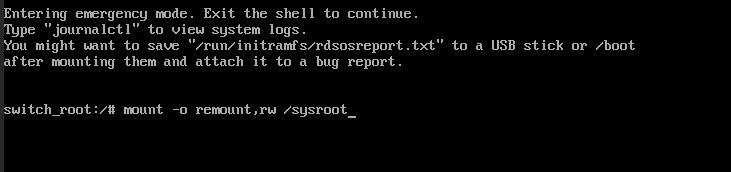
Switch into a chroot jail using the below command, where
/sysrootis treated as the root of the filesystem tree.# chroot /sysroot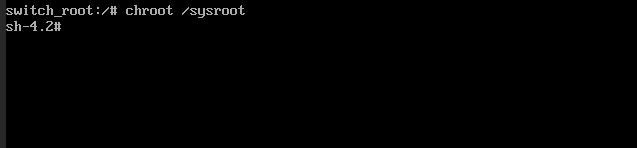
Type in the command
passwdto set the new password. The password would need to be entered twice.# passwd
Reboot the system: reboot -f.
# reboot -fTest the newly reset password once the login screen shows up.
CentOS 6
Log in to the server via
Consoleoption from LayerPanel v2.0 and clickSend CtrlAltDelbutton to reboot the server and access the boot menu.Once the
GRUB boot promptshows up telling topress any key, perform this action to enter the GRUB prompt. (There will only be a few seconds to press a key to stop the automated booting process if this is not done on time, the server would need to be restarted again)From the GRUB boot prompt, press the
Ebutton to edit the first boot option.At the GRUB menu, select the line that starts with
kerneland then press theEbutton to edit the kernel.Add the text single to the end of this line and press
ENTERto save the changes.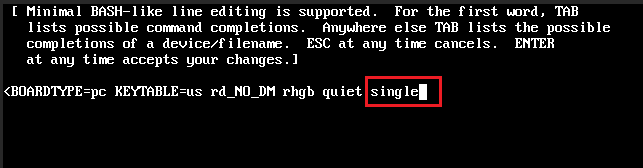
Press the
Bbutton to boot the server to these temporary options to reset the root password.The server will boot up to the root shell. Type in the command
passwdto set the new password. The password would need to be entered twice.# passwd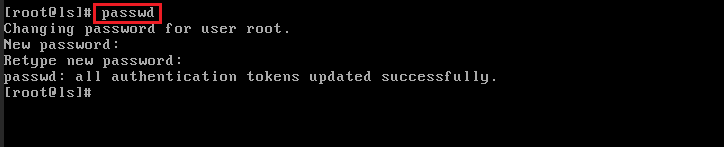
Once this has been completed, reboot the server and verify access to the server using the new password.
# rebootTest the newly reset password once the login screen shows up.
Debian & Ubuntu
Log in to the server via
Consoleoption from LayerPanel v2.0 and clickSend CtrlAltDelbutton to reboot the server and access the boot menu.Once the
GRUB boot promptshows up telling topress any key, perform this action to enter the GRUB prompt. (There will only be a few seconds to press a key to stop the automated booting process if this is not done on time, the server would need to be restarted again)From the GRUB boot prompt, press the
Ebutton to edit the first boot option.In the GRUB menu, find the kernel line starting with
linux /boot/and addinit=/bin/bashat the end of the line.# init=/bin/bash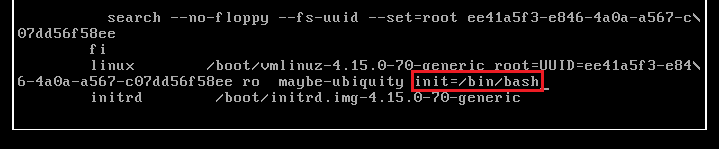
Press
CTRL+XorF10to save the changes and boot the server into single-user mode. Once booted the server will boot into the root prompt.Type in the command
mount -o remount,rw /# mount -o remount,rw /
Type in the command
passwdto set the new password. The password would need to be entered twice.# passwd
Reboot the system: reboot -f.
# reboot -fTest the newly reset password once the login screen shows up.
Rocky Linux
Log in to the server via
Consoleoption from LayerPanel v2.0 and clickSend CtrlAltDelbutton to reboot the server and access the boot menu.Once the
GRUB boot promptshows up telling topress any key, perform this action to enter the GRUB prompt. (There will only be a few seconds to press a key to stop the automated booting process if this is not done on time, the server would need to be restarted again)From the GRUB boot prompt, press the
Ebutton to edit the first boot option.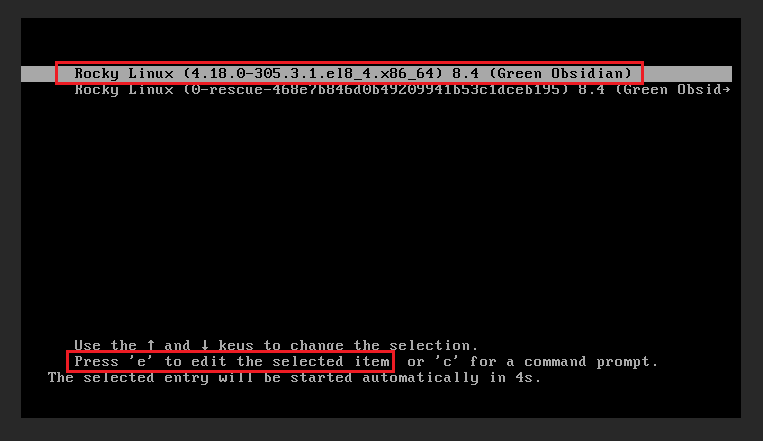
Find the kernel line starting with
linuxand changerotorw init=/sysroot/bin/sh.# rw init=/sysroot/bin/sh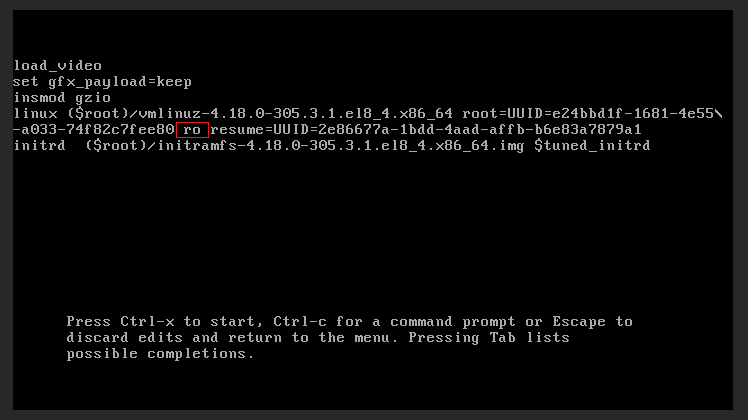
Press
CTRL+XorF10to save the changes and boot the server into single-user mode.Access the system with the below command.
# :/# chroot /sysroot
Type in the command
passwdto set the new password. The password would need to be entered twice.# :/# passwd
Run the below command to force file-system relabeling.
# :/# touch /.autorelabel
Reboot the system: reboot -f.
# :/# reboot -fWait for some time, as the relabeling will take a few minutes to get completed. Once this is completed, the server will be restarted once again automatically.
Test the newly reset password once the login screen shows up.
Alternative Method for Rocky Linux
Log in to the server via
Consoleoption from LayerPanel v2.0 and clickSend CtrlAltDelbutton to reboot the server and access the boot menu.Once the
GRUB boot promptshows up telling topress any key, perform this action to enter the GRUB prompt. (There will only be a few seconds to press a key to stop the automated booting process if this is not done on time, the server would need to be restarted again)From the GRUB boot prompt, press the
Ebutton to edit the first boot option.At the GRUB menu, select the kernel line starting with
linuxand pressEND key. This will take you to the end of the line. Here type inrd.break console=tty1.# rd.break console=tty1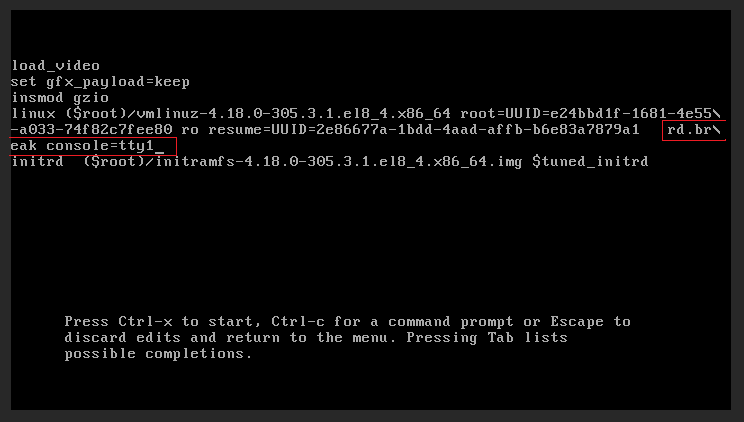
Press
CTRL+XorF10to save the changes and boot the server into single-user mode.The server will be booted into the switch-root prompt.
When using
rd.break, the system will be directly mounted on/sysrootin read-only mode and it needs to be remounted in read/write mode. The below command helps in this.# mount -o remount,rw /sysroot
Switch into a chroot jail using the below command, where
/sysrootis treated as the root of the filesystem tree.# chroot /sysroot
Type in the command
passwdto set the new password. The password would need to be entered twice.# passwd
Reboot the server by executing the below command.
# :/# reboot -fThe server will be rebooted back into the login prompt from where the newly set password can be used to log in to the system.
Fedora
Log in to the server via
Consoleoption from LayerPanel v2.0 and clickSend CtrlAltDelbutton to reboot the server and access the boot menu.Once the
GRUB boot promptshows up telling topress any key, perform this action to enter the GRUB prompt. (There will only be a few seconds to press a key to stop the automated booting process if this is not done on time, the server would need to be restarted again)From the GRUB boot prompt, press the
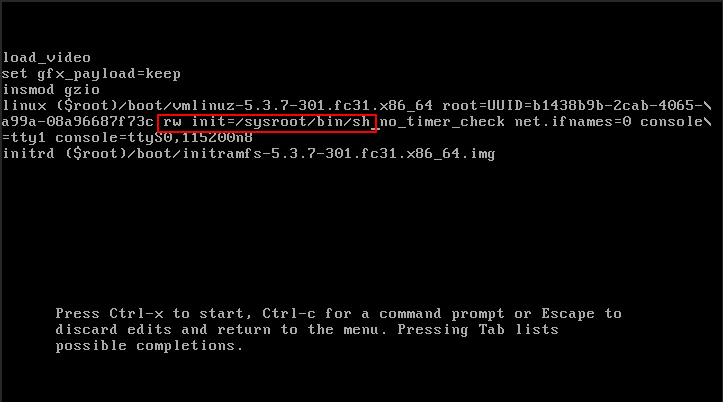
Ebutton to edit the first boot option.Find the kernel line starting with
linux,linux16orlinuxefi, changerotorw init=/sysroot/bin/sh.# rw init=/sysroot/bin/sh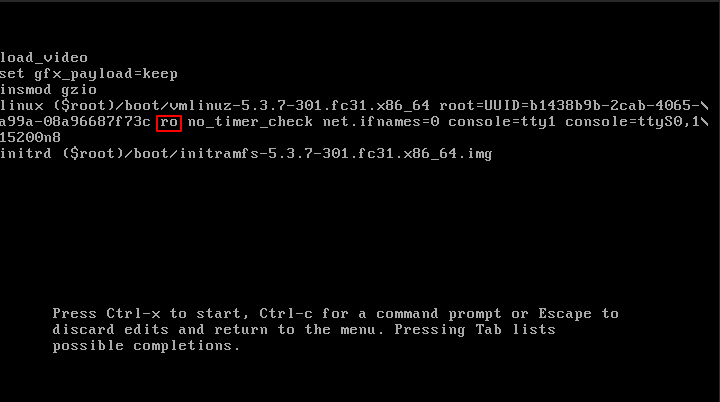
Press
CTRL+XorF10to save the changes and boot the server into single-user mode.Remount the hard drive with read-write permission.
# mount –o remount,rw /sysrootAccess the system with the command:
chroot /sysrootand pressENTER.# chroot /sysroot
Type in the command
passwdto set the new password. The password would need to be entered twice.# passwd
Reboot the system: /sbin/reboot -f.
# /sbin/reboot -fTest the newly reset password once the login screen shows up.
Related Tutorials
