Manage your Linux Cloud Servers via the Command Line Interface
This tutorial covers some basic Linux commands used on a daily basis by Linux System administrators for Linux File Management, User Management, File Searching and Memory, Disk, and CPU Management.
These commands are used in CLI or Terminal which is the most sophisticated method to run or execute a task.

Linux Server Administration Commands
1. sudo
Sudo stands for either substitute user do or super user do. sudo allows a user to run a program as another user (*most often the root user). There are many that think sudo is the best way to achieve best security practice on Linux.
# sudo ifconfig

By default, sudo requires that users authenticate themselves with a password which is the user’s password, not the root password itself.
# man sudo
The above manual page covers the synopsis, description, and examples for the command sudo.
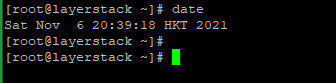
2. date
The basic Linux command is used to display the system date and time.
By default, the system date format is shown in the format below:
# date
Here, -s option is used to set the date and time:
# date -s '2021-11-06 11:00:00'

# man date
The manual page will give you more clarity on the options and will help to adjust the date and time format if you check out here.
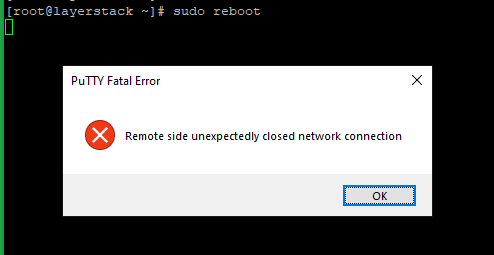
3. reboot
The command restarts the server instantly. On executing reboot command, the existing SSH connection will be terminated, and you would be able to connect to the server post the restart. Usually -f option is used to override or force immediate the command, i.e It will reboot forcefully.
# sudo reboot
# man reboot
Here, you will be able to view all the options on the man page.
4. wget
The utility wget is used to access the resources through URL, can download files using HTTP, HTTPS, and FTP protocols.
# wget https://hk03.layerstack.com/100MB.test

# wget -O https://hk03.layerstack.com/100MB.test
The above links are just tested links for download.
# man wget
The manual page of wget will fetch you the detailed syntax and options for customized outputs.
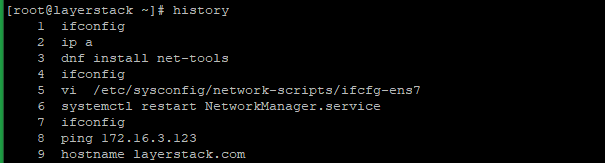
5. history
The command will show the command history i.e List of all the commands executed previously.
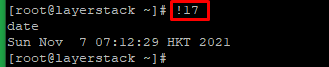
# !n
You would be able to execute the command from the list of history items. The below example shows the17th command to be shown.
# !-n
This option refers to the current command minus n. For example, the below screenshot denotes the current command number minus 36 will be shown.

# !!
This option shows the previous command:

# man history
The manual page for history will show all the options and possible values to show the history.
6. clear
This command is used to clear the terminal. Normally, this command is used to reset the screen.
# clear
Linux File Management Commands
1. pwd
The command stands for Print Working Directory and shows the present working directory. The output will be a path of the present working and it retrieves the path of your current working directory starting from the root directory i.e /.
# pwd

2. mkdir
Allows the user to create directories through this command.
# mkdir sample

While using -p option user can set a folder as a parent to another folder.
i.e In a single command, the user can create a directory inside a directory. This can be done at different levels as well.
# mkdir -p sample/test/abc

Here folder sample is parent to test which is a parent to folder abc.
3. cd
The command simply changes the current position of standing. The command Change Directory is used often to navigate between the positons in Shell.
# cd sample/test/abc
The command will traverse into the folder sample, test and abc. The execution point will be inside folder abc.

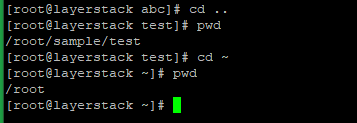
# cd ..

# cd ~
cd .. is used to traverse one level up.
cd ~ will traverse to the root directory irrespective of the current position.
4. ls
List command utility is the most used utility. This lists all the contents at a particular level. With the command we have different options such as given below:
# ls -l

# ls -lh

# ls -lha
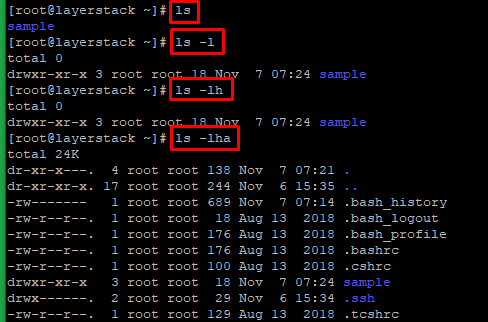
Each option produces corresponding detailed output while executing.
Simple
lscommand only lists the item.An additional flag
-lalong with ls describes the Folder/file permissions along with user/group ownership details and date and time of modification.An additional flag
-lhwill additionally incorporate the output into human-readable form.An additional flag
-lhawill show all the hidden files and folders present in that position along with a human-readable feature.
5. touch
This command utility is used to create a new file.
# touch sample_file.txt

6. mv
mv command is used for 2 purposes, either to move a file from one location to another or rename a file/folder or both.
The best example is given below:
Renaming a file, often used to back up a file.
# mv sample_file.txt sample_file.back

This is to move a file from one location to another.
# mv sample_file.txt sample_file.back /sample

7. rmdir
Remove directory command is used to remove empty directories.
# rmdir <foldername>

8. rm
The command rm is used to remove files and non-empty directories.
Especially while removing non-empty files the option flag used to remove consists of -r i.e remove recursively.
# rm <filename>

While removing directory:
# rm -r <foldername>

9. cp
The command copies the files and directories. Here you would require to specify source and destination.
# cp <sourcefile> <destination file="">

10. chown
The chown command allows you to change the user and/or group ownership of a given file, directory. All files are associated with an owner and a group and assigned with permission access rights for the file owner, the group members, and others.
The usage is given as below:
# chown -R <username>:<groupname> /Path /to /file or folder
Here -R option flag indicates recursive i.e apply to all subfolders or files within that location.
Option –v produces the process details even when the ownership stays the same.
Option –c displays the output information only when an owner or group of the target file changes.

Useful options:
| Command | Explanation |
|---|---|
| c, --changes | Display the detailed output. |
| -f, --quiet | Mask the error messages, i.e. does not show the errors. |
| -v, --verbose | Display the diagnostic for all the processes. |
| -R, --recursive | Perform a change in permissions for all the files and folders recursively. |
| --help | Access for help manual related to this command. |
11. chmod
The chmod command sets the permissions of files and directories.
# chmod <option> <permissions> <filename>
Each file or folder in Linux is associated with an owner and a group and assigned with permission access rights for three different classes of users:
- Owner
- Group
- Others
And there are three types of permissions allowed for files:
- Read
- Write
- Execute
The usage syntax:
# chmod USER_PERMISSIONS GROUP_PERMISSIONS OTHERS_USERS_PERMISSIONS
The below example gives full read, write and execute permissions for a particular folder:

Useful options:
| Command | Explanation |
|---|---|
| -c, --changes | Check whether a change has been made. |
| -f, --silent | Suppress the error messages. |
| -v, --verbose | Display diagnostic background details for every processed file. |
| -R, --recursive | Bring down changes files and directories recursively. |
| --help | Display the help manual. |
12. cat
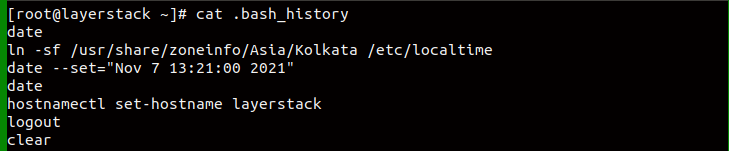
Cat (concatenate) command is very frequently used in Linux. It reads data from the file and gives its content as output.
# cat <filename>
It helps us to create, view, concatenate files. The below example shows the cat command to view the content of a file .bash_history.
The command is also used to concatenate multiple files and display output. The usage syntax is as follows:
# cat <filename1> <filename2>
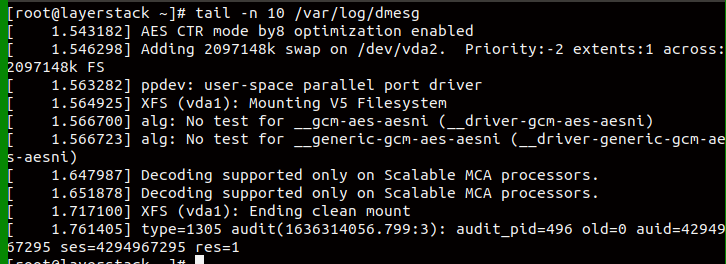
13. Tail
The tail command displays the last part (10 lines by default) of one or more files or data. It can be also used to monitor the file changes in real-time.
One of the most common uses of the tail command is to watch and analyze logs.
The command comes with certain options. To know more check the command manual:
# man tail
The below example shows the tail output of /var/log/dmesg:
User Management Commands
1) whoami
whoami is a basic Linux command utility used to find username associated with the current effective user id.
Just execute the command whoami in the terminal. It displays the username of the current user when this command is invoked.
# whoami

2) useradd and passwd
useradd is used to create a new user, while passwd is used to add a password to that user’s account. Only root or users with sudo privileges can use the useradd command to create new user accounts.
# useradd <username>
Once the user has been created, a password can be set to the user, this is done using passwd command.
# passwd <username>
Once entering the above command, it will prompt you to enter the password and then confirm it.

Useradd options:
| Command | Explanation |
|---|---|
| -D, --defaults | Set up the default values. |
| -e, --expiredate EXPIRE_DATE | The given explicit date on which the user account will be disabled. The date is specified in the format YYYY-MM-DD(default). |
| -g, --gid GROUP | Group name that already exists, which is the user’s initial login group. |
| -N, --no-user-group | Command does not create a new group of the same name but adds the user to the group specified by the -g option. |
| -p, --password PASSWORD | The password will be in encrypted form as it will satisfy the employed password policy. |
Memory, Disk, and CPU Management Commands
1) free
free command is used to display the amount of physical and swap memory. However, there are options for the user to view the output in different forms.
The free command has multiple options to format the output so that it better matches your requirements. To view all the options:
# man free
You would be able to view all the options including syntax.
free command with -h option shows the free physical memory and swap in human-readable form:

Useful options:
| Command | Explanation |
|---|---|
| -b, --bytes | Display the amount of memory in [bytes] |
| -k, --kilo | Display the amount of memory in [kilobytes] |
| -m, --mega | Display the amount of memory in [megabytes] |
| -g, --giga | Display the amount of memory in [gigabytes] |
2) du
du stands for disk usage. The du command can be used to track the files and directories which are consuming an excessive amount of space on the hard disk drive.

-h option along with du will give the output in human-readable form:

Useful options:
| Command | Explanation |
|---|---|
| -h, --human-readable | Print sizes in human readable format, rounding values and using abbreviations. For example, 1K, 234M, 2G, etc. |
| --si | Like -h, but use powers of 1000, not 1024 |
| -k | Like --block-size=1K |
| -l, --count-links | Count sizes many times if [hard-linked] |
| -m | Like --block-size=1M |
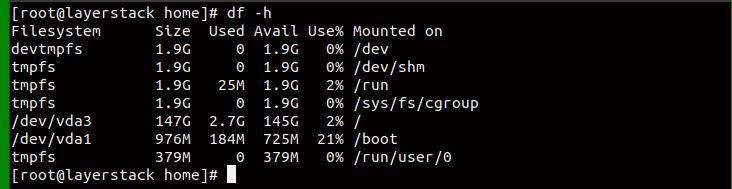
3) df
The df command (short for disk free), is used to display information related to file systems about total space and available space.
Here -h option is used for human-readable output:
# df -h
Useful options:
| Command | Explanation |
|---|---|
| -h | Print sizes in human readable format (e.g.,1K 234M 2G) |
| -H | Same as -h, but use powers of 1000 instead of 1024 |
| -i | List [inode] information instead of block usage |
| -k | Like --block-size=1K |
| -l | Limit listing to local file systems |
| -P | Use the [POSIX] output format |
| --sync | Invoke a sync before getting usage info |
| -t | Limit listing to local file systems |
| -T | Print file system type |
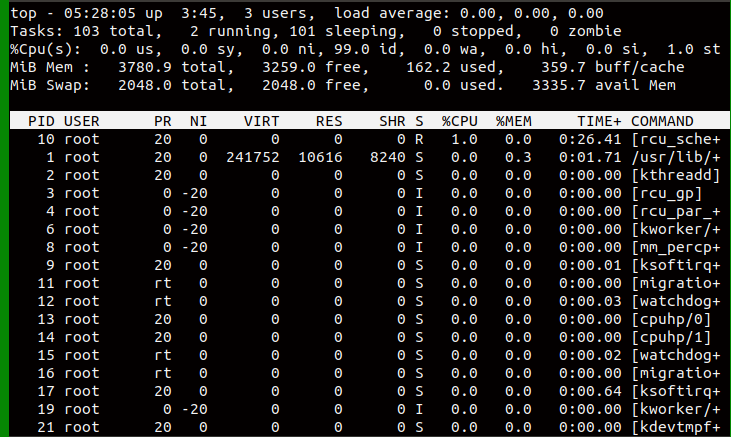
4) top
The top command in Linux lets you monitor currently running processes and the system resources they are using.
The top utility comes pre-installed with all Linux distros. Through this interactive command, you can customize how you can browse the list of processes, kill one, print the results to a file, and much more.
# top -cd1
Useful Options:
| Command | Explanation |
|---|---|
| -h/-v | Show library version and the usage prompt, then quit. |
| -c | Command-line / Program-name toggle: Start top with the last remembered c state reversed. Thus, if the top was displaying command lines, now that field will show program names, and vice versa. |
| -d | Delay-time interval: Specify the delay between screen updates and override the corresponding value in one's personal configuration file or the startup default. Later this can be changed with the d or s interactive commands. |
| -H | Instruct top to display processes in names of threads. If this option is not specified, the summation of all the threads will be displayed. |
| -n | Specify the maximum number of iterations top produces. |
File Searching Commands
1) whereis
This command is used to find the location of the source/binary file of a command and manuals sections.
whereis command has a hard-coded (code which is not dynamic and changes with specification) path, so you may not always find what you’re looking for.
The syntax for the command is as follows:
# whereis [options] filename

whereis command is also used to find other commands such as the below example which shows the details of mv command.

2) which
which command in Linux is a command that is used to locate the executable file associated with the given command by searching it in the path environment variable.
# which <command></command>

If you query for an alias, the which command will determine the actual command for the alias before performing your search:

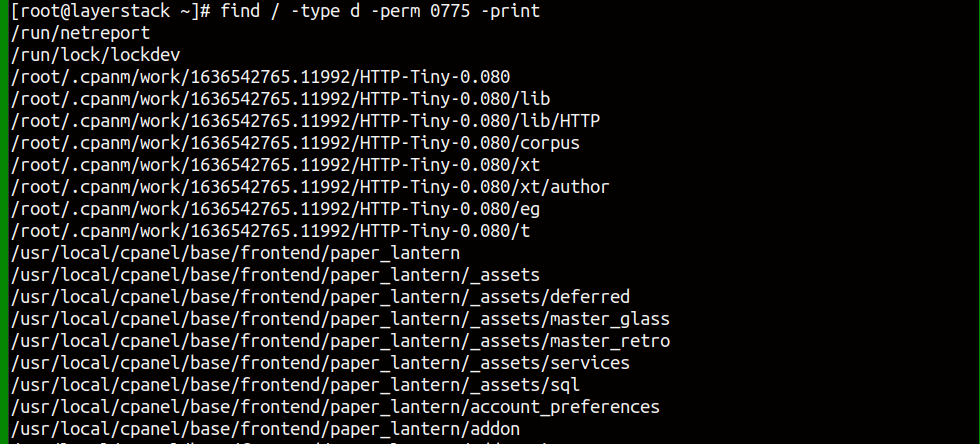
3) find
The find command is used to search and find out the list of files and directories based on conditions you specify for files that match the arguments. It can be used in a variety of conditions such as finding files by permissions, users, groups, file types, date, size, and other possible criteria.
The basic syntax of the find command is
# find <directory path="" to="" be="" searched=""> <options> <action>
The below example shows the search of files with name passwd:

Examples of find options:
The command will find all directories named myfolder:
# find / -type d -name myfolder
The below command will display all the files with permission 777:
# find . -type f -perm 0777 -print
Related Tutorials
