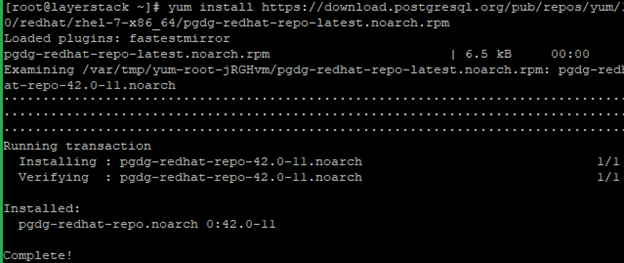
Run the below command to add PostgreSQL Yum Repository and it will combine with your Linux system and offers automatic updates for all supported versions of PostgreSQL on your CentOS server.
# yum install https://download.postgresql.org/pub/repos/yum/10/redhat/rhel-7-x86_64/pgdg-redhat-repo-latest.noarch.rpm
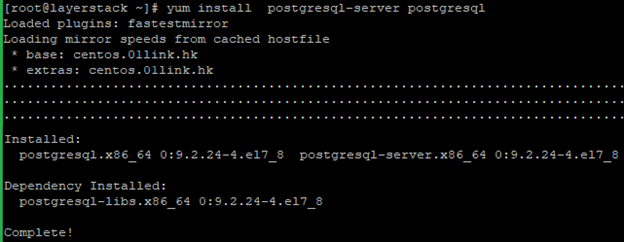
Once added to the PostgreSQL yum repository, then run the below command to install the PostgreSQL on your server.
# yum install postgresql-server postgresql
Initialize PostgreSQL Database to complete the database installation.
# postgresql-setup initdb

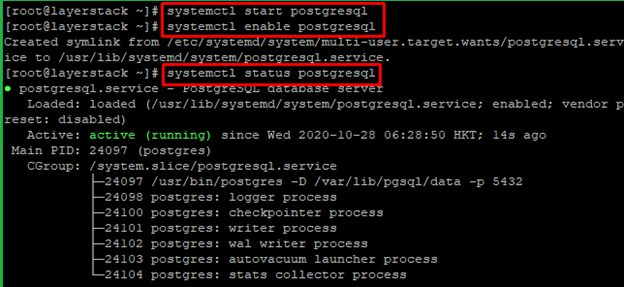
Once the database initialize completed, then run the below commands to start, enable and check the status of PostgreSQL.
# systemctl start postgresql

# systemctl enable postgresql

# systemctl status postgresql
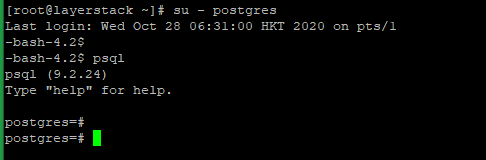
Run the below command to verify the installation.
# su - postgres
You can use the below command to change the password for user postgres for security purposes.
# postgres=# \password postgres
Run the below commands to add PostgreSQL Repository and it will combine with your Linux system and offers automatic updates for all supported versions of PostgreSQL on your Ubuntu server.
Import the GPG repository key with the below commands:
# apt-get install wget ca-certificates

# wget --quiet -O - https://www.postgresql.org/media/keys/ACCC4CF8.asc | sudo apt-key add -


Add the PostgreSQL repository by using the below command.
# sh -c 'echo "deb http://apt.postgresql.org/pub/repos/apt/ `lsb_release -cs`-pgdg main" >> /etc/apt/sources.list.d/pgdg.list'

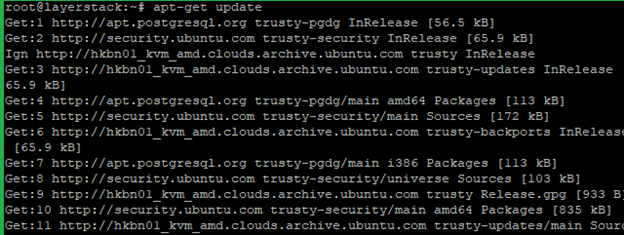
Now update the server to effect the changes.
# apt-get update
Once added the PostgreSQL repository and updated the server, then run the below command to install the PostgreSQL on your server.
# apt-get install postgresql postgresql-contrib

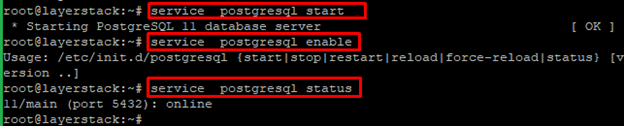
Once the installation is completed, then run the below commands to start, enable and check the status of PostgreSQL.
# service postgresql start

# service postgresql enable

# service postgresql status
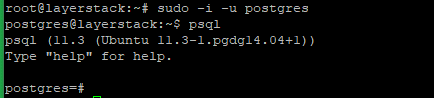
Run the below command to access PostgreSQL and launch the postgres shell program.
# sudo -i -u postgres

# psql
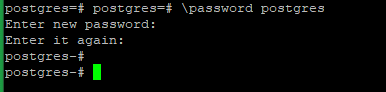
You can use the below command to change the password for user postgres for security purposes.
# postgres=# \password postgres

Run the below command from the postgres shell to check the details of the connection.
# \conninfo

