How to assign multiple IP addresses to network adapter on Linux Cloud Servers
Users may need to set up multiple IP addresses to the same network interface for hosting various SSL sites and avoid firewalls or being blacklisted in SPAM filters, etc. This is very useful for setting up multiple virtual sites in Apache using a single network interface with different IP addresses on a single subnet network.
This guide will help you to configure multiple IP addresses on Linux cloud servers.
AlmaLinux/Rocky Linux/CentOS
Check the current IP address of the server using the below command.
# ip addr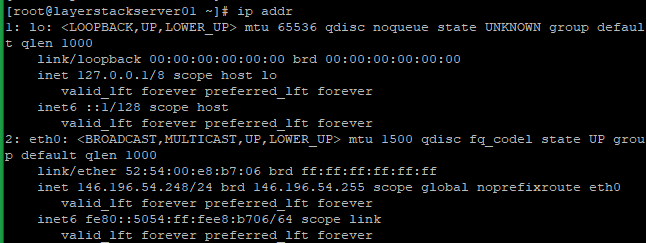
In the above example, the IP address is 146.196.54.248, you can find your server IP address on
eth0 adapter.Run the below command to view the network configuration file contents.
# cat /etc/sysconfig/network-scripts/ifcfg-eth0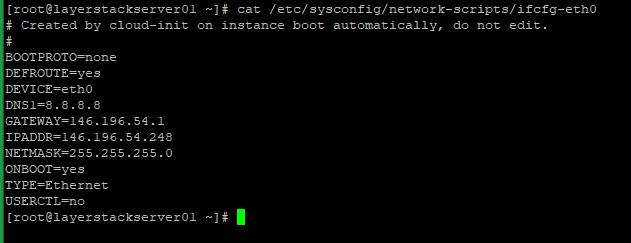
Create the sub-interface configuration files under
/etc/sysconfig/network-scripts/and add the configurations as below, then save and exit the file.**ifcfg-eth0:0** BOOTPROTO=static DEFROUTE=yes DEVICE=eth0:0 DNS1=8.8.8.8 IPADDR=192.168.2.2 NETMASK=255.255.255.0 ONBOOT=yes STARTMODE=auto TYPE=Ethernet USERCTL=no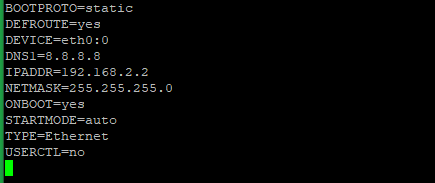
NOTE: In this example, 192.168.2.2 is the secondary IP address and you can replace it with the original additional IP address.
**ifcfg-eth0:1**

BOOTPROTO=static
DEFROUTE=yes
DEVICE=eth0:1
DNS1=8.8.8.8
IPADDR=192.168.2.3
NETMASK=255.255.255.0
ONBOOT=yes
STARTMODE=auto
TYPE=Ethernet
USERCTL=no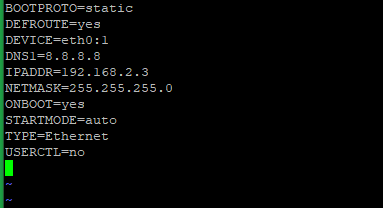
NOTE: In this example, 192.168.2.3 is the secondary IP address and you can replace it with the original additional IP address.
Reboot the server to reflect the changes. Once rebooted, then log in to the server using SSH and run the below command to display the IP addresses.
# ip addr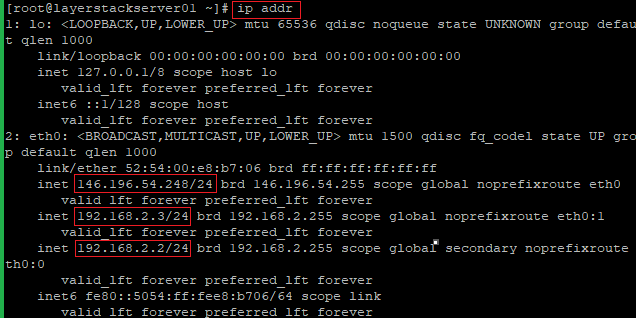
The additional IP addresses will be configured in the
eth0:0andeth0:1sub interface as in the above screenshot. In this way, you can add a bunch of IP addresses to a Single Network Interface.
Ubuntu 20.04LTS
Check the current IP address of the server using the below command.
# ip addr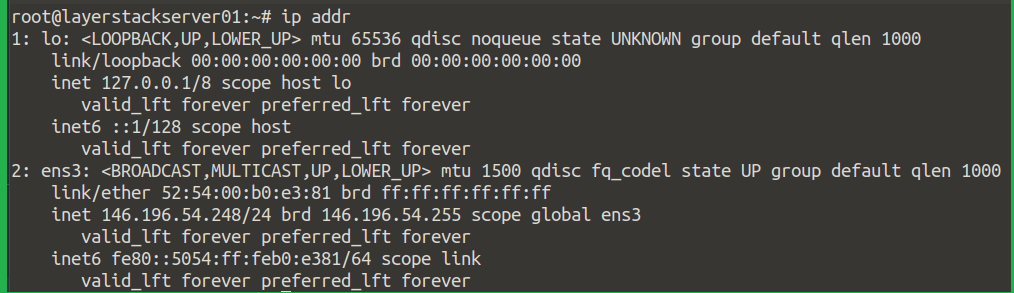
In the above example, the IP address is 146.196.54.248, you can find your server IP address on
ens3 adapter.Run the below command to view the network configuration file contents.
# cat /etc/netplan/50-cloud-init.yaml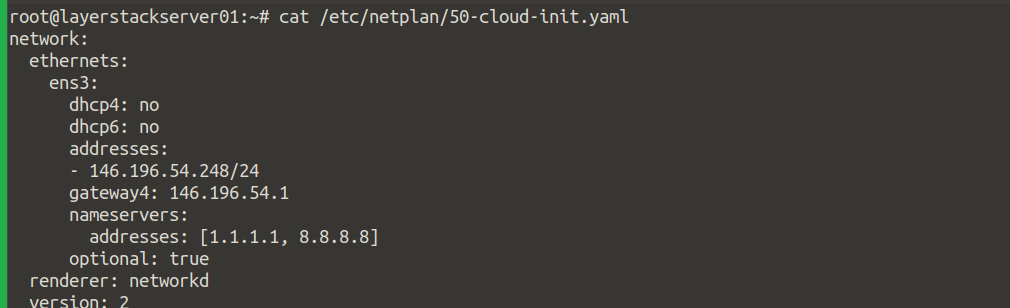
Add the additional IP address to the addresses field in the configuration file once you open the file in a suitable editor such as vi or nano.
# vi /etc/netplan/50-cloud-init.yaml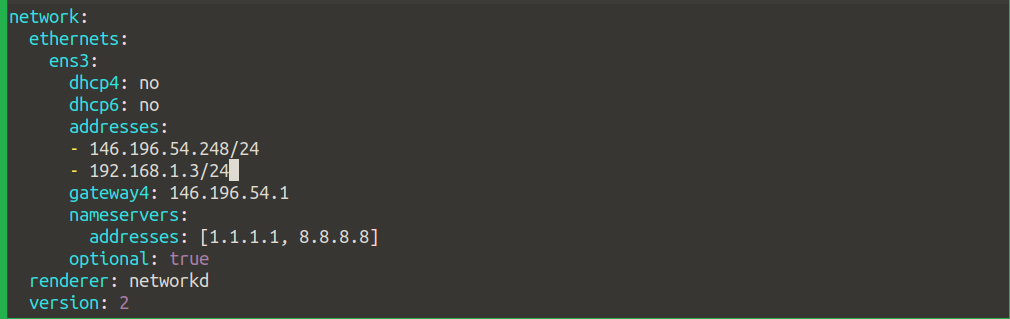
NOTE: In this example, 192.168.1.3 is the secondary IP address and you can replace it with the original additional IP address.
Save the changes execute the command netplan apply.
# netplan apply
Restart the networking process to reflect the changes using the command.
# systemctl restart networking.service
Then try to check the interface IP address whether it is reflecting
# ip addr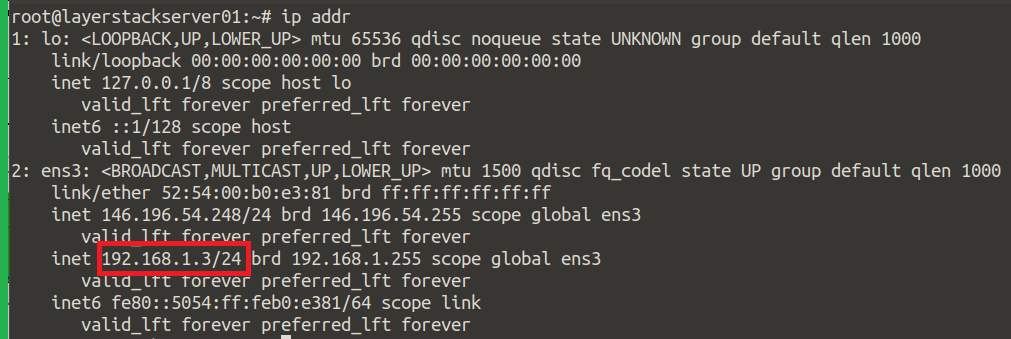
Repeat the above steps in case if it requires adding more IP addresses to the NIC interface.
Debian / Ubuntu18
Check the current IP address of the server using the below command.
# ip addr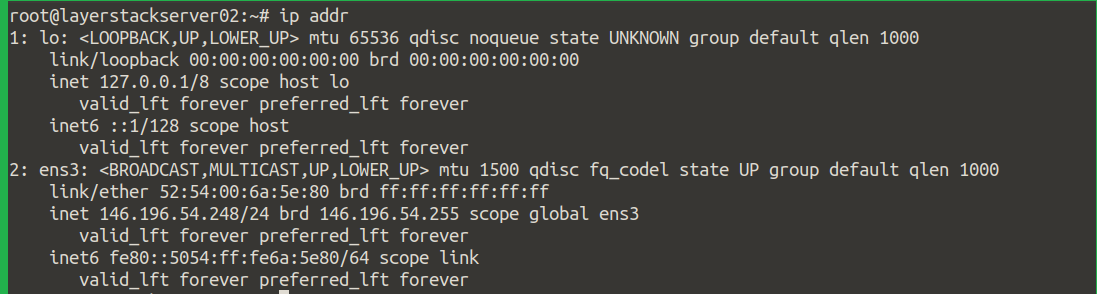
In the above example, the IP address is 146.196.54.248, you can find your server IP address on
ens3 adapter.Run the below command to view the network configuration file contents.
# cat /etc/network/interfaces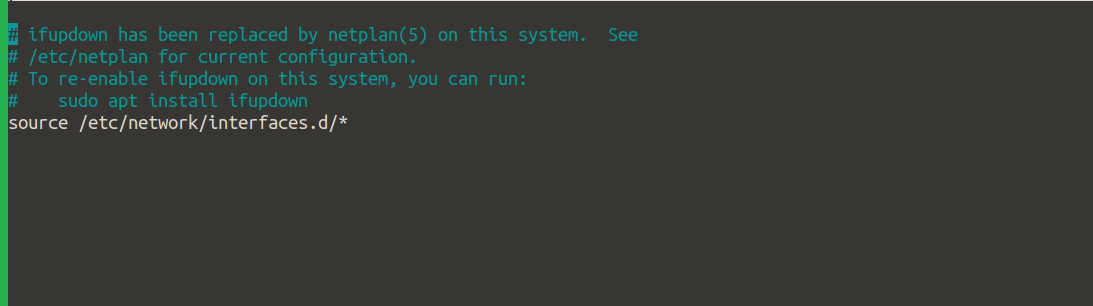
Open the configuration file here which is located in /etc/network/interfaces.
# nano /etc/network/interfacesHere, for the additional IP address, you would require to enter the configuration in the following format, where
interface-nameis the adapter name shown in ip addr output (E.g. ens3) and theadditional IP addressis the IP address you wish to add.iface <interface-name> inet static address <additional-ip address="">In the Cloud Servers, the entry will be:
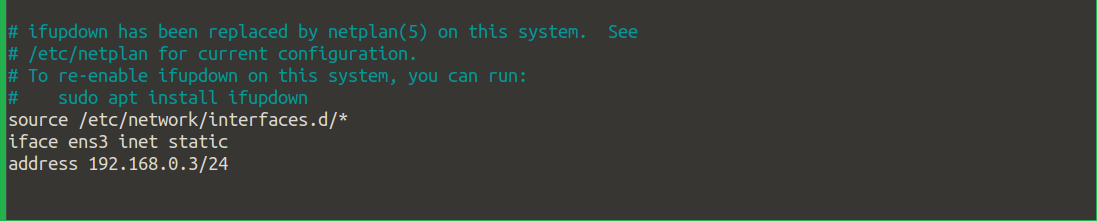
NOTE: In this example, 192.168.0.3 is the secondary IP address and you can replace it with the original additional IP address.
Save the changes and restart the network process.
# systemctl restart networking.service
To verify the changes, check the interface IP address whether it is reflecting
# ip addr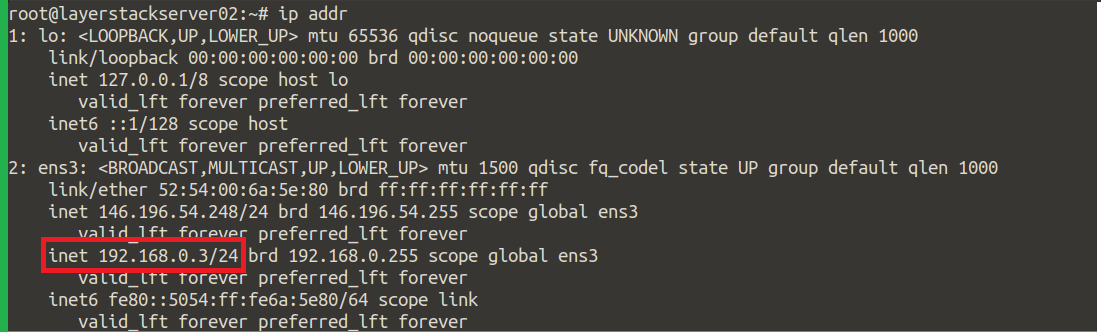
- Repeat the above steps in case if it requires adding more IP addresses to the NIC interface.
Related tutorials
How to assign multiple IP addresses to network adapter on Windows Cloud Servers
How to configure the Static IP Address & Network Card for Linux & Windows Cloud Servers
How to restart Network Interface / Network Adapter on Linux & Windows Cloud Servers
How to check TCP/IP configuration with ifconfig on Linux Cloud Servers
