How to use the Magento One-Click Install on LayerStack Cloud Servers
Magento, one of the most popular open-source e-commerce platforms written in PHP and it uses multiple other PHP frameworks, it offers powerful marketing, search engine optimization, and catalog-management tools.
Magento has its own advantages which include:
A simple and sophisticated user interface
Highly Customized
High-speed loading
Great flexibility
LayerStack has come up with a new feature where you can deploy Magento with a single click on your Cloud Servers for all regions.
HTTP link to log in to Magento Dashboard:
http://<serverip>/admin
Getting started with our One Click Magento installed Cloud servers
The following software will be installed once the server is deployed with Magento.
| Software | Description |
|---|---|
| MySQL server | Backend database for Magento |
| PHP 7 | Magento requires PHP 7 environment to operate |
| Nginx | The webserver used for the serving contents |
| Magento ver. 2.4.2 | Latest version of Magento CMS |
| Composer version 2.1.6 | Dependency management for PHP and in Magento |
The below are the required fields to be entered by the user in order to complete the Magento installation.
| Field | Description |
|---|---|
| Admin Username | This is the username of Magento admin user |
| Admin Password | A strong password suggested to login |
| Email Address | Email address of the Magento admin user |
Accessing the Magento site after Deployment
This section describes how to access the Magento application once the installation is done. By default, the Magento will be accessible by accessing your Cloud server’s IP address in a browser of your choice. Please follow the below steps:
Log in to LayerPanel2 and click on
Deployfrom the sidebar on the left side.Choose
Magento based on Ubuntu 20for the server OS and proceed to order the Cloud Servers.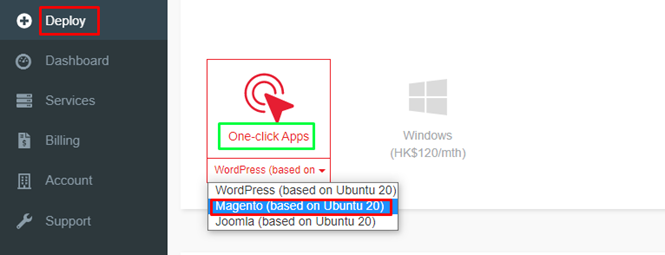
After the server is activated, click on
Servicesfrom the sidebar on the left side and further selectCloud Serversfor listing out your Cloud Servers.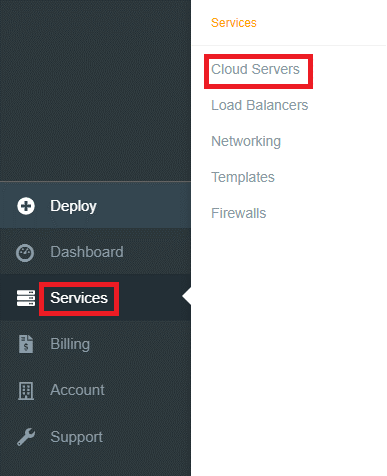
From the list of Cloud Servers, find your newly deployed Cloud Server with Magento one-click option.
In the below example the server IP is
123.123.123.123. You can copy the IP address using the Copy to clipboard icon adjacent to the IP address and then can paste it in any browser of your choice.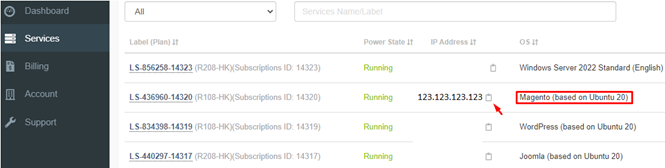
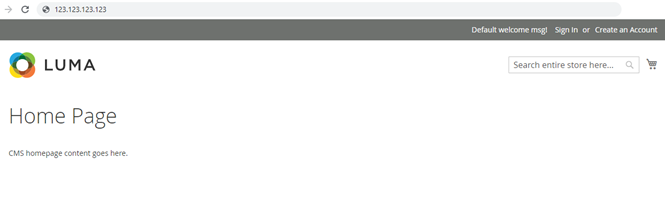
The page loads with the Magento homepage.
You can now log in to the
Magento admin dashboardby accessing the below link and personalizing the appearances for your website. The user can inputadminas the administrative username andserver's passwordfor logging into the admin dashboard of Magento.http://<serverip>/admin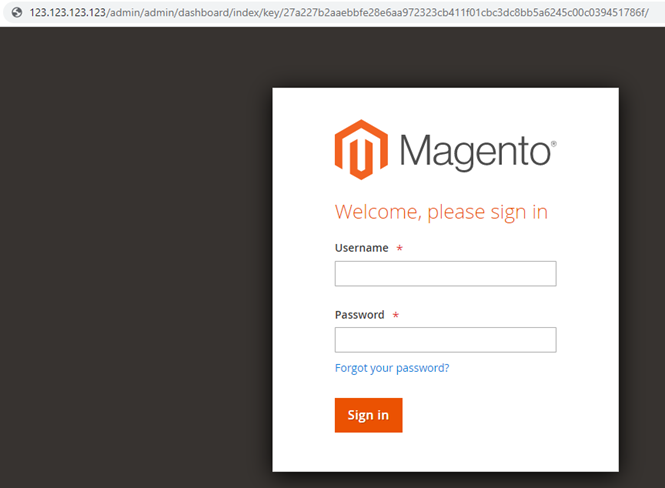
NOTE: Replace serverip in the above link with the actual IP address of your Cloud Servers.
How to link your domain name for your Magento Website?
You may have registered your domain with any global domain registrars, so you would be able to manage the DNS settings of your domain under the respective domain registrar’s account. To link your domain name to the Magento application to make it active under the domain in LayerStack Cloud Servers, you would require to set up A record entry for the website against the Cloud server’s IP address. This will resolve the domain name to the particular server IP.
NOTE: Pointing A record to the server IP is to be done at your Domain Registrar’s end. The DNS settings may vary according to the Registrar providers.
For more clarity you may refer to our DNS record setup tutorial:
How to update NameServer and DNS record for LayerStack Cloud Servers
Once the domain has been set up, it is required to change the Site URL by assigning the domain name to the Magento website. Follow the below steps:
Log in to the
Magento admin dashboard.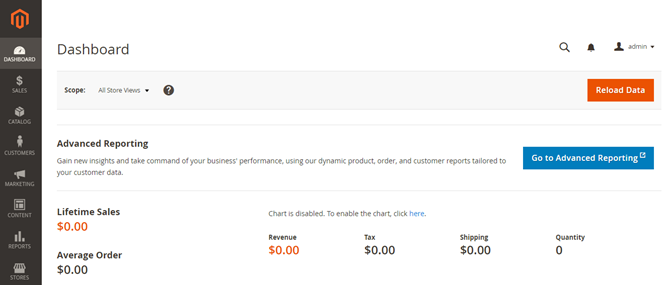
On the Admin sidebar, go to following option
Stores>Settings>Configuration.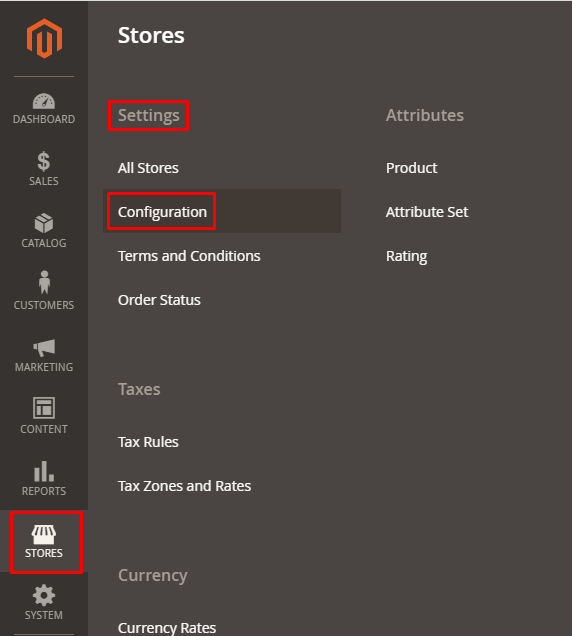
From the left panel, expand the
Generaloption and chooseWeb.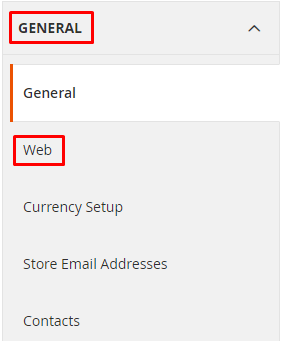
Now expand the
Base URLsandBase URLs (Secure)sections mentioned in the below image.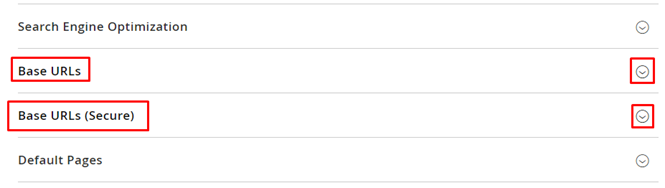
Fill in the
Base URLsection with the domain name.
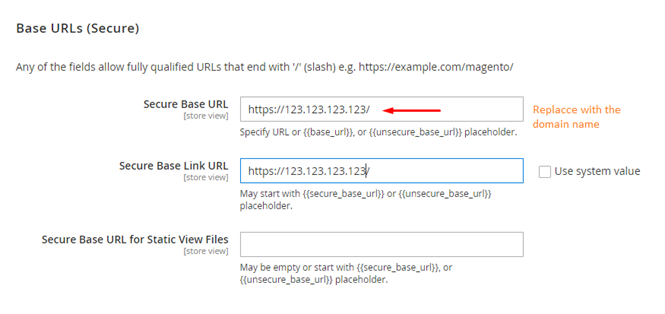
NOTE: Replace server IP with your registered domain name.
Click the
Save Configbutton in the top right once entered thedomain nameand it will then show a message stating “The configuration has been saved.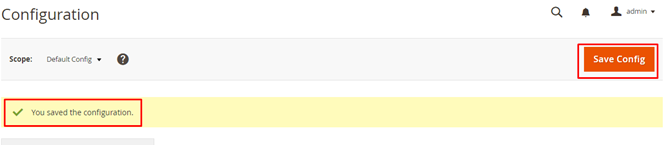
Once everything is done, Clear your Magento cache data. This will finalize the steps to deploy Magento with your Cloud Servers.
Related Tutorial
