How to set up NFS Share on Linux Cloud Servers
NFS (Network File System) is a method of file sharing solution that can be used to easily share files between servers. NFS provides a medium of central management and can allow any users to access their files from any server transparently.
This guide outlines the basic steps required to set up NFS share between two Linux servers in order to share files/folders among them. Global Private Networking is recommended for setting up NFS share as this helps in the sharing of files securely.
Configuring the NFS Server
NFS Server should be installed on the server in which the files/folders to be shared reside.
For installing the NFS server, execute the below command of each Linux OS.
CentOS
# yum -y install nfs-utils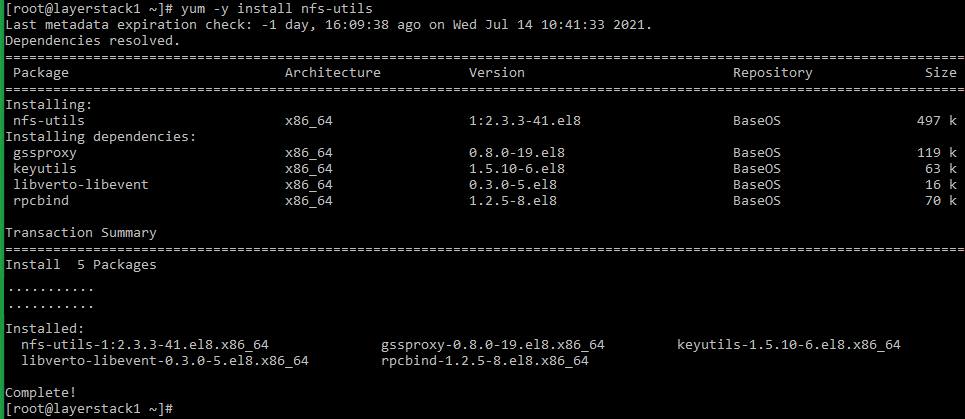
Ubuntu/Debian
# apt-get -y install nfs-kernel-server nfs-common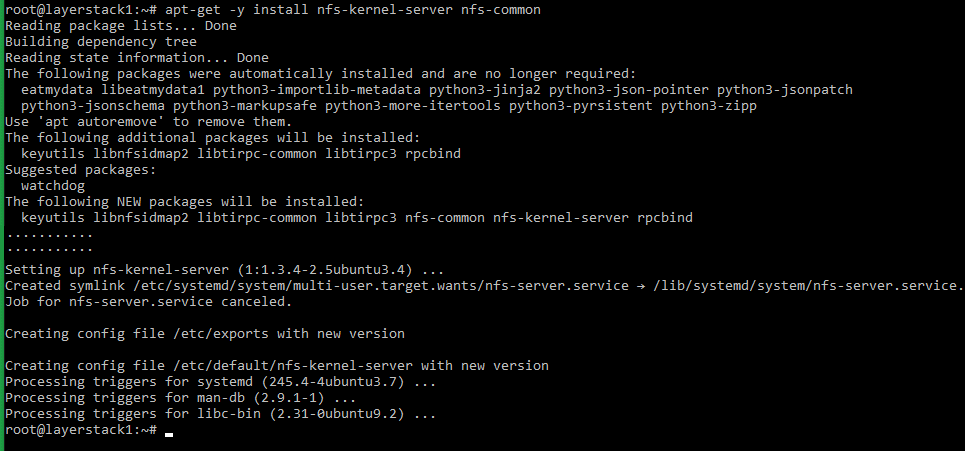
Create the folder that needs to be shared between the servers. An already existing folder can also be shared using NFS.
In the context of this guide, the folder named layerstackshare is created in
/partition.# mkdir /layerstackshare
In-order to share this folder, the below relevant entry should now need to be made in the
/etc/exportsfile. This is the main configuration file of NFS.Open the
/etc/exportsfile using any editor of choice:# vi /etc/exports
Enter the below line at the bottom of the file:
# /layerstackshare 192.168.2.120 (rw,sync,no_subtree_check)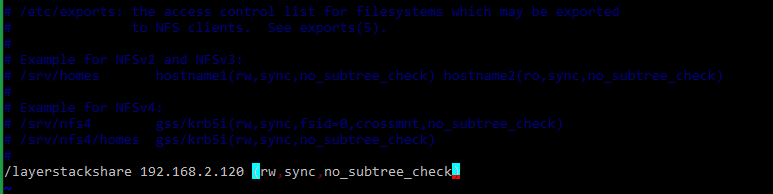
This line basically means that the folder named layerstackshare under the
/partition is being shared with another server (client) with IP192.168.2.120with read and write(rw)permissions.NOTE: The IP
192.168.2.120must be replaced by the original private IP of the NFS client.Restart the NFS Server by executing the below command of each Linux OS.
CentOS
# systemctl enable --now nfs-server rpcbind
Ubuntu/Debian
# service nfs-kernel-server restart
Configuring the NFS Client
Once the NFS server has been configured, the next step involves setting up the NFS client.
The first step is to install the required common NFS utilities in the NFS client-server. For this, execute the below commands of each Linux OS.
CentOS
# yum install nfs-utils -yUbuntu/Debian
# sudo apt install nfs-commonThe server on which the shared folder from the NFS server needs to be mounted is termed as the NFS client. For mounting the folder on the client-server, execute the below commands.
Create the folder at the client-side to which the shared folder is to be mounted:
# mkdir /mnt/lsclientshare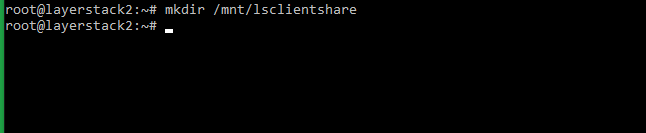
Mount the shared folder at the NFS client-server.
# mount 192.168.2.110:/layerstackshare /mnt/lsclientshare
NOTE: In the context of this guide, the IP address
192.168.2.110is the private IP address of the NFS server and needs to be replaced with the original IP address of the NFS server.The below command can be executed to check and confirm that the mount operation was successful.
# df -h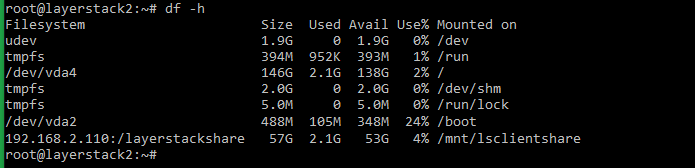
Testing the working of NFS setup
The working of the NFS server setup can easily be tested by creating a test file in the shared folder layerstackshare at the server-side and then checking its availability at the NFS client side.
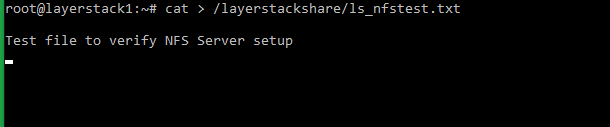
At the NFS server end, create a test file in the shared folder. In this context, the text file named ls_nfstest.txt has been created inside layerstackshare.
# cat > /layerstackshare/ls_nfstest.txt
Test file to verify NFS Server setup:
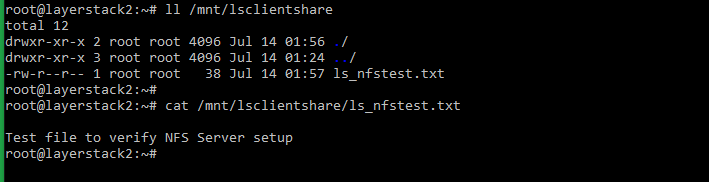
At the NFS client side, navigate to the mounted shared folder and check the availability of the shared file as well as the content inside the file.
# ll /mnt/lsclientshare

# cat /mnt/lsclientshare/ls_nfstest.txt**
Related Tutorial
Related LayerStack Product
