Disk partition is a process of splitting a single hard disk into two or more logical volumes (disk) and makes it function similar to a separate physical device. Since each partition is independent of the others, the data stored on each cannot interfere with the data on the others.
See the instructions for partitioning a single disk in Windows 2019 server into two partitions below.
- Right-click
Start Menu, then click Computer Management.
- Click
Disk Management from the left side pane of the window and see the current Disk and its partitions.
Note: You can see a partition named System Reserved in the above
screenshot. As the name says it is a system reserved partition, DO NOT
alter anything with this partition as it corrupts the OS installation)
Right-click on the partition with drive letter C and click Shrink Volume, and the Disk Management will query volume for available space for shrinking.
Enter the size that needs to decrease, and then click Shrink button.
In this example the drive is shrunk by 244467 MB or 238.74 GB, that is from total available shrink size of 344467 MB is decreased and the C drive becomes 113382 MB. The remaining space of 244467 MB becomes Unallocated.
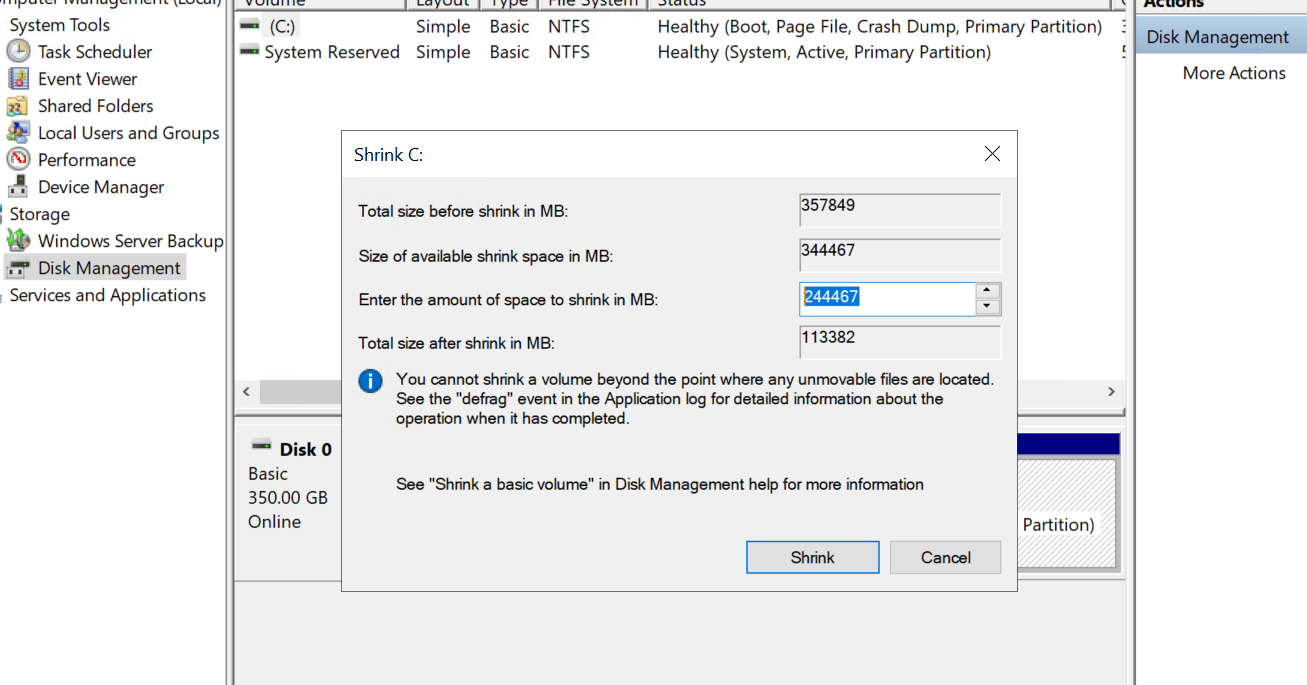
Note: It is not possible to shrink your volume greater than the amount
indicated in the Size of available shrink space in MB section.
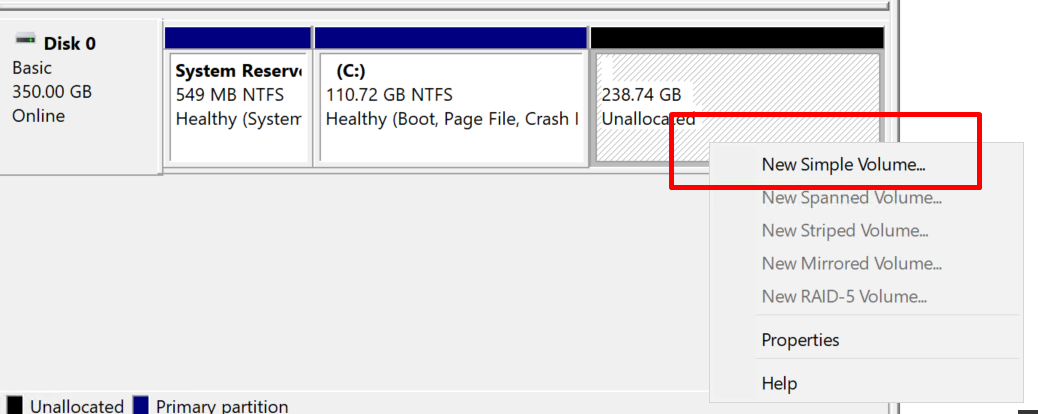
See a new unallocated partition in your Disk Management window now. Right-click on the unallocated partition and select New Simple Volume.
New Simple Volume Wizard should pop up. Click Next button to continue.
Enter the size of the partition you wish to allocate for the new drive and click Next button.
Select a drive letter from the next window, for example, the drive letter D.
Configuring the new partition. Click Format this volume with the following settings.
- For File system, select
NTFS.
- For Allocation unit size, select
Default.
- For Volume Label, input the
name you wish to give the new drive.
- Select
Perform a quick format.
After finishing above, click Next button.
Review your settings and click Finish button.
Final step Format the new volume. Right-click new volume then click Format.
Change the volume label again if necessary. Click Perform a quick format and click OK to complete the partitioning.
The new drive in the Disk Management window is ready now.
