How to install GPU Drivers on Linux Cloud Servers
As you may know that LayerStack uses AMD EPYC (Extreme Performance Yield Computing) processors for our instances, it is very important to have GPU drivers properly installed for full potential utilization.
AMD has already announced the compatible drivers with the third generation of the world’s most advanced processor system, to have the latest high-performance computing system featuring 2nd Gen AMD EPYC processors. With the 2nd Gen AMD EPYC processors, customers can maximize performance and cost efficiencies in heterogeneous computing, virtualized and hyper-converged infrastructure workloads, providing teams with the flexibility and capability to the maximum extent.
Driver Prerequisites
NVIDIA’s CUDA Tool kit is an essential component along with the dependencies.
The Primary step is to make sure the GPU is available on the deployed instance using the below command.
# lspci -vnn | grep NVIDIA
If the lspci command is not available, this can be installed by executing the below command.
# sudo yum install pciutils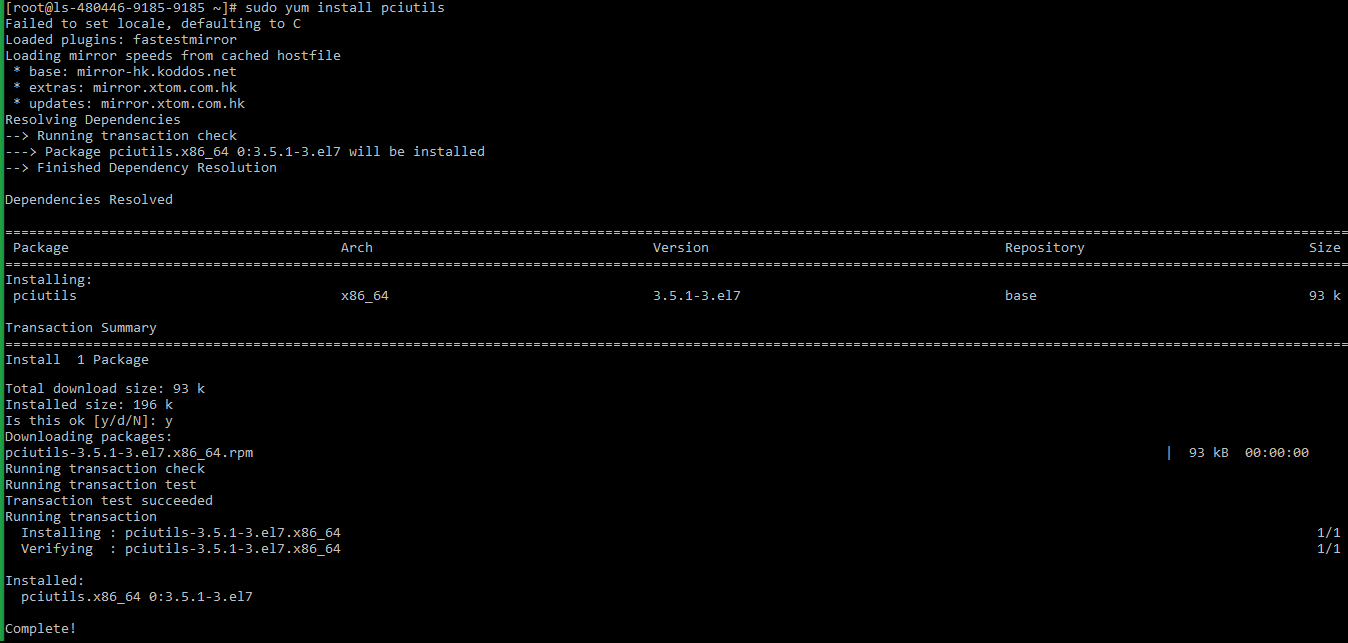
Dependencies Installation
Dependencies are to be installed before the NVIDIA drivers, using the below commands.
Please choose the corresponding commands as per the server OS.
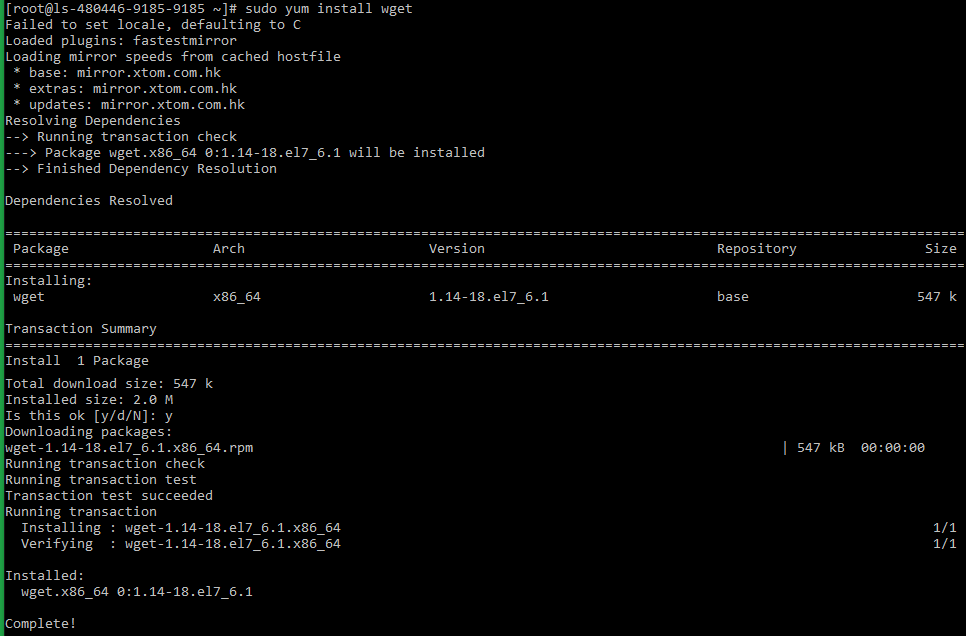
CentOS 7:

# sudo yum install kernel-devel-$(uname -r) kernel-headers-$(uname -r)

# sudo yum install wget

# sudo yum -y install gcc

Ubuntu 18.04:

# sudo apt-get install build-essential

OpenSUSE:

# zypper install gcc

# zypper install kernel-source

Debian 9:

# sudo apt-get install build-essential

# sudo apt-get install linux-headers-`uname -r`
Screenshots of CentOS server:
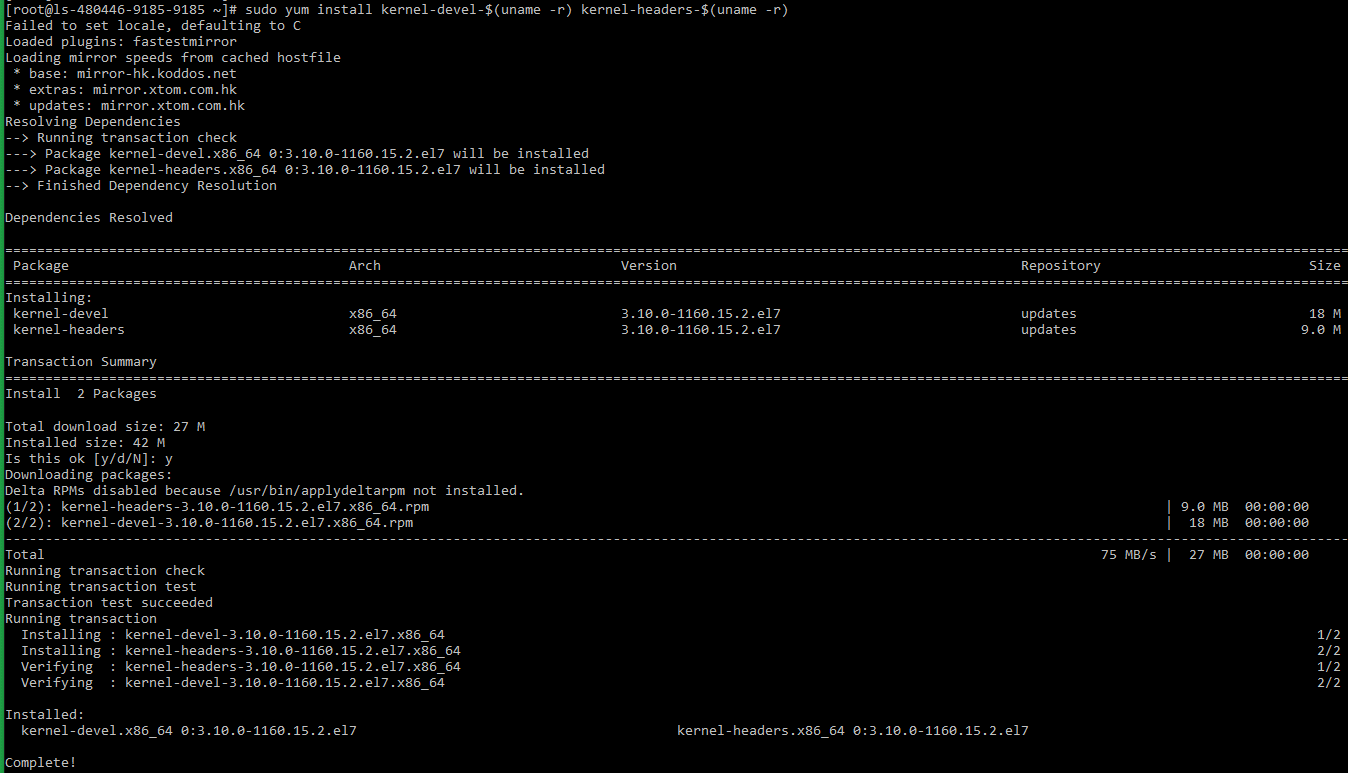
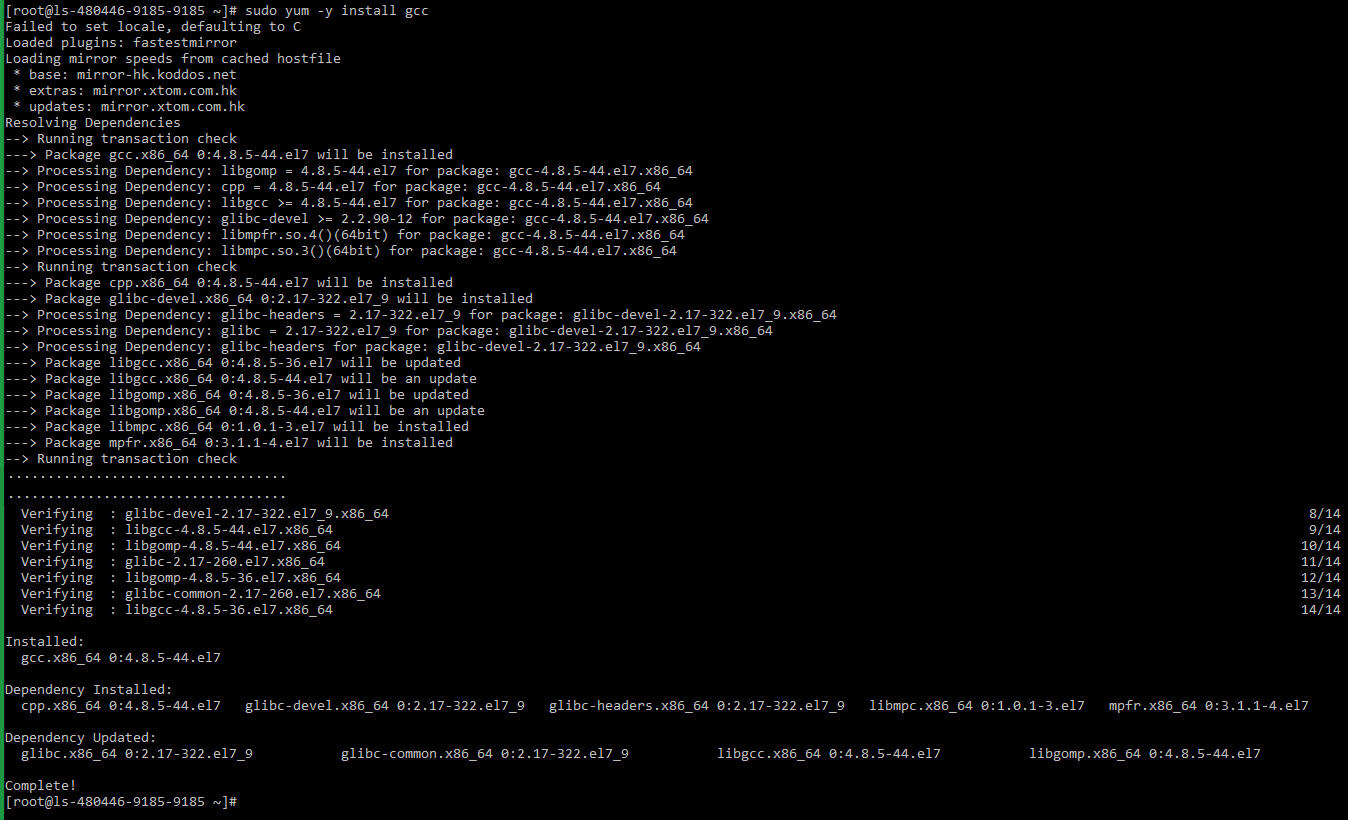
After the successful installation of dependencies, a reboot of the server is recommended in order to make sure that the newly installed kernel headers are available in the server and the installation of NVIDIA drivers proceeds smoothly.
Installation of NVIDIA Driver
After the successful installation of dependencies, the NVIDIA driver can be installed by using the below steps.
For installing CUDA Driver, the installation archive file first needs to be downloaded. This can be done from the official NVIDIA downloads page.
Go to the CUDA Driver following download page and choose the target platform and click on
Download Now.https://developer.nvidia.com/cuda-toolkit OR https://developer.nvidia.com/cuda-downloads

Please choose the suitable target platform by following the prompts and selecting the appropriate options. Once complete, you will be able to access the download link for the CUDA Toolkit installer.
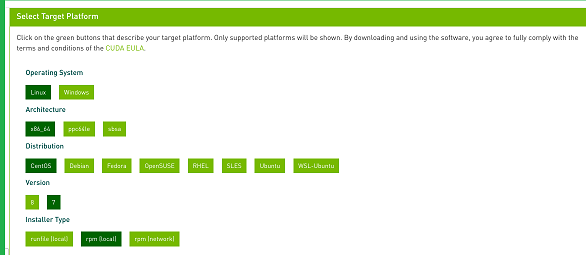
In this scenario, we use these values with OS Centos 7. For any other OS that is required, the below corresponding option for the fields can be selected accordingly:
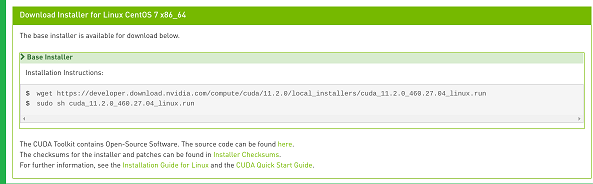
Operating System: Linux

Architecture: x86_64

Distribution: Centos

Version: 7

Installer type: runfile (local)
Download the base Installer by entering the commands shown in the screenshot. Now, wait till the download is finished.
# wget https://developer.download.nvidia.com/compute/cuda/11.2.0/local_installers/cuda_11.2.0_460.27.04_linux.run**
Once the downloading is finished, it is to execute the shell script to begin the installation process.
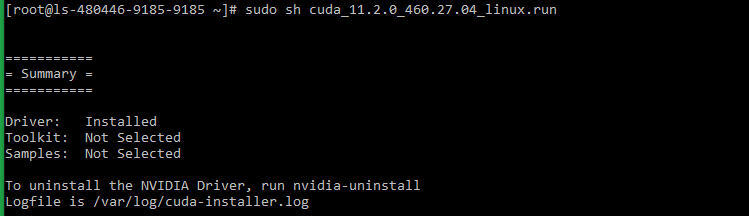
# sudo sh cuda_11.2.0_460.27.04_linux.run

or

# sudo sh cuda_*_linux.run
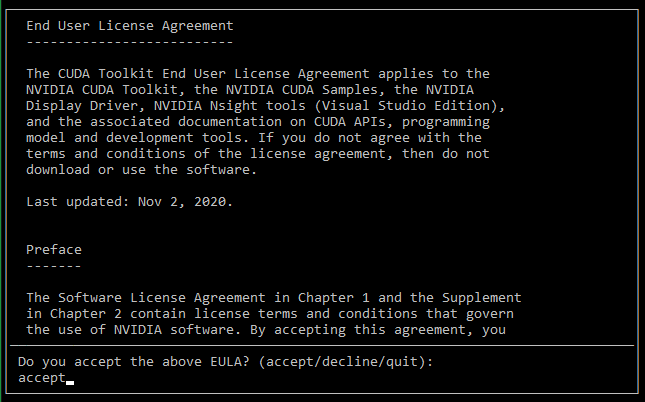
Accept and start the installation process.
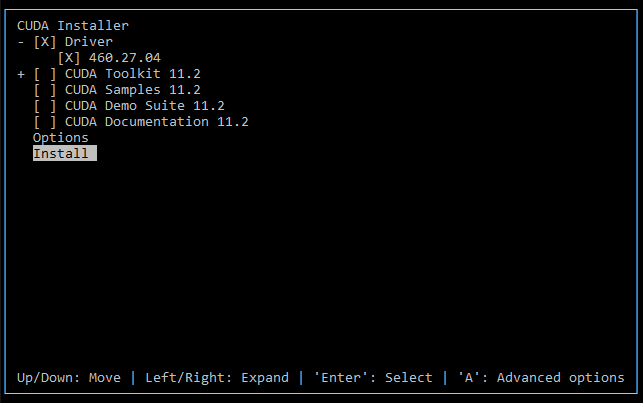
There will be a list of options, in order to install driver component only, please make sure to uncheck all the options that come below the Driver option, and check only the Driver Option, further select on Install and press enter key- the installation process will be starting – progress will be visible through the terminal progress- This will take a while to complete.
NOTE: CentOS or fedora may experience errors in this particular portion of the installation. This is because the installer requires a reboot of the entire system to remove the default drivers. Please make sure to reboot the machine and then run this portion.
Once the installation is completed, a summary of the installation will be displayed as below:
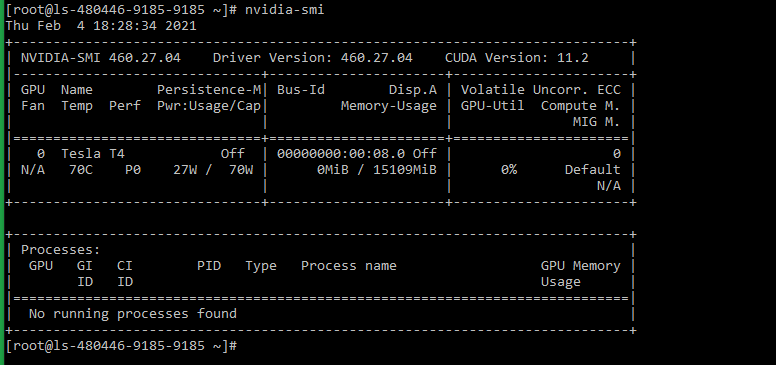
The installation can be verified by the following command. Please run the command below once the installation is finished.
# nvidia-smiOn running the above command, the output is similar to the below sample:
Related LayerStack Product
Related Tutorial for Dedicated GPU service
Related Tutorials for Cloud GPU service
