Object storage is a reliable and efficient way to manage and store data, but security should always be a top priority. The default way to access files is through secure (HTTPS) URLs within the shared domain hks3.layerstackobjects.com for the HK region or sgs3.layerstackobjects.com for the SG region. However, it's possible to use a custom domain, such as a subdomain of example.com, if preferred.
In this guide, we'll walk through the process of setting up a custom domain and securing it with a TLS certificate to ensure data security and privacy.
Installing Certbot
Install snap in your server. The command apt install snapd -y installs the snapd package, which is required to manage Snap packages on Ubuntu-based systems.
# apt install snapd -y

The command snap install core installs the basic runtime environment for Snap applications, and the command snap refresh core updates the core package to the latest version with bug fixes, security updates, and new features.
# snap install core; snap refresh core**

Installing Certbot, snap install --classic certbot installs Certbot, a tool used for obtaining and renewing SSL/TLS certificates. The --classic flag is used to enable access to system resources outside of the Snap container, allowing Certbot to interact with the host system's web server and make necessary changes for SSL/TLS certificate management.
# snap install --classic certbot

Create symbolic link for Certbot
The command ln -s /snap/bin/certbot /usr/bin/certbot creates a symbolic link between the Certbot binary located in the /snap/bin directory and the /usr/bin/certbot location. This allows the Certbot command to be executed from anywhere in the system, as /usr/bin is a directory that is already included in the system's PATH environment variable. Therefore, by creating a symbolic link to /usr/bin, the Certbot command becomes available globally.
# ln -s /snap/bin/certbot /usr/bin/certbot

Create SSL certificate
Create SSL using the below command.
# certbot certonly --manual --preferred-challenges dns -m [email protected] -d preferreddomainname.com

--manual specifies that the DNS challenge method will be used for domain validation, and that the user will manually complete the DNS record update.
--preferred-challenges dns specifies that the DNS challenge method will be preferred over other challenge methods.
-m [email protected] specifies the email address of the certificate holder.
-d preferreddomainname.com specifies the domain name for which the certificate will be issued.
Once executed the command, it will generate a TXT record which requires to be added in the DNS manager of the domain. After adding the TXT record , the final step for the DNS validation happens and then SSL certificate will be generated for the domain.
The certificate and chains will be saved at the path /etc/letsencrypt/live/preferreddomainname.com/:

Adding SSL certificate in LayerPanel2 portal
Log in to LayerPanel, navigate to Services >> Object Storage >> SSL/TLS Certificate.
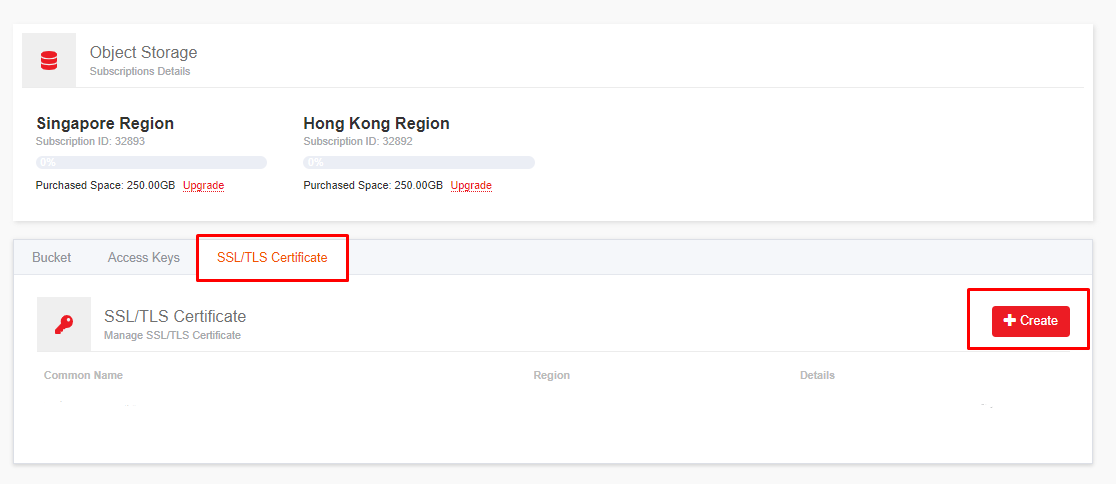
Click on Create button.
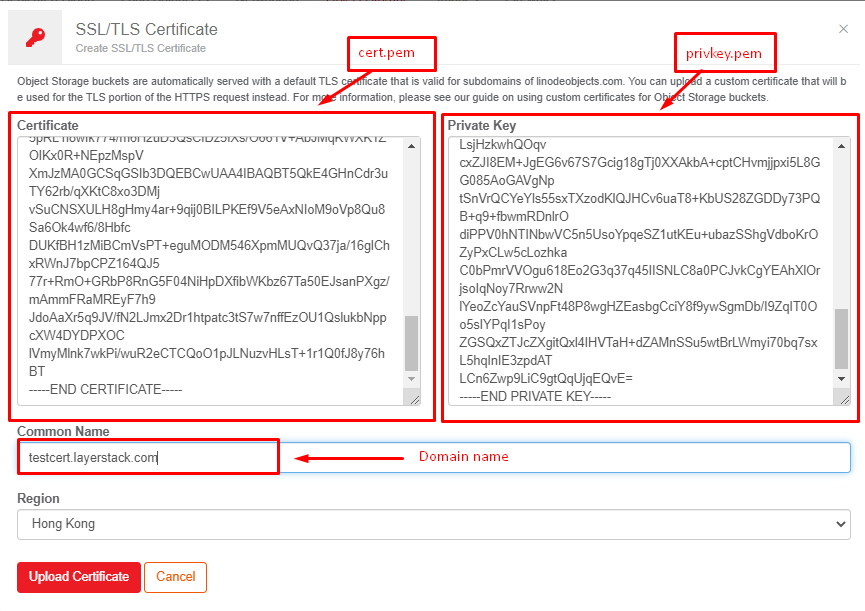
Open the cert.pem file and copy the contents to Certificate Box.
Open privkey.pem file and copy the contents to Private key Box.
Add the domain name in the Common Name box.
Click Upload Certificate finally.
By following the steps in this guide, you can configure a custom domain and ensure secure communication between your client applications and object storage.
Related Tutorials
