Configuring and formatting a new partition on Linux Cloud Servers
A block device is usually a physical device that's used for storing data. A partition is basically a way to organize a block device's storage into smaller segments, which means that partitioning allows an user to make use of a part of the block device's storage space for a particular purpose and the remaining parts for other uses.
One of the most common uses of partitions is in the ordinary filesystem. The three steps for doing this are:
- Create partition - done using the fdisk tool.
- Format the partition – done using the mkfs command, the filesystem is installed in this step.
- Mount the partition- done using the mount tool. Once a partition is mounted, it should be updated in the fstab config file in order for it to be made permanent.
It is important that proper backups are made before proceeding with formatting and creating new partitions.
This guide will outline the basic steps to create, format and mount a new partition in a Linux distribution.
Create a new partition
Firstly, verify the disk partitions in the server using the
fdiskcommand. Thel switchhelps in listing the partitions.# fdisk -lThe general output after executing the above command will be as below:
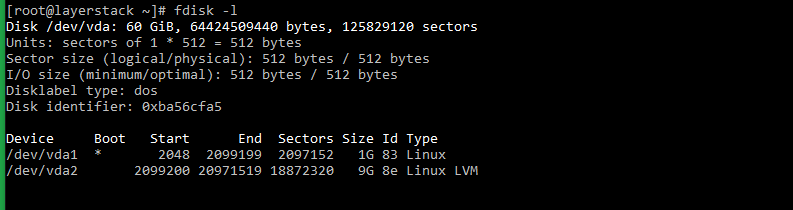
In the above example, the disk device name is
/dev/vdaand the partition has been created up to/dev/vda2.Create the new partition in the disk by using the
fdiskcommand.# fdisk /dev/vdaThe output will be as below, from where you can enter
mto view the available options.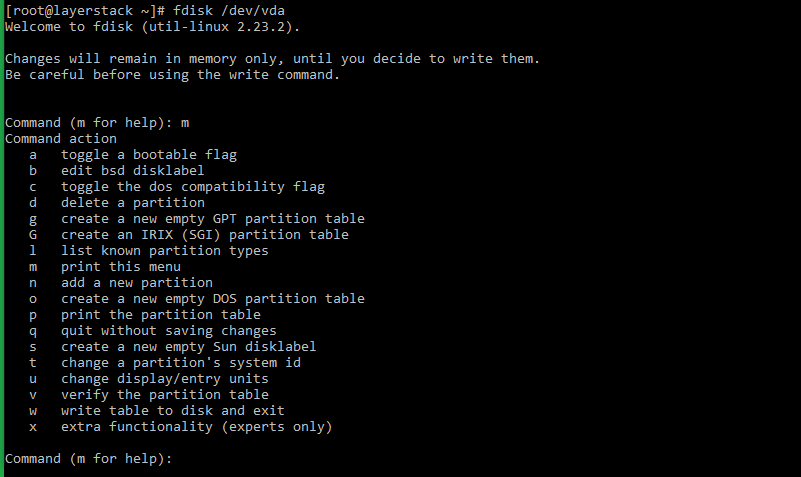
Type in
nto create the new partition. Depending on the type of partition that needs to be created (primary or extended), type inpore. A server cannot have more than 4 primary partitions, which means that if the server has 4 primary partitions already, then the optionpcannot be selected further. The optione(for extended partition) can be used at any time.In the below example, a primary partition is being created.
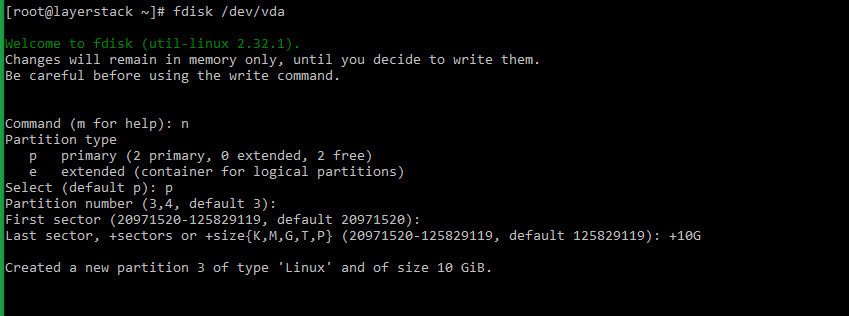
After selecting the type of partition, the below options will be prompted to be entered.
Partition number: The number that needs to be assigned to the new partition that will be created. Press
Enterto select the default valueFirst sector: The first sector in the disk from which the new partition is to be created. Press
Enterto select the default valueLast sector: The last sector in the disk up to which the new partition will be created. Press Enter to select the default value. A default value can also be specified, such as in the above example, a 10GB partition will be created when using the value as +10G.
Save the new partitioning table using
wcommand.# w
Executing the
fdisk -lcommand will show up the newly created partition as/dev/vda3.# fdisk -l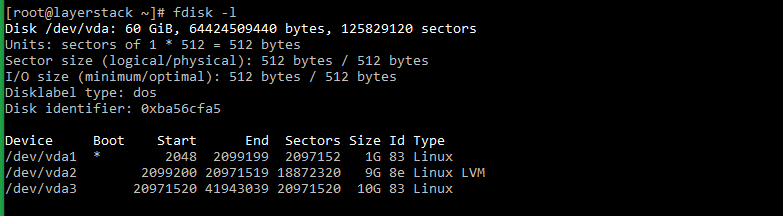
Format the new partition
The mkfs command utility can be used to format the newly created disk partition, thereby creating the file system on the partition. The type of file system that is needed on the partition can be defined using mkfscommand.
Some of the file system types that can be created are ext2, ext3, ext4, fat, vfat, ntfs, etc.
In the below example, either of the two commands can be used to format the partition as
ext4file system.# mkfs -t ext4 /dev/vda3 OR # mkfs.ext4 /dev/vda3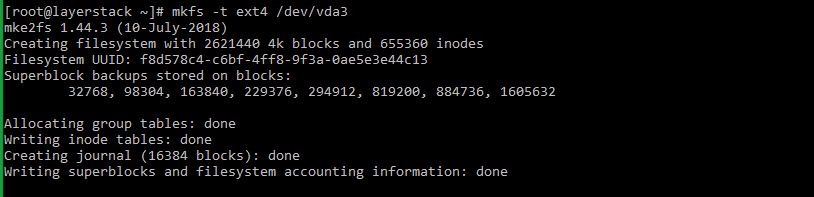
Mount the new partition
Once the new partition has been formatted, it can be mounted in the server through a mount point. The mount point should first be created and then the partition mounted to it.
The below commands can be made use for creating the mount point and mounting the partition to it.
# mkdir /newdiskmnt  (Use for creating mount point)
# mount /dev/vda3 /newdiskmnt  (Use for mounting new partition to mount point)
Execute either of the below commands to verify that the new partition is mounted correctly.
# mount | grep "/dev/vda3"
(or)
# df -h | grep "/dev/vda3"
Mount the partition at system start-up
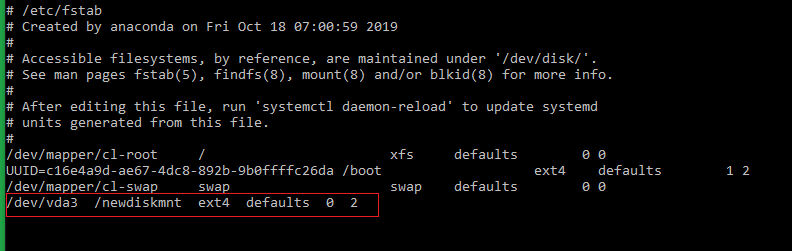
In order for the new partition to be mounted at the time of system boot up, an appropriate entry is typed in the fstab file.
Open the
/etc/fstabfile using any editor, type in the below entry in it, and then save and quit the file.# /dev/vda3 /newdiskmnt ext4 defaults 0 2